Table of Contents
- Quick Inspiration: Modern Cake Design Fundamentals
- Why Cake Design Matters
- Cake Ideas by Occasion
- Cake Designs by Skill Level
- Trending Cake Styles and Aesthetics
- Harmonizing Flavors with Structural Design
- Step-by-Step Guide: Assembling and Decorating a Layer Cake
- Cake Style and Decorating Medium Comparison
- Expert Engineering and Temperature Tips
- Common Decorating Mistakes and Fixes
- Essential Tools and Equipment
- Recommended Internal Reading
- Authoritative Culinary Resources
- Key Takeaways
- Frequently Asked Questions
Quick Answer: What Makes Great Cake Ideas Work?
Successful cake ideas balance structural stability, balanced flavor profiles, and cohesive aesthetic themes. Whether you create a rustic semi-naked cake or an ornate Lambeth-piped vintage tier, the secret lies in proper chilling cycles, stable frosting mediums, and precision leveling.
Beginners should focus on single-tier textured buttercream designs, while intermediate and advanced decorators can experiment with wafer paper sails, isomalt gems, and sharp fondant edges.
- Core Foundations: Level sponges, secure dowels, and consistent crumb coats prevent structural collapse.
- Aesthetic Trends: Vintage over-piped borders, Korean bento box designs, and botanical palette knife textures lead modern baking.
- Flavor Harmony: Pair dense fillings with sturdy sponges (like butter cakes) and light mousses with delicate génoise layers.
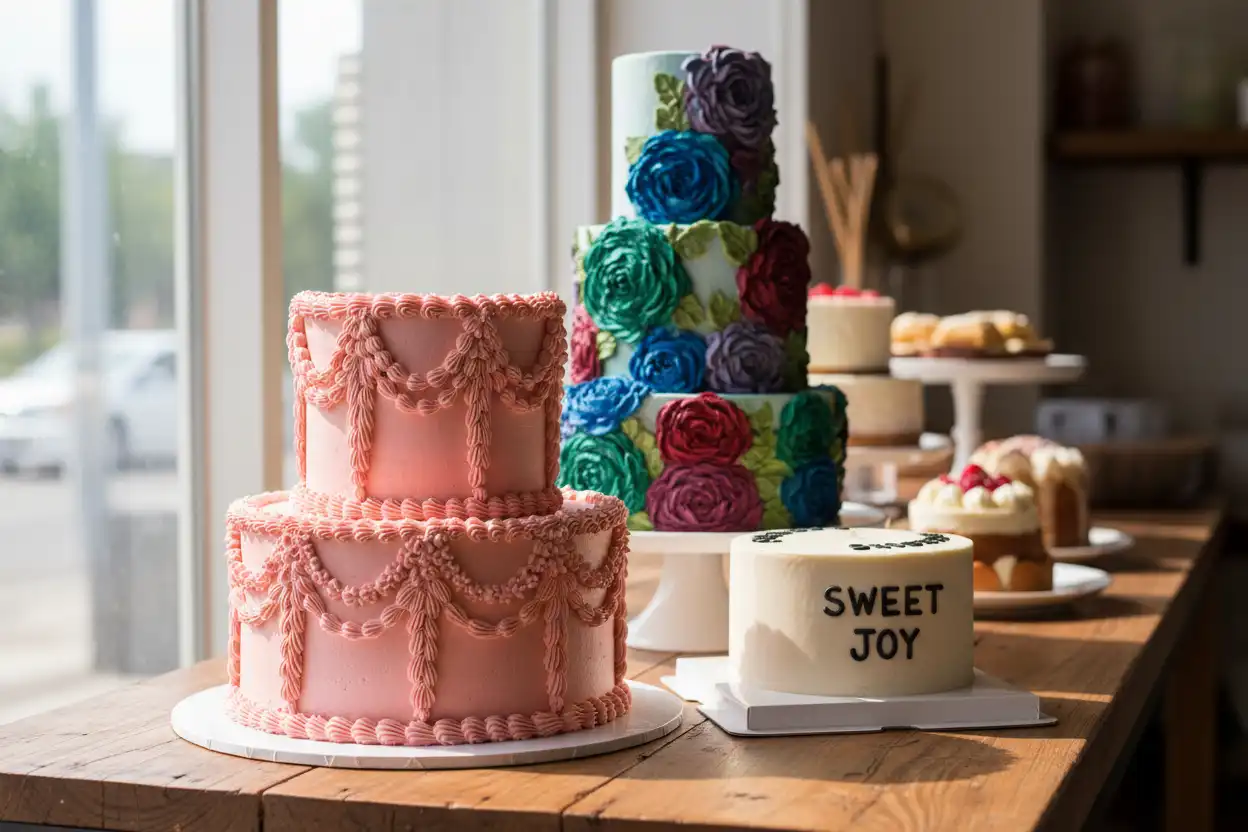
Why Cake Design Matters
A celebration cake serves as the emotional centerpiece of any gathering. The right cake design captures the mood of an event, tells a story, and provides a memorable culinary experience.
This guide provides practical cake cake ideas for home bakers, ambitious beginners, and celebration planners. You will discover accessible decorating methods, reliable flavor pairings, and technical principles that eliminate guesswork in the kitchen.
Cake Ideas by Occasion
Every milestone calls for a specific visual tone and portion strategy. Matching your design to the event setting ensures both practical service and visual impact.
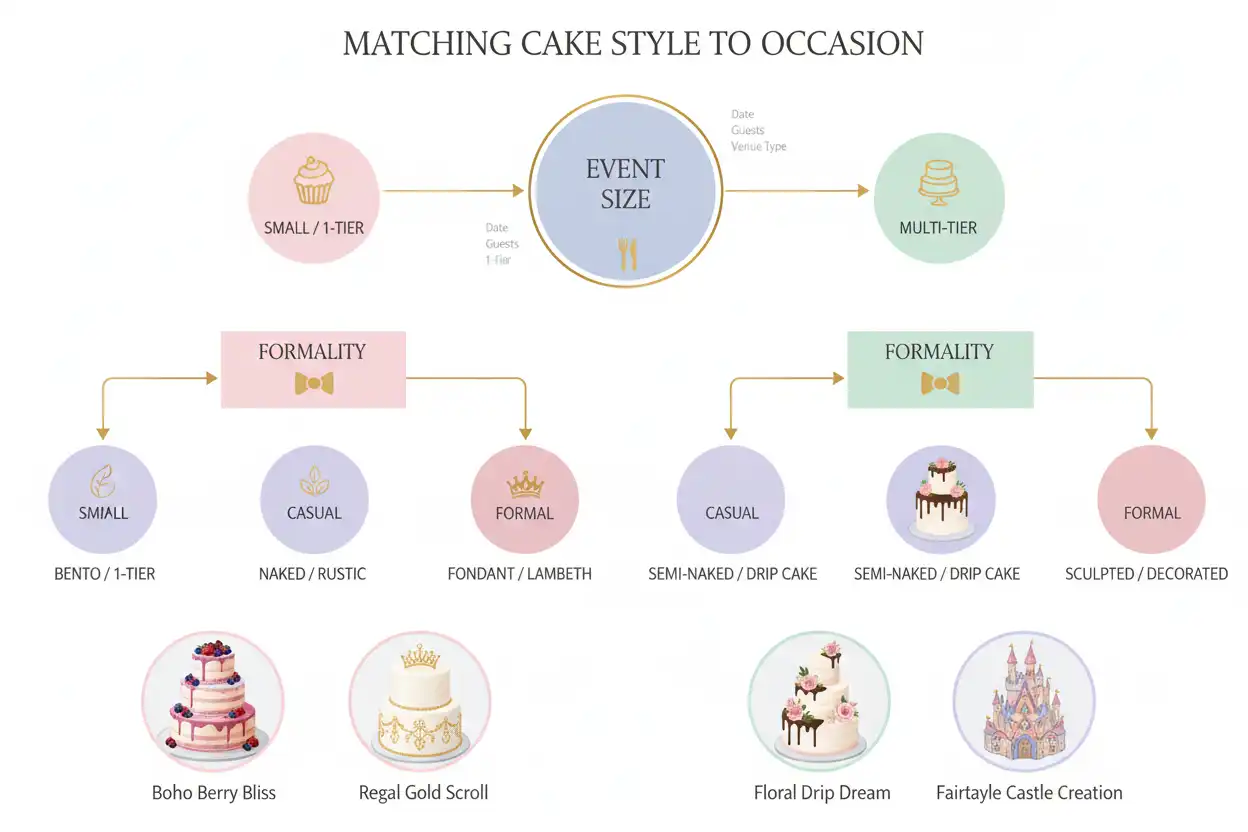
Birthday Cakes for All Ages
Birthday celebrations offer the widest room for creative experimentation. Modern birthday cake concepts have shifted away from heavily artificial novelty designs toward sophisticated texture and vibrant color palettes.
- Retro Lambeth Piping: Royal icing or firm Swiss meringue buttercream piped in dramatic shells, swags, and scrollwork creates a dramatic Victorian look popular for milestone birthdays.
- Textured Palette Knife Florals: Using an offset spatula or painter’s palette knife to apply tinted buttercream leaves and petals creates an impressionistic, oil-painting aesthetic.
- Gourmet Drip Cakes: A chilled white chocolate or dark chocolate ganache drip paired with piled-high macarons, meringue kisses, and fresh berries provides height and indulgence.
- Geometric Color Blocking: Sharp, contrasting buttercream segments separated by clean lines deliver a playful, modern aesthetic for teens and adults alike.
Weddings and Milestone Anniversaries
Wedding and anniversary cakes require longevity, structural strength, and refined visual appeal. These designs must hold up under venue lighting and temperature fluctuations for several hours.
- Pressed Botanical Elegance: Edible, organic pansies, violas, and cornflowers pressed directly into smooth ivory buttercream offer an effortless garden-party aesthetic.
- Wafer Paper Sails: Steamed and manipulated wafer paper sheets dried into dramatic, translucent waves add architectural movement to minimalist tiers.
- Bas-Relief Sculpting: Using silicone lace molds and sugar paste to create raised, classical stone-carving patterns on fondant creates timeless luxury.
- Metallic Leaf Accents: Delicate applications of 24-karat edible gold or silver leaf along raw, torn buttercream edges provide an artisanal, organic finish.
Baby Showers and Gender Reveals
Baby celebrations favor soft pastels, playful tactile elements, and surprise internal reveal mechanics.
- Secret Core Pinata Cakes: A hollowed center filled with tinted chocolate pearls, sprinkles, or candy reveals color when sliced without requiring dyed outer frosting.
- Watercolor Ombré Washes: Blending three complementary pastel buttercreams with a warm bench scraper produces a dreamy, cloud-like gradient.
- Sculpted Fondant Cloud and Moon Motifs: Three-dimensional toppers mounted on food-safe floral wire add dynamic vertical height to small single-tier cakes.
Seasonal and Holiday Showstoppers
Seasonal baking relies heavily on natural colors and warming flavor notes reflecting the time of year.
- Autumn Spiced Naked Cake: Cinnamon-nutmeg sponge layers filled with salted caramel buttercream, left un-iced on the sides and topped with candied figs and rosemary sprigs.
- Winter Birch Bark Cake: White chocolate bark shards applied vertically around a chocolate layer cake, dusted with powdered sugar snow and fresh cranberries.
- Spring Citrus Blossom: Lemon curd filling encased in pale yellow Swiss meringue, adorned with candied citrus wheels and chamomile blooms.
- Summer Berry Cascade: Fluffy vanilla chiffon loaded with whipped mascarpone cream and an overflowing cascade of fresh blackberries, raspberries, and mint.
Cake Designs by Skill Level
Selecting a project matched to your current technical comfort level prevents frustration and ensures consistent results. Build your skills progressively through these tiered design concepts.
Beginner-Friendly Designs
Beginner designs eliminate the stress of achieving razor-sharp buttercream edges while focusing on fundamental balance and flavor execution.
- The Rustic Back-of-Spoon Swirl: Cover a chilled cake in a generous layer of frosting, then use the back of a soup spoon to create rhythmic, swirling indentations across the top and sides.
- Single-Layer Sheet Cake with Piped Borders: Bake a tender 9×13-inch vanilla buttermilk cake, top with silky cream cheese frosting, and pipe simple shell borders using an open star tip (Wilton 1M).
- Toasted Coconut or Nut Encrusted Cake: Press toasted flaked coconut, chopped pecans, or crushed honeycomb into fresh frosting around the sides to instantly disguise any surface imperfections.
Intermediate Structural Concepts
Intermediate bakers can tackle multi-layer stability, crisp edge work, and precise stencil applications.
- The Fault Line Cake: Apply a center band of sprinkles, gold leaf, or fruit, chill firmly, and apply a thick top and bottom layer of frosting with uneven, jagged borders that expose the center band.
- Buttercream Stenciling: Place a flexible acrylic cake stencil against chilled buttercream, spread a contrasting colored frosting across the pattern, and peel away for crisp graphic designs.
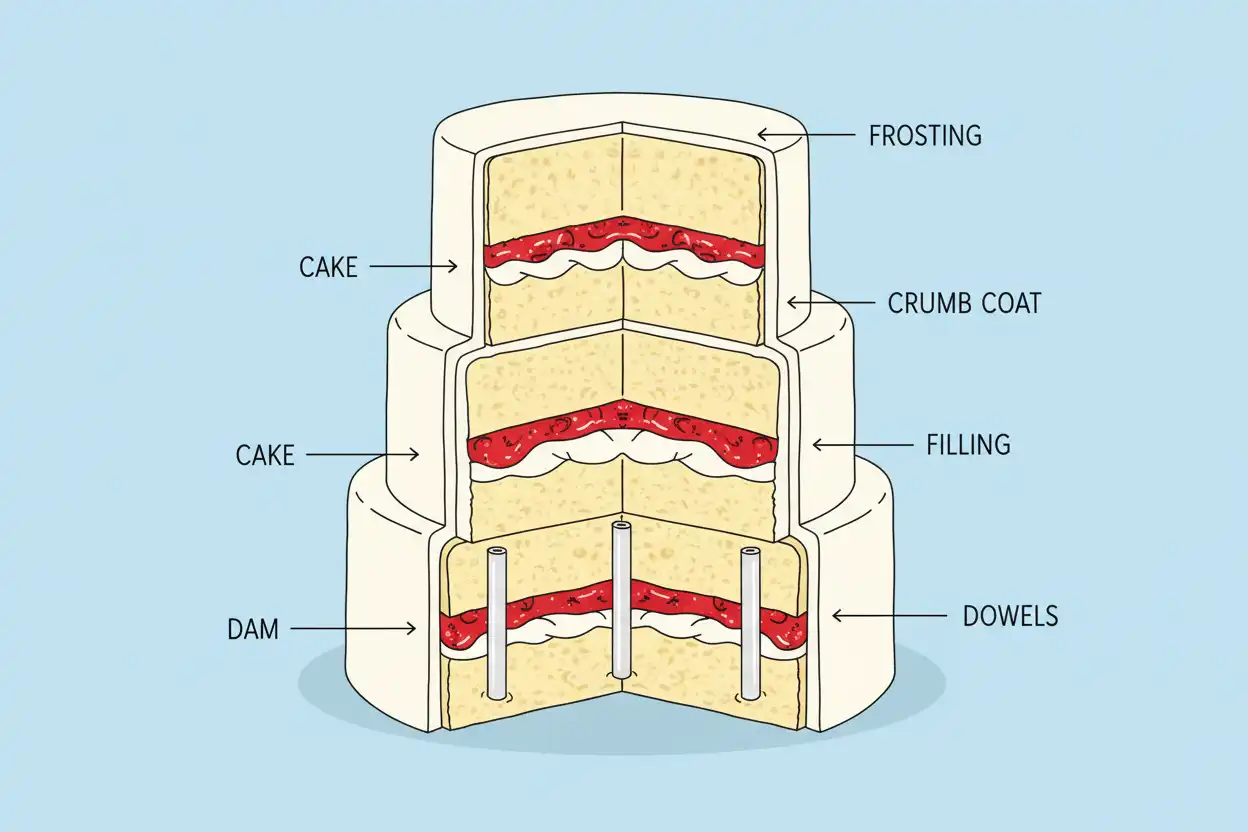
- Two-Tier Dowelled Cake: Construct a stable two-tiered cake utilizing food-grade support rods, precise center doweling, and level cardboard rounds.
Advanced and Sculptural Centerpieces
Advanced projects require a deep understanding of food engineering, internal armatures, and sculptural mediums.
- Isomalt Geode Cavities: Carve deep diagonal trenches into a multi-layer cake, seal with ganache, and embed custom-colored rock candy crystals accented with edible metallic paint.
- 3D Carved Structural Cakes: Dense mud cakes or carved Madeira sponges sculpted into lifelike objects, covered in modeling chocolate and painted with cocoa butter pigments.
- Gravity-Defying Suspended Elements: Secure internal threaded rods to a heavy baseboard to suspend pouring ganache jugs, floating teacups, or orbiting planetary spheres above the cake.
Trending Cake Styles and Aesthetics
Baking trends blend classic culinary craft with contemporary visual culture. These styles currently dominate artisanal bakeries and social platforms worldwide.
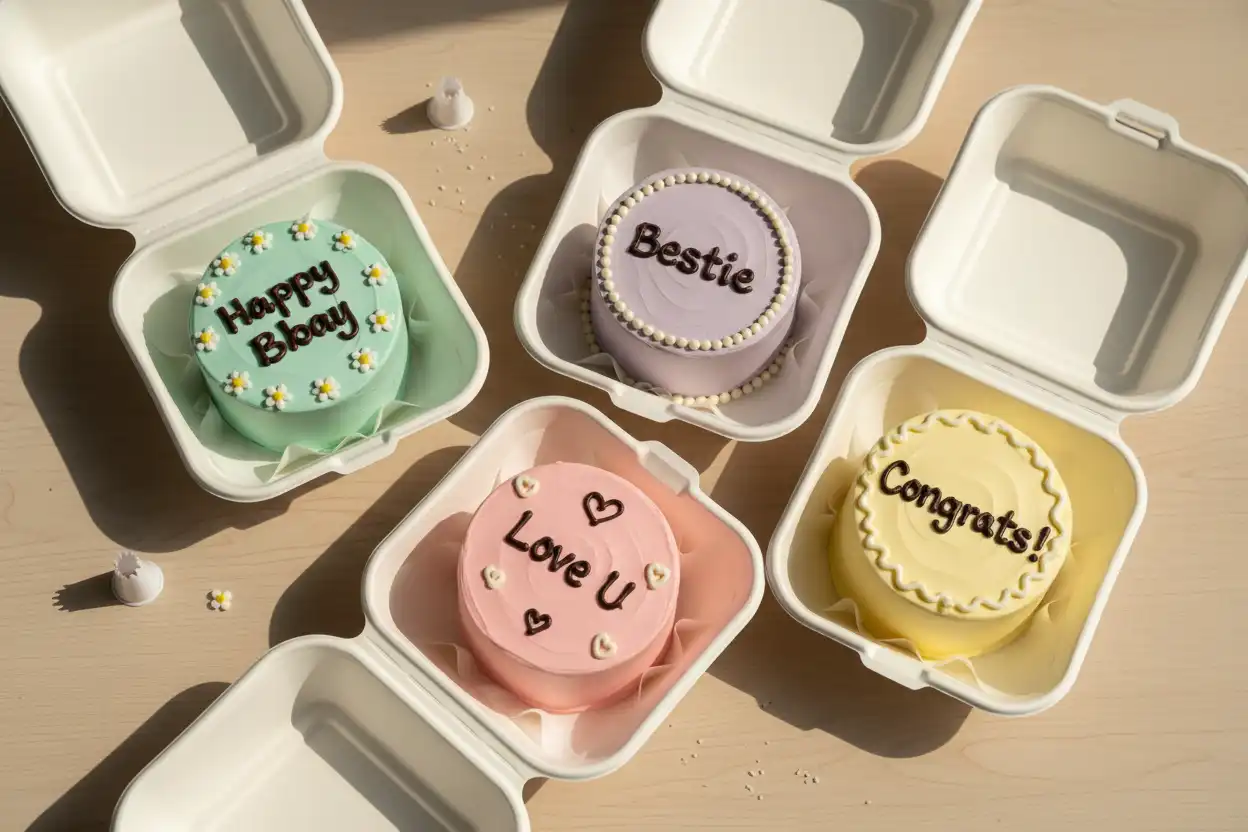
- Korean Bento Lunchbox Cakes: Mini 4-inch single-layer cakes served in clamshell takeout boxes, characterized by pastel backgrounds, minimalist hand-piped lettering, and tiny vintage illustrations.
- Monochromatic Layering: Using a single color family across varying textures, such as glossy glaze drips, matte buttercream, velvet spray cocoa butter, and edible sugar pearls.
- Comic Book / 2D Cartoon Cakes: Outlining every edge, drip, and decorative cherry with black rolled fondant or black piped icing to make the real cake look like a flat two-dimensional drawing.
- Pressed Wafer Paper Ruffles: Layering hundreds of fine, scalloped wafer paper strips to mimic delicate couture fabric textures over tall tier heights.
Harmonizing Flavors with Structural Design
A visually stunning cake must taste exceptional. The weight and density of your sponge must also physically support the chosen filling without collapsing under its own weight.
Sponge Density and Filling Pairing Rules
- Dense Mud Cakes & Pound Cakes: Ideal for heavy carved cakes, tiered bases, and fondant coverings. Pair with chocolate ganache, praline paste, or salted caramel.
- Classic Butter & Oil Sponges: Versatile workhorses for standard layer cakes. Pair with fruit curds, American buttercream, or Swiss meringue buttercream.
- Chiffon & Sponge Cakes: Extremely delicate; suitable only for single-tier or refrigerated roll cakes. Pair with stabilized chantilly cream, fresh fruit compote, and light citrus mousses.
Classic and Contemporary Flavor Combinations
- Earl Grey & Lavender Lemon: Bergamot-infused sponge layers filled with bright lemon curd and frosted in fragrant lavender-infused Swiss meringue buttercream.
- Espresso Dark Chocolate & Salted Tahini: Fudgy chocolate stout cake filled with nutty tahini caramel and masked in dark espresso whipped ganache.
- Matcha Green Tea & Strawberry Yuzu: Earthy matcha sponge layered with fresh strawberry reduction and crisp yuzu buttercream.
- Brown Butter & Spiced Pear: Nutty brown butter cake paired with caramelized cardamom pear compote and maple cream cheese frosting.
Step-by-Step Guide: Assembling and Decorating a Layer Cake
Follow this systematic process to construct a stable, professionally finished layer cake at home.
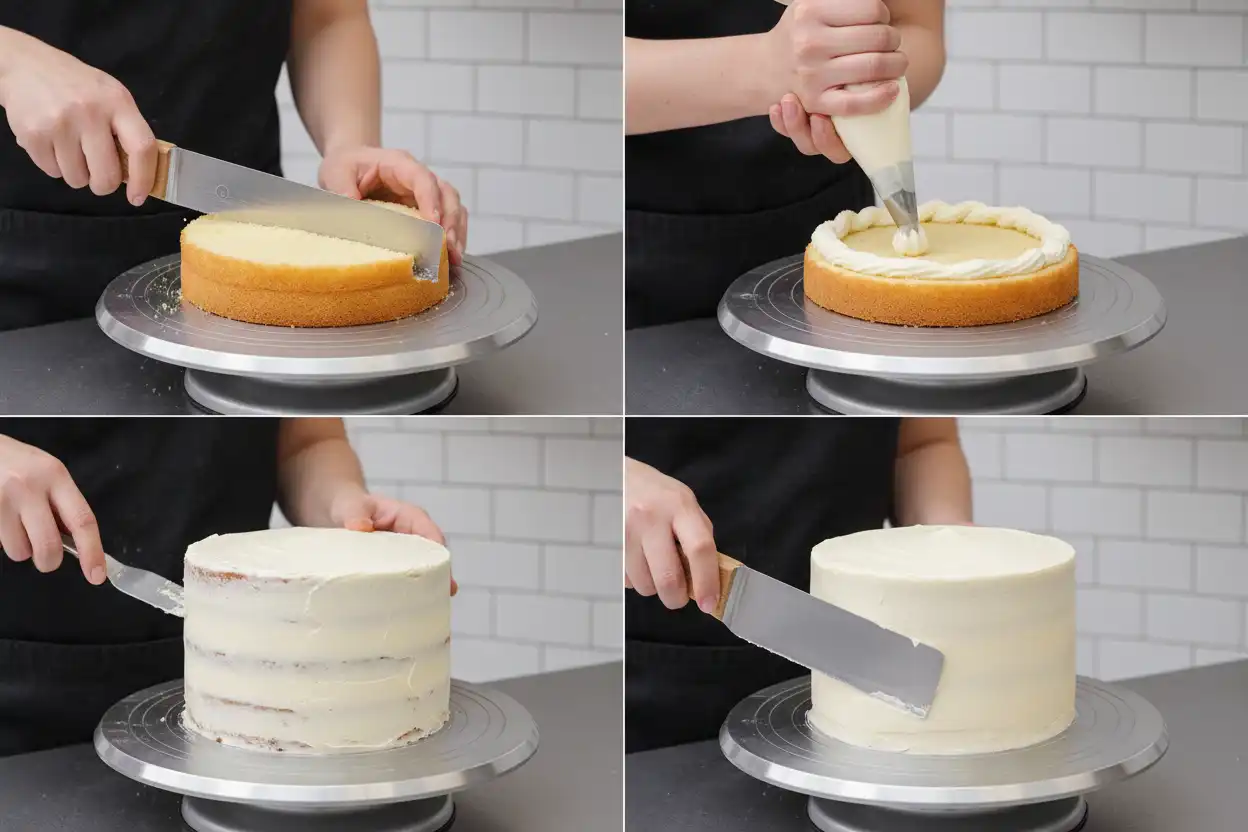
Step 1: Leveling and Torting the Sponges
What: Removing the baked dome and slicing each cake horizontally into uniform layers.
Why: Uneven layers cause the cake to lean, slip, and eventually crack.
How: Chill your baked layers for at least two hours. Use a serrated bread knife or an adjustable wire cake leveler held flat against the countertop to slice off the crown evenly.
Common Mistake: Slicing warm cake layers causes jagged tears and structural weakness.
Pro Tip: Place a non-slip silicone mat under your turntable to prevent unwanted shifting while cutting.
Step 2: Securing the Base and Piping the Filling Dam
What: Anchoring the bottom layer to a greaseproof cake board and creating an outer border for fillings.
Why: Soft fillings like fruit compotes, curds, or mousses will squeeze out the sides under the weight of higher layers if uncontained.
How: Smear a tablespoon of buttercream onto the cake board to glue the bottom sponge down. Pipe a 1/2-inch thick perimeter ring of stiff buttercream around the outer edge of the sponge layer, then fill the interior ring with your chosen soft filling.
Common Mistake: Overfilling the dam causes the outer layer to bulge, creating a “belly” around the cake waist.
Pro Tip: Keep your filling layer level with the height of your piped dam.
Step 3: Applying the Crumb Coat and Chilling
What: Applying a thin, transparent foundation layer of frosting to lock in loose crumbs.
Why: The crumb coat prevents stray cake flecks from contaminating your clean final exterior coat.
How: Spread a thin layer of buttercream over the top and sides using an offset spatula. Scrape away excess frosting until the sponge pattern is visible through the coat. Chill in the refrigerator for 20–30 minutes until firm to the touch.
Common Mistake: Returning your spatula with loose crumbs directly back into the clean frosting bowl.
Pro Tip: Keep a separate small container of frosting dedicated strictly to your crumb coat stage.
Step 4: Applying the Final Coat and Smoothing
What: Spreading a thick, even exterior layer of frosting and smoothing the edges.
Why: This provides a clean canvas for piped borders, stencils, or clean minimalist aesthetics.
How: Apply generous dollops of frosting to the chilled cake. Hold a stainless steel bench scraper at a 45-degree angle against the sides while rotating the turntable with your other hand. Smooth the top by pulling excess frosting from the outer rim inward toward the center.
Common Mistake: Pressing too hard with the scraper, which exposes the crumb coat beneath.
Pro Tip: Dip your metal scraper in hot water and wipe it completely dry before your final smoothing pass. The warm metal melts the surface lipids slightly for a porcelain-smooth finish.
Step 5: Adding Decorative Accents and Finishing Touches
What: Applying top borders, drips, stencils, flowers, or toppers.
Why: This transforms a simple iced cake into a tailored centerpiece.
How: For drips, ensure your ganache is between 85°F and 90°F (29°C to 32°C) before applying to a thoroughly chilled cake using a squeeze bottle. For piping, hold your piping bag at a steady 90-degree angle to maintain uniform pressure.
Common Mistake: Applying warm ganache or soft frosting to a room-temperature cake, causing it to slide off.
Pro Tip: Practice your piping rhythms on parchment paper before touching the actual cake surface.
Cake Style and Decorating Medium Comparison
Use this comparative breakdown to choose the right medium, prep time, and aesthetic for your next project.
| Cake Style | Difficulty | Ideal Sponge | Prep Time | Room Temp Shelf Life | Best Occasion |
|---|---|---|---|---|---|
| Semi-Naked Rustic | Beginner | Vanilla Buttermilk | 1.5–2 Hours | 4–6 Hours (Dries faster) | Rustic Weddings, Brunches |
| Vintage Lambeth | Intermediate | Firm Sponge Cake | 3–4 Hours | 8–12 Hours | Milestone Birthdays, Showers |
| Mirror Glaze Entremet | Advanced | Almond Dacquoise / Joconde | 6+ Hours (Frozen base) | 2 Hours Max (Must stay cool) | High-End Dinner Parties |
| Sculpted 3D Fondant | Advanced | Dense Chocolate Mud Cake | 5–8 Hours | 24 Hours | Themed Parties, Anniversaries |
| Bento Lunchbox Cake | Beginner | Oil-Based Vanilla Sponge | 1 Hour | 8 Hours | Personal Gifts, Casual Celebrations |
Expert Engineering and Temperature Tips
Professional cake artistry relies on food science and structural engineering. Applying these technical precautions guarantees stability during assembly and transit.
The Temperature Rule: Buttercream melts at 90°F–95°F (32°C–35°C). Never display an all-butter frosting in direct sunlight or outdoors in temperatures exceeding 75°F (24°C). Switch to high-ratio shortening blends or white chocolate ganache foundations for high-heat events.
Dowel Physics for Tiered Cakes
- Support Weight Distribution: The bottom tier must never support the physical weight of upper tiers directly. Insert at least 4 to 6 food-grade plastic poly-dowels or thick wooden dowels into the bottom tier, cut exactly flush with the top surface of the cake.
- Cardboard Separators: Every stacked tier must sit on its own greaseproof cardboard round, which rests directly on the support dowels beneath it.
- Central Locking Rod: For cakes taller than two tiers or traveling long distances, drive a sharpened center wooden dowel through all tiers down into the baseboard to prevent lateral shearing during transport.
Botanical Safety and Fresh Flowers
- Never Insert Bare Stems: Pesticides, bacteria, and floral sap contaminate cake sponges. Wrap every stem tightly with floral tape and insert into plastic posy picks or wide drinking straws before placing into the cake.
- Choose Non-Toxic Species: Avoid toxic flowers such as lilies, hydrangea, foxglove, and baby’s breath near food. Opt for organically grown roses, ranunculus, pansies, and lisianthus.
Transport Protocols
- Always transport stacked cakes fully chilled until firm to the touch.
- Place the cake box on a non-slip rubber mat in the flattest area of your vehicle (the front passenger footwell or flat trunk space, never on a sloping car seat).
- Run the car air conditioning on maximum cold for 10 minutes prior to loading the cake.
Common Decorating Mistakes and Fixes
Every baker encounters technical challenges. Recognizing the underlying cause helps you correct issues quickly before serving.
1. Frosting Tearing and Crumbs in the Outer Layer
Cause: Attempting to frost a dry, warm sponge, or using buttercream that is too cold and stiff.
Solution: Warm your frosting slightly by microwaving 10% of the batch for 10 seconds and beating it back in. Always chill your cake thoroughly before applying the final coat.
2. The Middle Tier Bulge (“Cake Belly”)
Cause: Soft filling compressed by the weight of upper sponge layers without a firm perimeter dam.
Solution: Pipe a stiff buttercream dam at least 1/2-inch wide. Let the filled, un-iced cake settle in the refrigerator for one hour under a light weight (such as a small cutting board) before crumb coating.
3. Buttercream Sweating and Condensation
Cause: Moving a cold cake directly into a warm, humid room, causing moisture in the air to condense on the surface.
Solution: Allow chilled cakes to acclimate gradually in an air-conditioned room inside a cardboard box. The cardboard absorbs ambient moisture during the warming transition.
4. Tearing Fondant (“Elephant Skin”)
Cause: Over-kneading, excess powdered sugar drying out the sugar paste, or rolling the fondant too thin.
Solution: Use a tiny amount of vegetable shortening on your hands and work surface rather than cornstarch. Roll fondant to an even 1/8-inch thickness for smooth draping.
Essential Tools and Equipment
Investing in reliable, professional tools drastically improves your speed, precision, and final decorating finish.
- Heavy Cast-Iron Rotating Turntable: A weighted turntable (such as an Ateco 612) provides smooth, continuous rotation essential for even scraping.
- Offset Spatulas (4-inch and 8-inch): Keeps your fingers clear of the frosting while spreading fillings and smoothing tops.
- Stainless Steel Bench Scraper: Delivers straight vertical sides and clean 90-degree top corners far better than plastic alternatives.
- Digital Kitchen Scale: Weighing ingredients in grams guarantees consistent sponge density, rise, and structural reliability.
- Piping Bags and Core Tips: Stock heavy-duty 16-inch disposable piping bags along with Wilton 1M (open star), Wilton 2D (drop flower), Ateco 808 (large round), and Ateco 104 (petal tip).
- Acrylic Discs: Clear acrylic discs placed at the top and bottom of the cake act as physical guides for flawless, sharp buttercream edges.
Recommended Internal Reading
Build your foundational skills and explore specific flavor profiles with our related baking guides:
- The Ultimate Swiss Meringue Buttercream Guide: Recipes, Troubleshooting, and Flavoring
- How to Safely Stack and Dowel Multi-Tiered Cakes for Beginners
- Piping 101: Mastering Shells, Rosettes, and Borders
- Foolproof Vanilla Sponge Recipe Engineered for Carving and Layering
- Edible Flowers for Cakes: Complete Safety, Sourcing, and Preparation Guide
Authoritative Culinary Resources
Consult these established educational institutions and baking authorities for further technical study:
- King Arthur Baking Company: Detailed flour protein analyses, baker’s percentages, and sponge chemistry references.
- Wilton Decorating School: Classical piping tip charts, royal icing consistency standards, and visual tutorials.
- Institute of Culinary Education (ICE): Professional pastry arts curricula covering emulsion science, sugar work, and entremet construction.
Key Takeaways
- Cold Sponges Decorate Best: Always chill cakes before torting, leveling, and icing to minimize crumbling and movement.
- Structure Comes First: Pipe a sturdy buttercream dam to trap soft fillings and prevent unsightly bulging waistlines.
- Tools Dictate Precision: A heavy rotating turntable and stainless steel bench scraper are the two most critical investments for clean finishes.
- Safety Is Paramount: Always seal fresh flower stems with floral tape and posy picks before placing them into edible cakes.
Bringing Your Cake Ideas to Life
Successful cake decorating is a practical craft developed through patience, temperature control, and consistent practice. Start with accessible single-tier textures like rustic spoon swirls or naked styles, then progress toward tiered construction and advanced piping techniques as your confidence grows.
Pick one design concept from this guide, prepare your mise en place, and enjoy the creative process of making a centerpiece your guests will remember.
Frequently Asked Questions
What are the easiest cake ideas for absolute beginners?
The easiest cake ideas for beginners are single-tier rustic swirl cakes, semi-naked cakes, and single-layer sheet cakes with piped rosettes. These styles do not require razor-sharp buttercream edges, making them forgiving while still looking elegant and appetizing.
How far in advance can I bake and decorate a celebration cake?
You can bake sponge layers up to one month in advance, wrap them tightly in plastic wrap, and freeze them. You can assemble and crumb coat the cake up to two days ahead. Final decorations should be added within 24 hours of the event for optimal freshness.
What type of frosting is best for achieving sharp edges on modern cakes?
Swiss meringue buttercream, Italian meringue buttercream, and white chocolate ganache are the best mediums for sharp edges. Their high fat content and stable emulsification allow them to firm up solidly in the refrigerator, enabling clean cuts with a heated bench scraper.
How do I stop my cake layers from sliding or leaning?
Prevent sliding by leveling all baked domes flat, using a firm buttercream filling dam, and chilling the cake for 30 minutes immediately after stacking. For multi-tier cakes, always insert supportive wooden or plastic dowels cut flush with the sponge surface.
Can I put fresh flowers directly into my cake?
No, you should never insert bare flower stems directly into cake. Stems can introduce pesticides, soil bacteria, and toxic sap. Wrap stems in food-safe floral tape and insert them into plastic posy picks or wide straws before placing them in the cake.
What is the secret to achieving a smooth, consistent ganache drip?
The secret is managing the temperature of both the cake and the ganache. Your cake must be thoroughly chilled and firm, while your ganache should be cooled to approximately 85°F–90°F (29°C–32°C). This allows the drip to flow smoothly without melting the buttercream.
How do I get deep, vibrant colors in buttercream without a bitter aftertaste?
Use concentrated gel paste or oil-based food colorings rather than water-based liquid drops. Mix your color into a small amount of buttercream and microwave it for 5 to 10 seconds to fully bloom the pigments, then mix it back into the main batch.
Should I store my decorated cake in the fridge or at room temperature?
Store decorated buttercream cakes in the refrigerator if they contain perishable fillings like fruit curd, pastry cream, or cream cheese. Bring the cake to room temperature for 1 to 2 hours before serving to ensure the sponge and frosting are soft and flavorful.