A Minecraft-inspired cake is a square, pixel-style dessert designed to look playful, colorful, and instantly recognizable at a themed party. This guide gives you a complete vanilla cake recipe, exact ingredient measurements, decorating steps, equipment suggestions, and practical tips for turning a simple bake into a blocky showpiece. Use it for a minecraft birthday cake, a minecraft cake party, or a weekend baking project with kids who love the game.
What makes a great Minecraft cake?
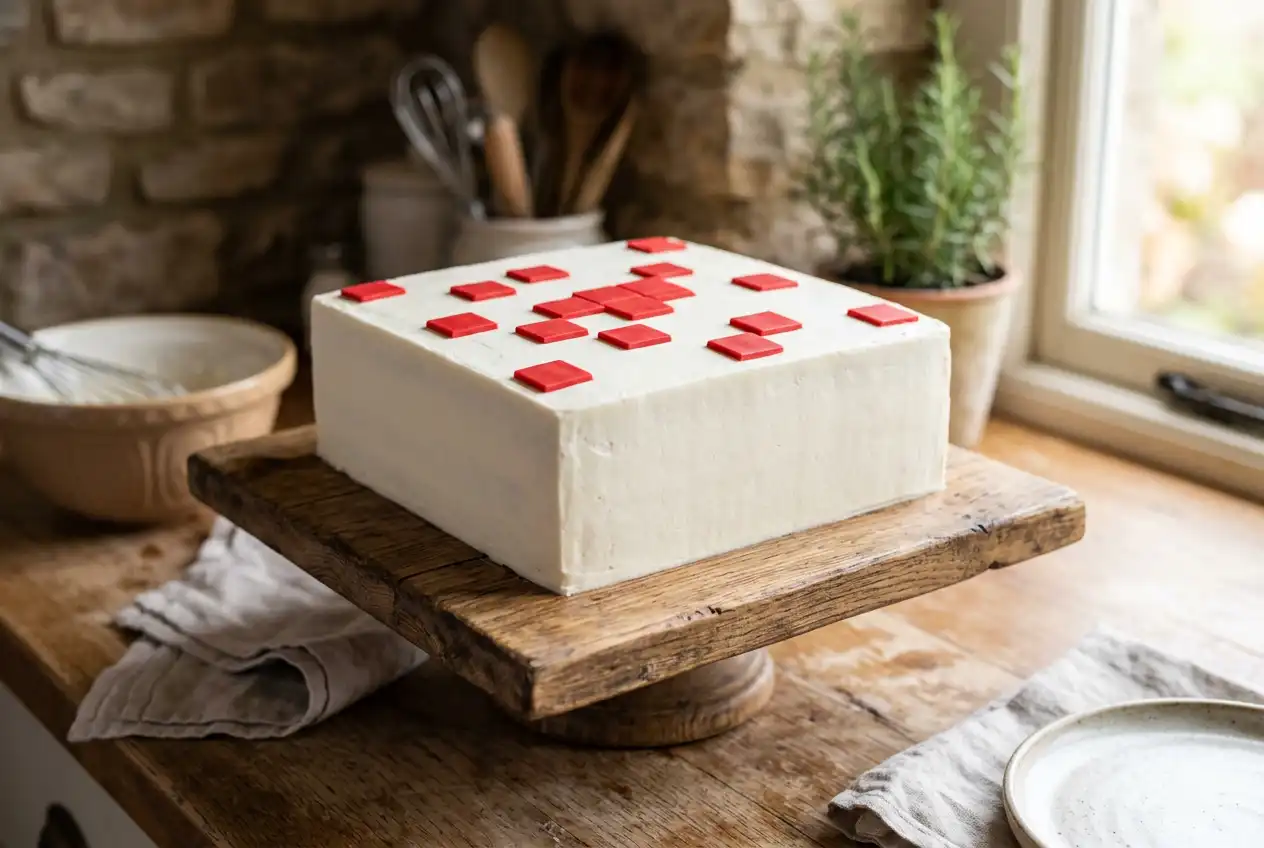
A great Minecraft cake combines clean square shapes, bold color blocks, and a flavor people actually want to eat. The design should feel pixelated rather than perfectly smooth, which makes it more beginner-friendly than many character cakes. Instead of sculpting complicated figures, you build the look with square cake layers, tinted frosting, fondant tiles, or piped buttercream squares.
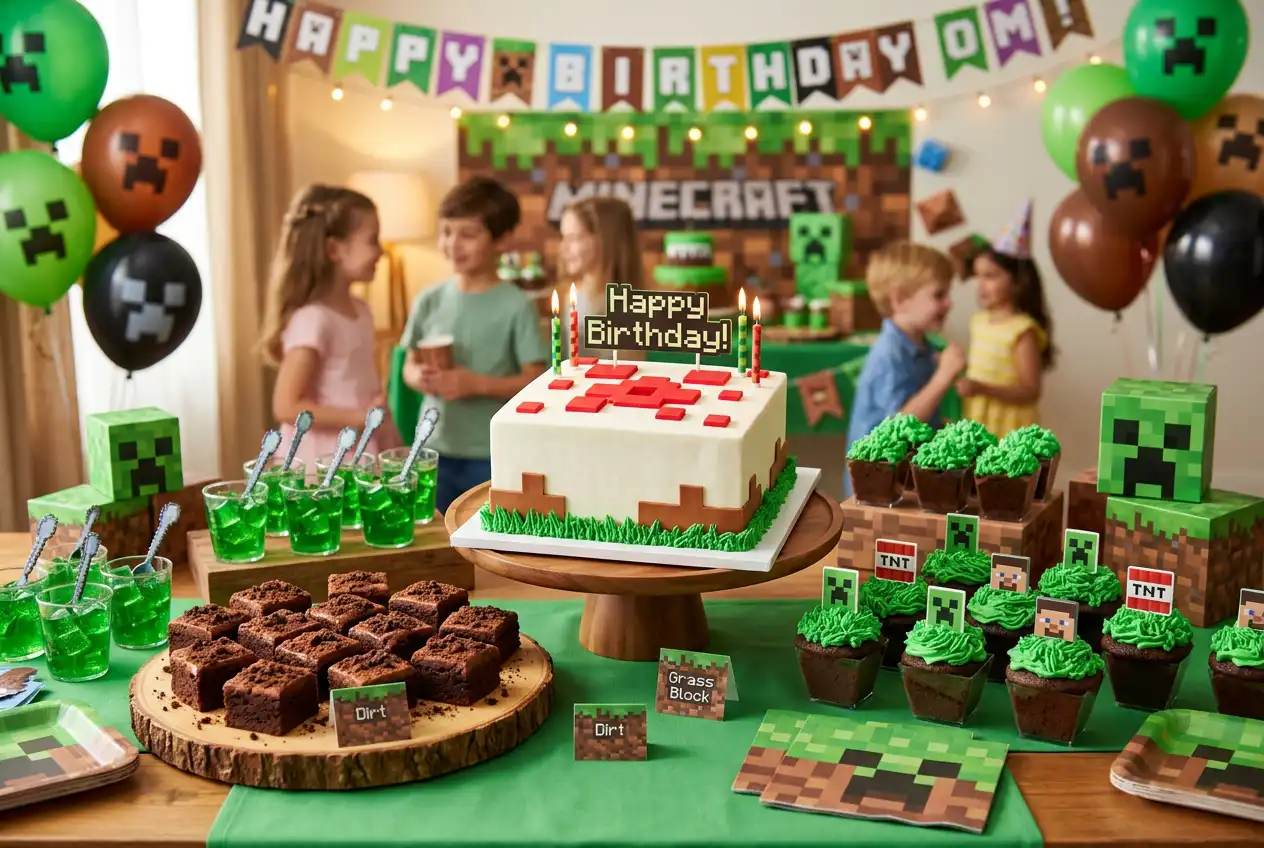
In the game, cake is a simple white-and-red block. In real life, you can use that as the base idea, then add grass blocks, creeper faces, TNT colors, or edible pixel decorations. That balance is what makes minecraft cake ideas so flexible: you can keep the design easy, or make it more detailed for a bigger celebration.
The cake design at a glance
This minecraft cake recipe makes one 8-inch square, two-layer vanilla cake with buttercream filling and pixel-style decoration. It serves about 12 to 16 people, depending on slice size. The cake is sturdy enough to decorate but still soft, moist, and pleasant to eat.
You will bake two square sponge layers, stack them with vanilla buttercream, coat the outside, then add Minecraft-inspired color blocks. The main version below uses a white cake base with red “cake block” squares on top. You can also add green and brown side tiles for a grass-block effect.
Recommended tools
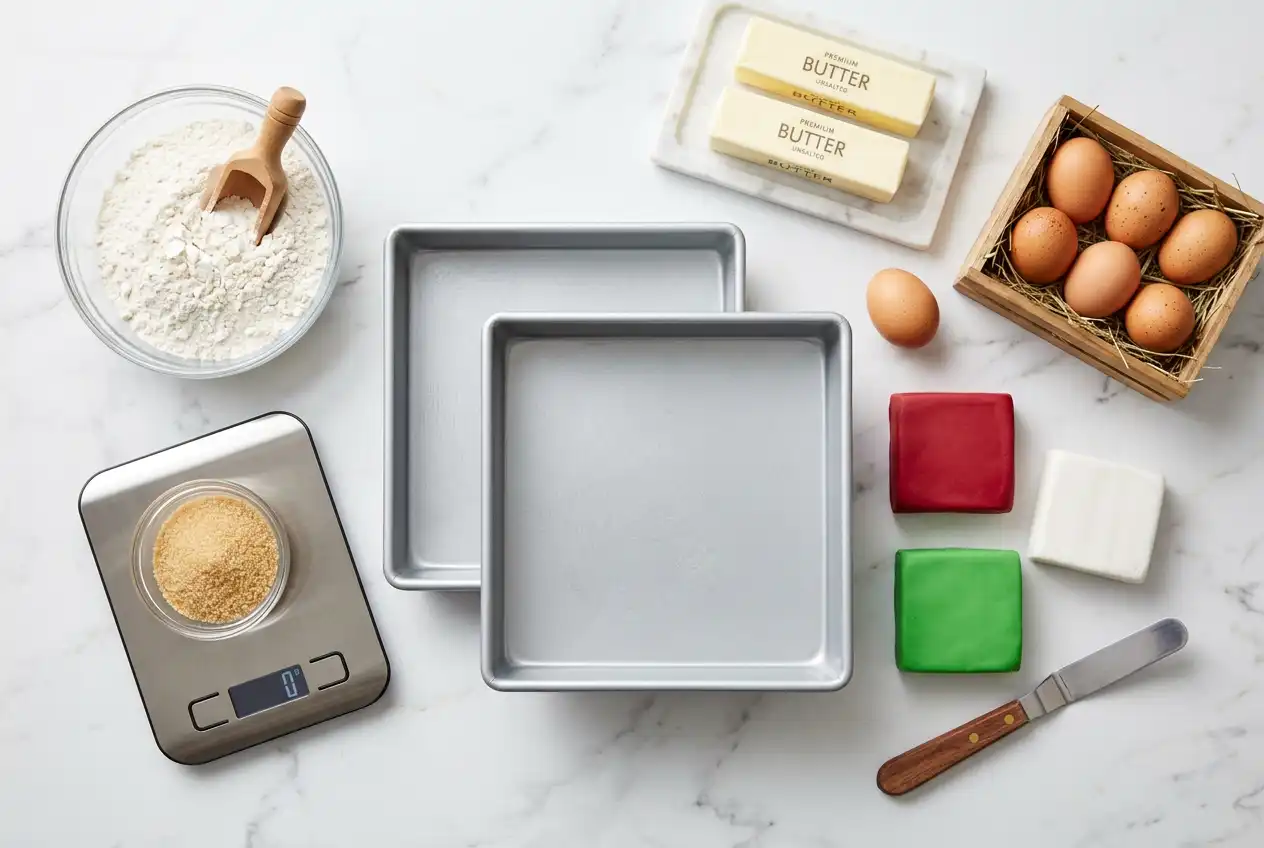
These tools make the process cleaner and easier:
- Digital kitchen scale for accurate flour, sugar, and butter measurements
- Two 8-inch square cake pans for the classic block shape
- Electric mixer or stand mixer for smooth batter and fluffy buttercream
- Silicone spatula for scraping the bowl and folding batter evenly
- Offset spatula for spreading frosting
- Piping bags for neat square details or borders
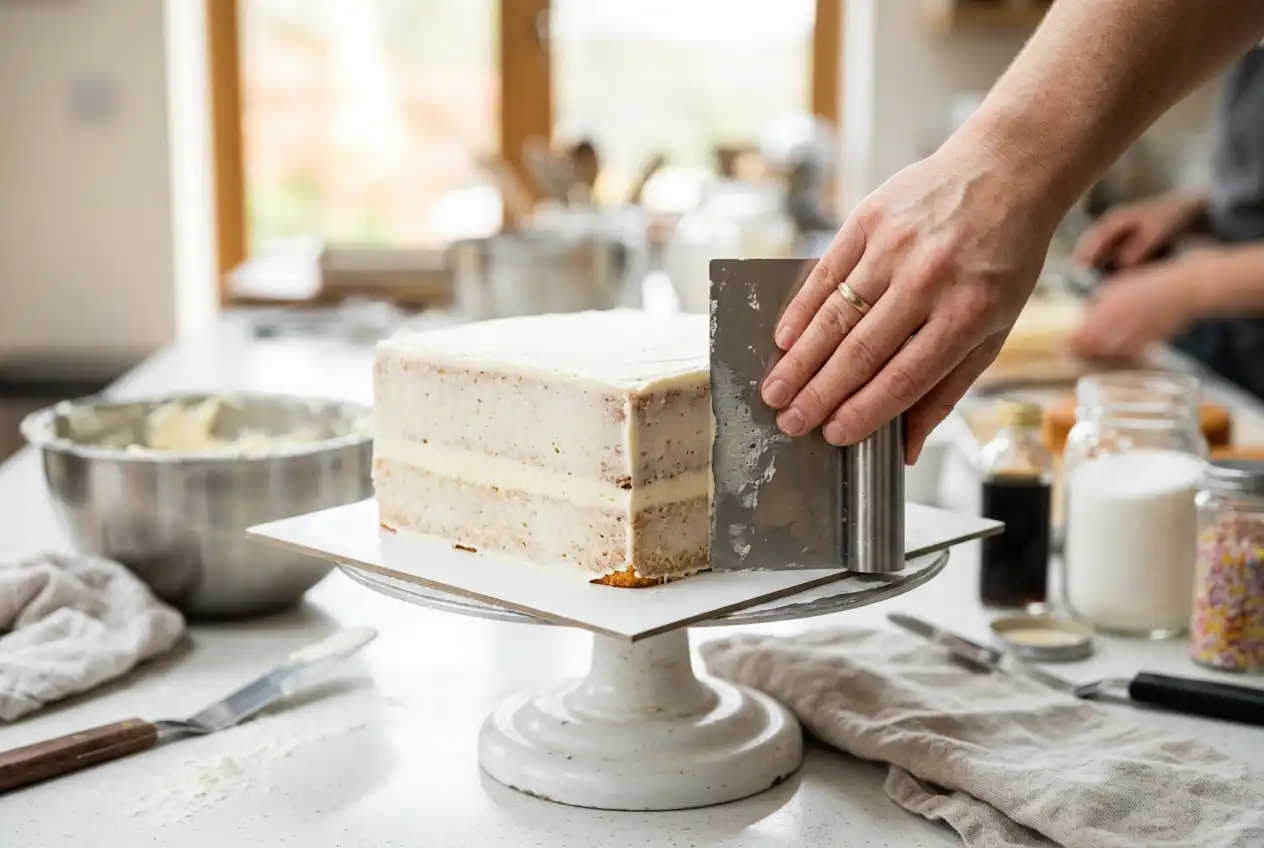
- Bench scraper for straight cake sides
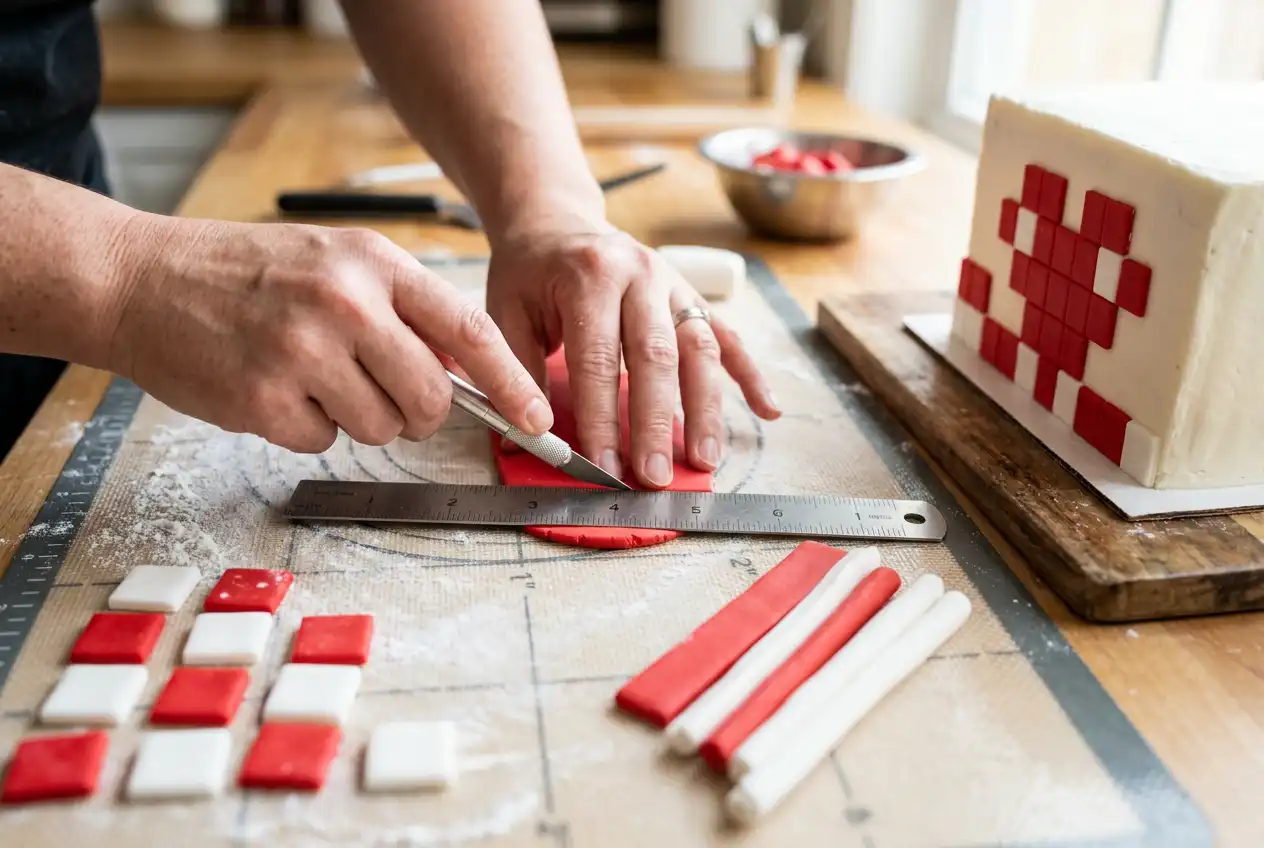
- Ruler and sharp knife for cutting fondant or frosting squares
You do not need every tool, but the cake pans, mixer, scale, and spatula are especially helpful.
Ingredients for the Minecraft cake
Use room-temperature butter, eggs, and milk for the best texture. A kitchen scale gives the most consistent results, but cup measurements are included where helpful.
Vanilla cake layers
- 280 g all-purpose flour, about 2 1/4 cups
- 250 g granulated sugar, about 1 1/4 cups
- 12 g baking powder, about 1 tablespoon
- 3 g fine salt, about 1/2 teaspoon
- 170 g unsalted butter, softened, about 3/4 cup
- 3 large eggs, about 150 g without shells
- 180 ml whole milk, about 3/4 cup
- 60 g sour cream, about 1/4 cup
- 10 ml vanilla extract, about 2 teaspoons
- 15 ml neutral oil, about 1 tablespoon
Vanilla buttercream frosting
- 340 g unsalted butter, softened, about 1 1/2 cups
- 540 g powdered sugar, about 4 1/2 cups
- 45 ml heavy cream or whole milk, about 3 tablespoons
- 10 ml vanilla extract, about 2 teaspoons
- 2 g fine salt, about 1/4 teaspoon
Pixel decorations
- 250 g white fondant, about 1 cup packed, or extra white buttercream
- 120 g red fondant, about 1/2 cup packed, for cake-block squares
- 80 g brown fondant, about 1/3 cup packed, optional for dirt-block sides
- 80 g green fondant, about 1/3 cup packed, optional for grass-block sides
- 2 to 4 drops red gel food coloring, if tinting white fondant or buttercream
- 2 to 4 drops green gel food coloring, optional
- 1 to 2 drops brown gel food coloring, optional
- 15 g cornstarch or powdered sugar, about 2 tablespoons, for rolling fondant
Step-by-step baking instructions
Follow the steps in order. Give the cake enough cooling time before decorating, because warm layers will melt the frosting.
- Prepare the pans. Heat the oven to 175°C / 350°F. Grease two 8-inch square cake pans. Line the bottoms with parchment paper, then lightly grease the parchment.
- Measure the ingredients. Use a kitchen scale to weigh the flour, sugar, butter, and powdered sugar. Accurate measurements help the layers bake evenly and stack cleanly.
- Mix the dry ingredients. In a large bowl, whisk together the flour, granulated sugar, baking powder, and salt. This spreads the leavening evenly through the batter.
- Add the butter. Add the softened butter to the dry ingredients. Beat with an electric mixer on low speed until the mixture looks sandy and slightly clumpy. This method helps create a tender crumb.
- Combine the wet ingredients. In a separate jug or bowl, whisk the eggs, milk, sour cream, vanilla extract, and oil until smooth.
- Make the batter. Pour half of the wet mixture into the flour mixture. Beat on medium speed for about 45 seconds. Scrape the bowl with a silicone spatula, then add the remaining wet mixture. Beat just until smooth. Do not overmix.
- Fill the pans. Divide the batter evenly between the two prepared cake pans. Smooth the tops with an offset spatula so the layers bake flat.
- Bake the cake. Bake for 25 to 32 minutes, or until the tops spring back lightly and a toothpick inserted in the center comes out clean or with a few moist crumbs.
- Cool the layers. Let the cakes cool in the pans for 10 to 15 minutes. Turn them out onto a wire rack and cool completely before frosting.
- Make the buttercream. Beat the softened butter with an electric mixer for 2 to 3 minutes until creamy. Add the powdered sugar in stages, mixing on low at first. Add cream, vanilla, and salt. Beat for another 2 minutes until fluffy.
- Level the cakes if needed. If the cake tops are domed, trim them with a serrated knife. Square, even layers make the Minecraft design look cleaner.
- Stack the cake. Place one cake layer on a board or serving plate. Spread about 1 cup of buttercream over the top. Add the second layer and press gently to secure it.
- Apply a crumb coat. Spread a thin layer of buttercream over the top and sides. Use a bench scraper to smooth the sides. Chill the cake for 20 to 30 minutes so crumbs stay locked in.
- Add the final frosting layer. Cover the cake with a thicker layer of buttercream. Smooth the sides and top, but do not worry about making it flawless. Minecraft designs look best with blocky, graphic shapes.
- Create pixel squares. Roll out the white and red fondant on a surface dusted with cornstarch or powdered sugar. Cut small squares with a ruler and sharp knife. Aim for consistent sizes, such as 1-inch squares.
- Decorate the top. Cover the top with white fondant squares or smooth white buttercream. Add red squares in a scattered pattern to mimic the cake block from the game.
- Decorate the sides. For a grass-block look, place brown squares along the lower sides and green squares near the top edge. For a simpler minecraft minecraft cake style, keep the sides white and add a red pixel border.
- Finish and chill. Place the cake in the refrigerator for 15 minutes to set the decoration. Let it sit at room temperature for 20 to 30 minutes before serving so the buttercream softens.
How can you customize the recipe for a Minecraft party?
You can customize this cake by changing the color palette, adding small edible figures, or matching the design to a favorite Minecraft block. The base cake stays the same, while the decoration changes to fit your party theme. That makes it a practical cake recipe minecraft fans can enjoy in many different ways.
Easy design variations
- Classic game cake: White top, red pixel squares, and white sides.
- Grass block cake: Green top, brown sides, and darker green squares for texture.
- Creeper cake: Green frosting with black square eyes and mouth.
- TNT cake: Red sides, white center band, and black block letters.
- Diamond ore cake: Gray frosting with light blue pixel squares.
Flavor swaps
Vanilla is reliable, but you can adjust the flavor without changing the structure too much. Replace 30 g of flour with 30 g cocoa powder for a light chocolate version. Add 1 teaspoon almond extract with the vanilla for a bakery-style flavor. For a colorful party center, fold 80 g of rainbow sprinkles into the finished batter before baking.
If you are planning a larger minecraft cake party, bake two separate square cakes and display them as different blocks. One can be a classic cake block, and another can be a grass or creeper block. This gives guests variety without requiring complicated carving.
Professional baking tips and tricks
Good technique matters as much as decoration. These tips help the cake bake evenly, stack neatly, and stay fresh until serving.
Oven temperature and baking consistency
Bake at 175°C / 350°F for a soft, even crumb. If your oven runs hot, the edges may brown before the center finishes. An oven thermometer is useful because built-in oven dials can be inaccurate.
Place the pans on the center rack with space between them. If your oven has hot spots, rotate the pans once after about 18 minutes. Avoid opening the oven too early, because sudden temperature changes can make the cake sink.
How to check cake doneness
Use more than one doneness cue. The cake should pull slightly from the pan edges, spring back when touched gently, and pass the toothpick test. A toothpick should come out clean or with a few moist crumbs, not wet batter.
If the top looks done but the center is still wet, bake for 3 to 5 more minutes and check again. Do not rely only on color. Vanilla cakes can look pale even when fully baked.
Frosting and decorating tips
Chill the crumb coat before adding the final frosting layer. This step keeps crumbs from dragging through the surface. Use a bench scraper against the sides while turning the cake board for sharper edges.
For fondant squares, cut more pieces than you think you need. Pixel designs look better when the squares are uniform and close together. If using piping bags instead of fondant, pipe small square patches with a flat or round tip and smooth each patch lightly with a small spatula.
Storage recommendations
Store the finished cake in an airtight cake carrier at cool room temperature for up to 1 day if your kitchen is not warm. For longer storage, refrigerate it for up to 4 days. Let slices come to room temperature before eating for the best texture.
Unfrosted cake layers can be wrapped tightly and frozen for up to 2 months. Thaw them in the refrigerator overnight before decorating. Buttercream can also be made ahead and refrigerated for several days; bring it to room temperature and re-whip before using.
Common mistakes to avoid
Even a simple minecraft cake recipe can go wrong if the cake is rushed. The most common issues are easy to prevent with a little patience.
- Decorating warm cake: Warm layers melt buttercream and make fondant slide.
- Skipping the crumb coat: Loose crumbs will show through the final frosting.
- Using too much food coloring: Gel coloring is strong, so add it slowly.
- Cutting uneven squares: Pixel decoration depends on consistent shapes.
- Overmixing the batter: Too much mixing can make the cake dense.
- Serving straight from the fridge: Cold buttercream tastes firmer and less creamy.
If you are making the cake for a minecraft birthday cake table, finish it several hours before the event. That gives you time to fix edges, add extra squares, and move the cake safely.
A simple planning checklist
Use this checklist to stay organized from baking day to party time.
- Bake the cake layers the day before decorating if possible.
- Cool layers completely before wrapping or frosting.
- Prepare buttercream while the layers cool.
- Cut fondant squares before stacking the cake.
- Chill the crumb coat for cleaner final frosting.
- Add delicate decorations after the final frosting layer is smooth.
- Keep the cake cool during transport.
- Bring the cake to room temperature before serving.
This approach works whether you are following one recipe for cake on minecraft inspiration or combining several minecraft cake ideas into one design. The key is to treat the cake like a set of edible blocks: bake square, stack straight, decorate in pixels, and keep the colors bold.
Final serving ideas
Serve the cake with simple party extras that match the theme. Square brownies can become “dirt blocks,” green gelatin cubes can look like slime, and blue drinks can stand in for water. Cupcakes with small pixel toppers are also useful if you need extra servings.
For the cleanest slices, use a sharp knife dipped in warm water and wiped dry between cuts. Cut the cake into a grid to keep the block theme going. With a reliable base recipe, simple tools, and a little minecraft cake inspiration, you can create a dessert that looks fun, tastes homemade, and fits the party perfectly.