Quick Answer: The Golden 3-Ingredient Ratio
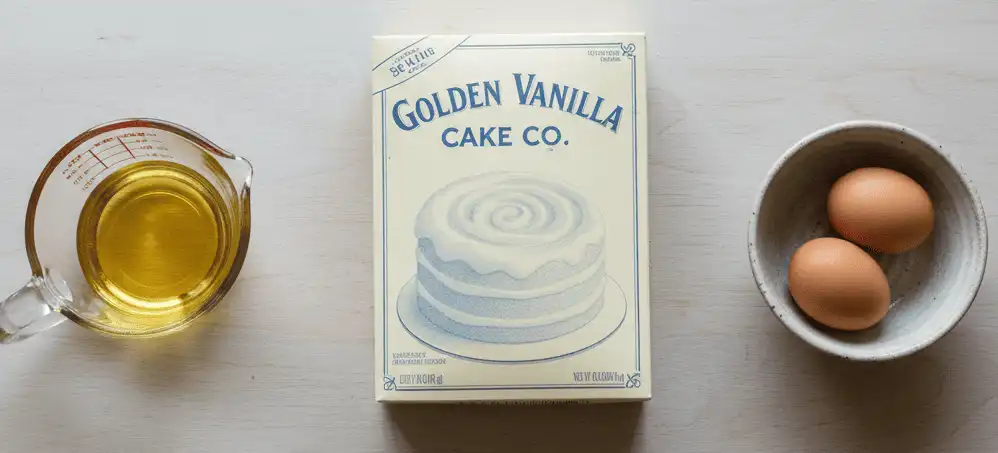
To make foolproof 3 ingredient cake mix cookies, combine one standard box of cake mix (15.25 ounces), 1/2 cup of neutral oil (or melted unsalted butter), and 2 large eggs. Mix until a thick dough forms without adding any water or milk called for on the cake mix box.
Bake at 350°F (177°C) on a parchment-lined baking sheet for 10 to 12 minutes until the edges are set and the centers remain soft. Cool on the sheet for 5 minutes before transferring to a wire rack to finish setting.
- Prep Time: 5 minutes
- Bake Time: 10–12 minutes
- Yield: 20–24 standard cookies
Baking homemade cookies often demands measuring flour, sugar, leavening agents, and salt with strict precision. One minor misstep in weighing dry goods can ruin the final texture. That level of kitchen chemistry is not always practical when time or pantry stock is low.
This comprehensive guide teaches you how to repurpose standard commercial cake mix into dense, chewy, bakery-style cookies. Whether you are baking for a school event, filling an unexpected dessert craving, or teaching young children practical kitchen skills, this formula delivers dependable results every time.
You will learn the fundamental food science behind this shortcut, the exact role of each ingredient, how to avoid greasy or overly cakey textures, and how to adapt any store-bought box mix into custom flavors.
Why This Recipe Works: The Science of Cake Mix Baking
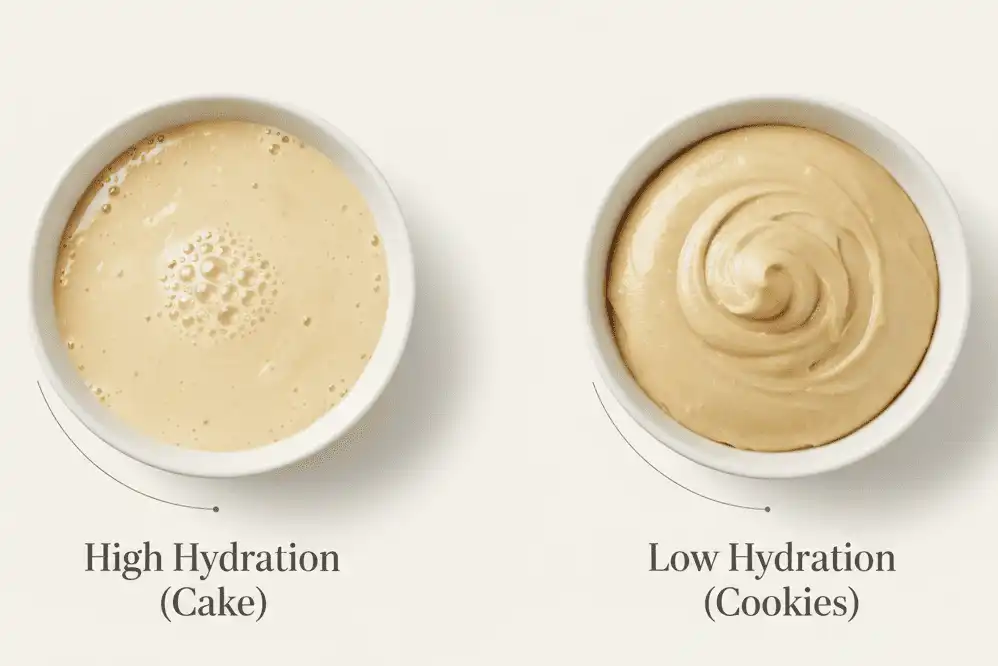
A standard boxed cake mix contains four essential components: chlorinated cake flour, superfine granulated sugar, commercial leavening agents (baking soda or sodium acid pyrophosphate), and emulsifiers (such as mono- and diglycerides). When preparing a traditional cake, adding water, oil, and multiple eggs creates a loose, aerated batter with high hydration.
To transform cake batter into cookie dough, hydration must be drastically reduced. By omitting all added liquid water or milk, the flour starches and proteins hydrate only through the water present in the egg whites and the fat source. This reduction prevents excess steam production, transforming what would be an airy sponge cake into a dense, chewy cookie crumb.
The pre-blended emulsifiers in commercial cake mixes stabilize the structure rapidly. They bind the fat and egg proteins evenly throughout the starches, yielding a uniform dough that resists spreading too thin across hot baking sheets.
The Essential 3 Ingredients and Box Size Rules
Success starts with precise ratios. While the recipe is simple, changes in commercial packaging sizes over recent years require attention to detail.
1. One Standard Box of Cake Mix (15.25 Ounces)
The dry mix provides all structural flour, leaveners, salt, and flavorings. Yellow, white, chocolate, red velvet, lemon, and spice mixes all work identically with this base ratio. Never add any liquid ingredients listed on the back of the package; use only dry powder straight from the bag.
2. Half Cup of Fat (Vegetable Oil, Canola Oil, or Melted Butter)
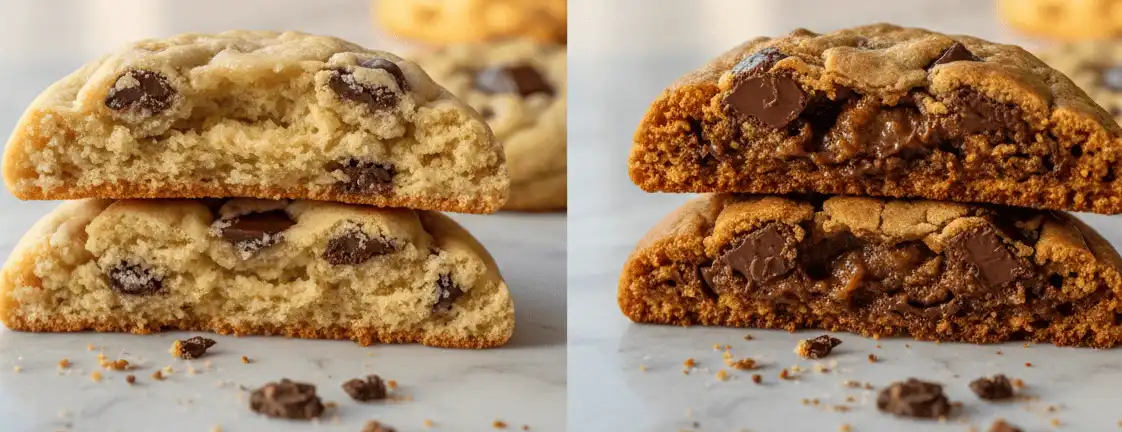
Fat controls tenderness, moisture retention, and cookie spread. Liquid vegetable oils produce a chewy, tender crumb that stays soft for days. Melted butter creates crisper edges, richer flavor, and slightly greater spread due to its natural milk solids and 16–18% water content.
3. Two Large Eggs (Room Temperature)
Eggs supply structural protein through the whites and richness through the yolks. They also serve as the primary hydration agent for the dry mix starches. Cold eggs will cause melted butter to seize and harden the dough; bring them to room temperature by resting them in a bowl of warm water for 5 minutes prior to mixing.
Oil vs. Butter: Choosing Your Fat Source
Your choice of fat alters the physical characteristics of the finished cookie. Neither option is incorrect, but each produces a noticeably different mouthfeel and appearance.
Vegetable or Canola Oil
Using 100% pure neutral vegetable or canola oil keeps the dough soft and supple. Because oil remains liquid at room temperature, oil-based cake mix cookies stay moist and chewy for up to five days. Oil also allows the core flavor of the cake mix—such as strawberry or lemon—to remain clear without competing dairy notes.
Melted Unsalted Butter
Replacing oil with an equal volume of melted butter adds complex flavor and promotes appealing surface browning through the Maillard reaction. Cookies made with butter feature delicate, slightly crisp edges and a fudgier center. Because butter solidifies at room temperature, these cookies will become firmer over time than oil-based versions.
Neutral Coconut Oil
Refined liquid coconut oil is a reliable 1:1 plant-based alternative. Choose refined coconut oil to avoid an unwanted coconut flavor in non-tropical recipes. Ensure the melted oil cools slightly before combining it with the eggs to prevent premature protein coagulation.
Step-by-Step Baking Guide
Follow these steps in precise sequence for uniform baking and optimal texture.
Step 1: Oven Calibration and Pan Preparation
What: Preheat your oven to 350°F (177°C) and line two large, rimmed baking sheets with unbleached parchment paper or silicone baking mats.
Why: Cake mix dough contains high levels of concentrated sugars that caramelize quickly. Placing dough on an unlined metal pan leads to scorching and sticking before the center finishes setting.
How: Position oven racks in the upper-middle and lower-middle thirds of your oven. Avoid non-stick cooking sprays on bare aluminum sheets, as cooking sprays can pool around the cookie base and cause greasy, over-spread bottoms.
Common Mistake: Baking on hot cookie sheets directly out of the oven. Always let baking sheets return to room temperature before dropping the next batch of dough.
Pro Tip: Use an inexpensive oven thermometer hung on the center rack. Most home ovens run 15 to 25 degrees hotter or cooler than their digital display indicates.
Step 2: Mixing the Core Ingredients
What: Whisk the liquid ingredients first, then blend in the dry cake mix.
Why: Whisking the eggs and oil together beforehand creates an initial emulsion. This prevents pockets of dry mix from absorbing isolated fat pools, resulting in a cohesive dough.
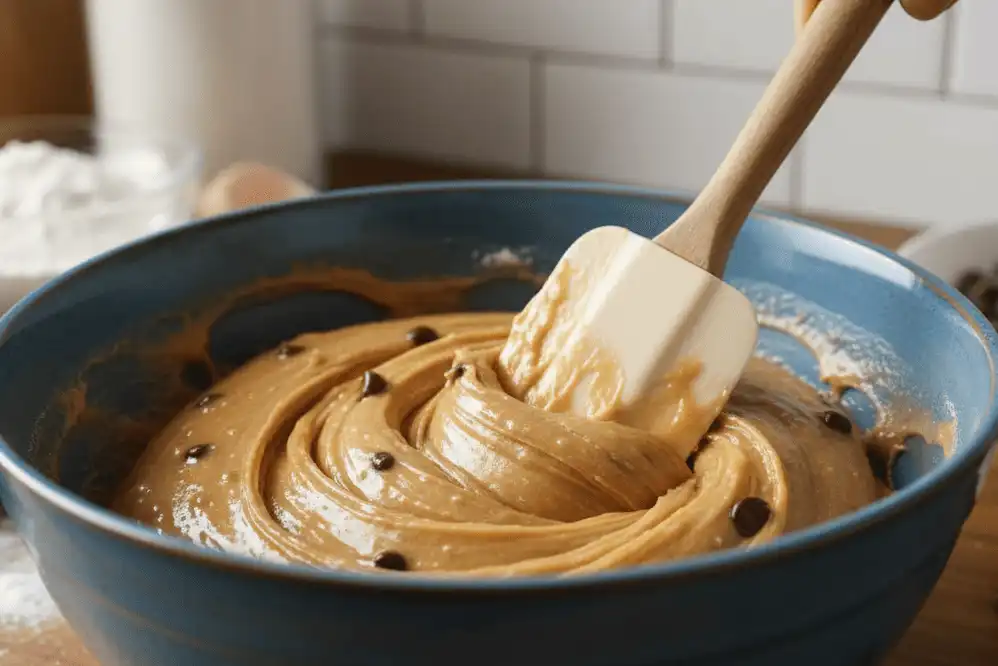
How: In a large mixing bowl, beat 2 large eggs and 1/2 cup of oil or melted butter with a fork or balloon whisk for 30 seconds. Empty the dry cake mix into the bowl. Switch to a sturdy rubber spatula or wooden spoon. Stir patiently until no streaks of dry powder remain.
Common Mistake: Using a high-speed electric hand mixer for too long. Overworking the dough develops excess gluten in the cake flour, making the baked cookies rubbery rather than tender.
Pro Tip: The dough will be much thicker and stickier than regular cake batter. It should resemble thick drop-cookie dough rather than pourable liquid.
Step 3: Chilling the Dough (The Secret Step)
What: Chill the mixed dough in the refrigerator for 15 to 20 minutes before portioning.
Why: While optional if you are in a rush, a brief chill allows the starches in the flour to fully hydrate and solidifies the fats. This prevents excessive spreading and yields a thicker cookie with a domed, crinkled top.
How: Cover the mixing bowl with plastic wrap or a silicone cover and place it in the refrigerator. If you choose to skip this step, expect your cookies to bake slightly thinner and spread roughly 20% wider.
Common Mistake: Chilling the dough overnight without covering it tightly, which dries out the exterior surface and prevents proper spreading.
Step 4: Portioning and Shaping
What: Scoop the dough into uniform portions and place them on the lined baking sheets.
Why: Consistent sizing guarantees that all cookies bake at the exact same rate. If sizes vary on the same tray, smaller portions will burn while larger portions remain raw inside.
How: Use a standard #40 spring-loaded cookie scoop (about 1.5 tablespoons or 30 grams of dough). Space the dough balls at least 2 inches apart on the prepared sheets, placing no more than 12 cookies per standard half-sheet pan.
Common Mistake: Rolling the sticky dough vigorously between warm palms. If hand-rolling, lightly coat your hands in neutral oil or powdered sugar to prevent sticking.
Pro Tip: For bakery-style crinkle tops, roll each chilled portion lightly in confectioners’ sugar before arranging them on the pan.
Step 5: Baking to Exact Timing
What: Bake at 350°F (177°C) for 10 to 12 minutes.
Why: Cake mix cookies bake faster than scratch dough because of their high ratio of fine sugar and pre-treated starches. Leaving them in the oven until they look fully brown dries them out permanently.
How: Set a kitchen timer for 10 minutes. At the 6-minute mark, rotate your baking sheet front-to-back to compensate for hot spots. Look for lightly golden, matte edges while the very center remains slightly soft and puffy.
Common Mistake: Waiting for the centers to feel firm to the touch. Once removed from the oven, carryover cooking completes the process on the hot tray.
Step 6: Controlled Cooling
What: Cool on the warm baking pan for 5 minutes, then move to a wire cooling rack.
Why: Freshly baked cake mix cookies are delicate. Attempting to lift them immediately with a spatula causes them to tear and collapse.
How: Set the entire baking sheet on a trivet or counter. After 5 minutes, slide a thin metal spatula underneath each cookie and transfer it to a wire rack to finish cooling to room temperature.
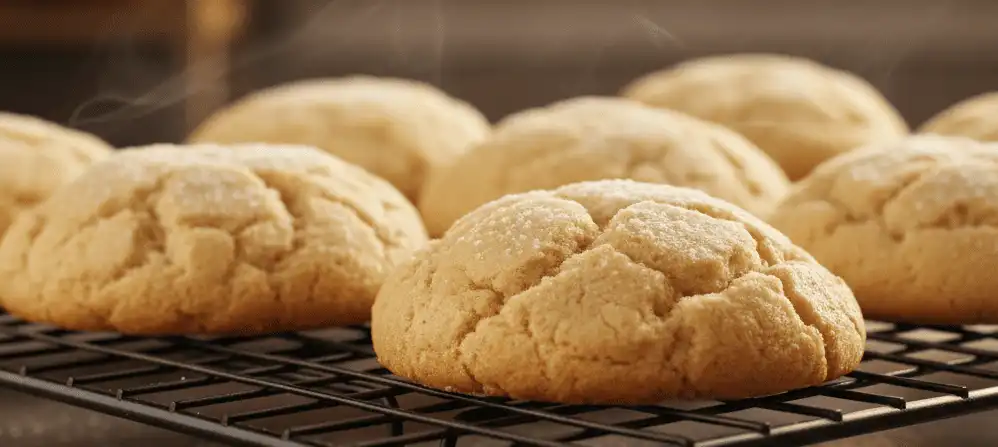
Comparison: Cake Mix vs. Scratch vs. Refrigerated Dough
Understanding the tradeoffs between preparation methods helps you choose the right approach for your timeline, budget, and desired outcome.
| Attribute | 3-Ingredient Cake Mix | Traditional Scratch Cookies | Store-Bought Tub/Log Dough |
|---|---|---|---|
| Active Prep Time | 5 minutes | 20–30 minutes | 2 minutes |
| Number of Ingredients | 3 basic items | 8–12 items | 1 packaged item |
| Average Cost Per Batch | $2.00 – $3.50 | $4.50 – $7.00 | $4.00 – $6.00 |
| Primary Texture Profile | Soft, chewy, tender center | Crisp edge, dense/chewy center | Evenly crisp or crumbly |
| Customization Potential | High (dozens of box flavors) | Unlimited | Very low (fixed flavors) |
| Margin for Error | Extremely low (foolproof) | Moderate (sensitive to scales) | Extremely low |
| Softness Retention | 4–5 days at room temp | 2–3 days at room temp | 1–2 days at room temp |
Popular Flavor Variations and Combinations
The standard 3-ingredient base acts as a foundation. By swapping the cake mix variety or adding simple mix-ins, you can create dozens of distinct cookie styles.
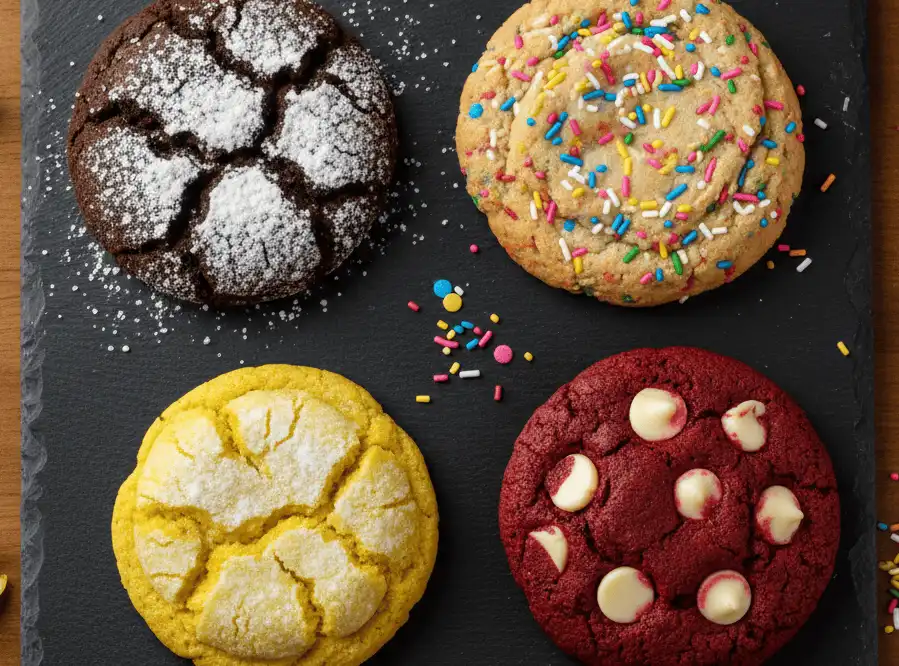
1. Classic Chocolate Fudge Crinkle
Use Devil’s Food or Dark Chocolate cake mix with 1/2 cup vegetable oil and 2 eggs. Fold in 1/2 cup semi-sweet chocolate chips if desired. Roll the portioned dough balls thoroughly in a bowl of sifted powdered sugar before baking. As the cookies expand in the heat, the sugar crust fissures to create a dramatic black-and-white cracked design.
2. Funfetti Celebration Cookies
Combine one box of Confetti or Funfetti cake mix with 1/2 cup melted butter and 2 eggs. Stir in 2 tablespoons of extra rainbow jimmies to brighten the color. These taste remarkably like bakery birthday cake batter while holding an authentic drop-cookie chew.
3. Bright Citrus Lemon Crinkles
Use Lemon cake mix paired with 1/2 cup canola oil, 2 eggs, and the freshly grated zest of one whole lemon. The natural citric oils cut through the sweetness of commercial mix and impart an authentic fresh-fruit finish. Dust with confectioners’ sugar prior to baking.
4. Red Velvet White Chocolate Melts
Mix Red Velvet cake mix with 1/2 cup melted unsalted butter, 2 eggs, and 3/4 cup premium white chocolate chips. The rich cocoa notes in the red velvet balance the creamy cocoa butter in the white chocolate chips. These are ideal for holiday dessert platters and bake sales.
5. Autumn Spiced Snickerdoodles
Prepare standard Spice cake mix or Yellow cake mix with oil and eggs. In a small ramekin, blend 2 tablespoons granulated sugar with 1 teaspoon ground cinnamon. Roll each dough ball generously through the cinnamon-sugar mixture before spacing on the baking tray.
Common Mistakes and How to Avoid Them
Even simple recipes can suffer from common baking errors. Avoid these pitfalls to protect your finished batch.
Mistake 1: Adding Water or Milk Listed on the Box
Why it happens: Habit leads many bakers to follow the liquid instructions printed on the cake mix box instead of following the cookie formula.
How to avoid: Keep water, milk, and measuring cups put away. The only moisture needed comes from your two eggs and the 1/2 cup of fat. Adding exterior water turns your dough into a runny cake batter that puddles across the entire pan.
Mistake 2: Overbaking Until the Centers Harden
Why it happens: Beginners often expect cookies to emerge from the oven fully firm and golden brown across the entire crown.
How to avoid: Pull the cookies out the moment the perimeter looks matte and slightly golden. The center should look soft and underdone. The hot baking sheet continues to bake the interior gently for several minutes on the counter without stripping out internal moisture.
Mistake 3: Skipping Parchment Paper
Why it happens: Believing non-stick cooking spray or bare pans are sufficient.
How to avoid: Always line pans with culinary parchment paper or silicone baking mats. Boxed mixes have high concentrations of sugar that caramelize swiftly against direct aluminum, leading to burnt bottoms long before the dough cooks through.
Mistake 4: Using the Wrong Cake Mix Size
Why it happens: Older heirloom recipes were balanced for discontinued 18.25-ounce boxes.
How to avoid: Check the net weight listed on the front lower corner of your box. If you happen to use an older 18.25-ounce mix from a specialty manufacturer, increase the fat to 1/2 cup plus 2 tablespoons. For modern 15.25-ounce boxes, keep fat precisely at 1/2 cup.
Professional Baker Tips and Edge Cases
Use these advanced techniques to elevate basic cake mix cookies into artisanal-style treats.
The “Pan Bang” Technique for Dense Chewy Centers
If you prefer flatter cookies with distinct rippled edges, open the oven door at the 9-minute mark. Lift the baking sheet 2 inches above the rack and drop it firmly onto the wire grates twice. This intentional impact collapses trapped air bubbles and forces the center downward, intensifying chewiness across the whole cookie.
The Glass Cup Rim Trick
Immediately after removing the hot cookie sheet from the oven, invert a round drinking glass or round biscuit cutter over a warm cookie. Gently swirl the cup in a circular motion around the cookie edges for 5 seconds. The hot, malleable borders will smooth against the inner glass walls, creating a clean, circular shape.
Adjusting for High Altitude
At elevations above 3,500 feet, low atmospheric pressure causes baked goods to rise too quickly and spread excessively. To correct this, stir 2 tablespoons of unbleached all-purpose flour into the dry cake mix and add 1 tablespoon of water to the wet ingredients. Increase the oven temperature to 375°F (190°C) and reduce total baking time by roughly 2 minutes.
Dietary Modifications and Egg Substitutes
You can adapt this base formula to accommodate specific dietary restrictions and allergies with modest adjustments.
Egg-Free Alternatives
If you have an egg allergy or run out of fresh eggs, you can use these functional replacements:
- Unsweetened Applesauce: Use 1/4 cup of smooth unsweetened applesauce per egg (1/2 cup total). The pectin provides structural stability, though the cookies will be softer and slightly more cake-like.
- Commercial Egg Replacer: Powdered starch-based egg replacers (such as Bob’s Red Mill) mixed with warm water according to package directions yield the closest structural match to whole eggs.
- Flax Eggs: Mix 2 tablespoons of finely ground golden flaxseed meal with 5 tablespoons of warm water. Let the slurry rest for 10 minutes to gel. This works well in spice, chocolate, and carrot cake mixes.
Gluten-Free Adjustments
Certified gluten-free cake mixes generally contain between 12 and 15 ounces of blended rice flours and starches. Because gluten-free flours absorb moisture more slowly, let the mixed dough sit on the counter for 10 minutes before scooping. If the dough feels excessively loose, fold in 1 to 2 tablespoons of sweet white rice flour or cornstarch.
Storage, Shelf Life, and Freezing Instructions
Proper storage prevents moisture loss and preserves cookie texture for days or months.
Room Temperature Storage
Allow the cookies to cool to room temperature. Transfer them into an airtight glass or plastic container, placing sheets of wax paper between stacked layers. Store at room temperature away from direct sunlight for up to 5 days. Adding a single slice of plain sandwich bread to the container helps maintain humidity, keeping the cookies soft without making them soggy.
Freezing Baked Cookies
Arrange cooled cookies in a single layer on a parchment-lined baking sheet and place them in the freezer for 1 hour until solid. Transfer the frozen cookies into heavy-duty zip-top freezer bags, pressing out excess air. Label with the date and freeze for up to 3 months. Thaw individual cookies on the counter at room temperature for 20 minutes before serving.
Freezing Raw Dough Balls
Scoop unbaked dough portions onto a baking sheet as if preparing to bake. Place the entire pan into the freezer for 2 hours until the balls freeze firm. Move the frozen dough balls into an airtight freezer container. You can bake them directly from the freezer at 350°F (177°C); simply add 2 to 3 minutes to the standard baking duration.
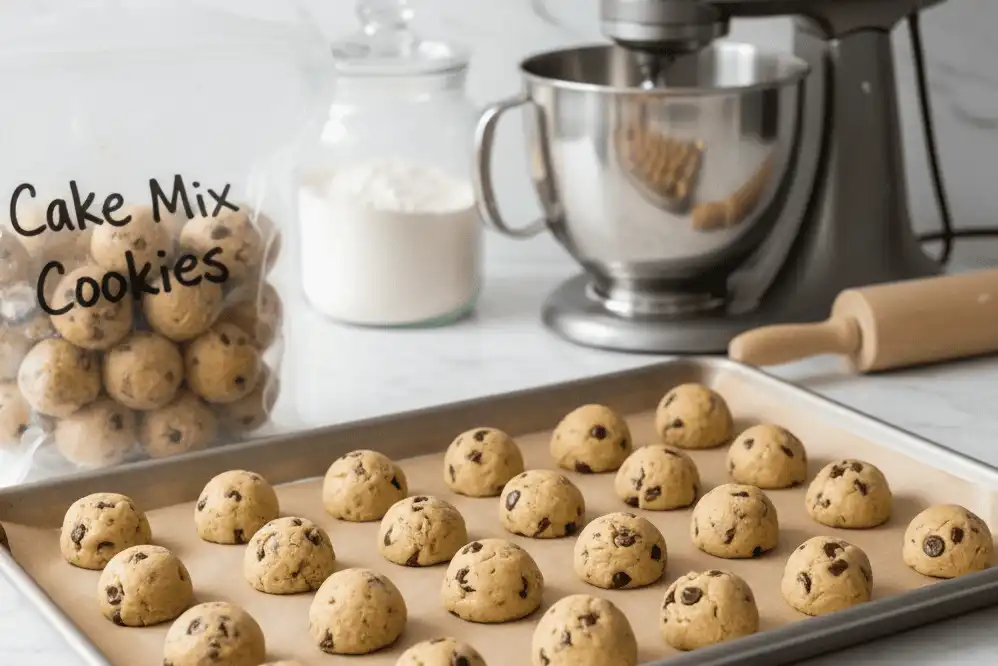
Recommended Tools and Equipment
Having the right tools on hand makes preparation effortless and keeps cookies uniform.
- Heavy-Gauge Half-Sheet Pans: Light-colored natural aluminum pans distribute heat evenly and prevent over-browning underneath.
- Unbleached Culinary Parchment Paper: Prevents sticking and simplifies cleanup without altering the baking surface.
- Size #40 Spring-Loaded Cookie Scoop: Dispenses equal 1.5-tablespoon portions swiftly without messy hand-shaping.
- Oven Thermometer: Hangs inside the oven chamber to verify accurate temperature calibration.
- Stainless Steel Wire Cooling Racks: Allows air to circulate under freshly baked cookies, stopping moisture condensation beneath the crust.
Authority References
For deeper study into food safety and baking science, consult these resources:
- USDA Food Safety and Inspection Service: Egg Safety and Handling Guidelines for guidelines on safe cooking and storing of egg products.
- FDA Center for Food Safety and Applied Nutrition: Guidance on proper food handling regarding raw commercial flour mixes and foodborne illness prevention.
- King Arthur Baking Company Research Kitchen: Reference materials on fat ratios, starch gelatinization, and cookie spread mechanics.
Key Takeaways
- The Master Ratio: 1 box (15.25 oz) cake mix + 1/2 cup fat + 2 large eggs. Never add water or milk.
- Fat Selection: Vegetable oil keeps cookies tender and soft for days; melted butter gives crisper edges and richer flavor.
- Chilling Helps: Resting dough in the refrigerator for 15 minutes reduces spreading and improves surface crinkles.
- Underbake Slightly: Pull cookies when the edges are matte and set, but the center looks underdone (10–12 minutes total).
- Parchment Paper is Mandatory: Concentrated sugars scorch on bare metal; parchment guarantees even browning and easy removal.
Final Thoughts
Baking reliable homemade cookies does not require an afternoon of careful measuring or a cupboard full of specialty ingredients. With a single box of cake mix, cooking oil, and two eggs, you have everything needed to turn out dozens of soft, chewy cookies in under twenty minutes.
Try the base formula first with your favorite cake mix flavor, then experiment with chocolate chips, citrus zest, or holiday sprinkles. Once you master the core ratio, you will have a dependable, versatile dessert ready whenever the craving strikes.
Frequently Asked Questions
Can I use butter instead of vegetable oil for cake mix cookies?
Yes. You can swap 1/2 cup of melted unsalted butter for the vegetable oil at a direct 1:1 ratio. Butter yields a richer taste and slightly crisper edges. Keep in mind that butter solidifies as it cools, so butter-based cookies will feel firmer the next day compared to those made with oil.
Why did my cake mix cookies turn out flat and greasy?
Flat, greasy cookies usually happen when too much oil is added, warm melted butter is mixed with warm dough, or baking sheets are greased with cooking spray. Use exactly 1/2 cup of fat for a 15.25-ounce mix, bake on parchment paper, and chill the dough for 15 minutes before baking.
Do I need to add the water called for on the back of the box?
No, never add water or milk. The instructions on the box are designed to make pourable, aerated cake batter. Cookies require much lower hydration. The moisture in your two eggs and 1/2 cup of fat provides all the hydration needed to bind the dry mix into a thick dough.
How do I know when 3 ingredient cake mix cookies are done baking?
Look for edges that appear matte, dry, and lightly set while the center remains puffy and soft to the touch. This takes 10 to 12 minutes at 350°F (177°C). If you wait until the center browns, the cookies will turn hard once fully cooled.
Can I freeze the dough to bake later?
Yes. Portion the dough into individual balls using a cookie scoop and place them on a parchment-lined tray in the freezer for 2 hours. Once frozen solid, transfer the dough balls into a zip-top freezer bag for up to 3 months. Bake straight from frozen, adding 2 to 3 minutes to the cook time.
Why are my cookies cakey instead of chewy?
Cakey cookies stem from overbeating the dough with an electric mixer or leaving them in the oven too long. Mix by hand with a spatula just until dry pockets disappear. Pull the cookies from the oven at 10 to 11 minutes to let carryover cooking finish the centers on the warm pan.
Can I make these cookies without eggs?
Yes. Replace the 2 eggs with 1/2 cup of unsweetened applesauce (1/4 cup per egg) or commercial powdered egg replacer prepared with water according to its package instructions. The applesauce creates a softer, slightly more delicate cookie, but it binds the dough effectively without altering flavor.
How long do these cookies stay fresh?
Store cake mix cookies in an airtight container at room temperature for up to 5 days. Placing a piece of plain sandwich bread inside the container helps balance ambient moisture, preventing the cookies from drying out and keeping them soft throughout the week.