Quick Answer: How to Make Red Velvet Cake Mix Cookies
To make classic red velvet cake mix cookies, combine one standard 15.25-ounce box of red velvet cake mix, 1/2 cup of neutral oil (or melted unsalted butter), and 2 large eggs in a bowl. Fold in 1 cup of white chocolate chips or your choice of mix-ins. Do not follow the liquid instructions on the cake box.
Scoop 1.5-tablespoon portions of dough onto a parchment-lined baking sheet. Bake at 350°F (177°C) for 10 to 12 minutes until the edges are set and the centers remain soft. Allow them to cool on the warm baking pan for 5 minutes before transferring to a wire cooling rack.
- Prep Time: 10 minutes
- Bake Time: 10–12 minutes
- Yield: 20–24 cookies
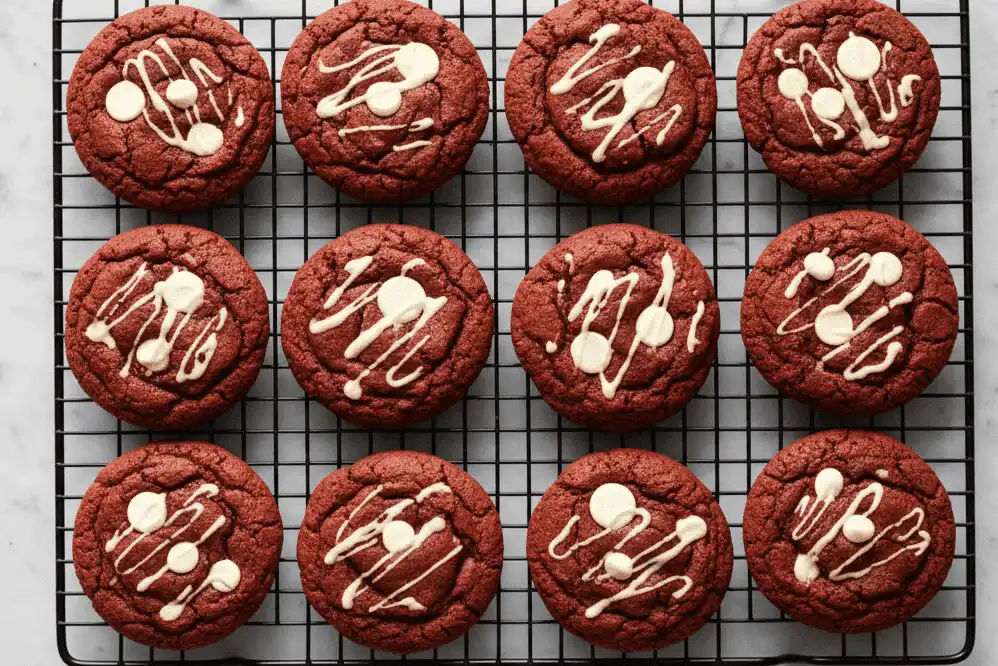
- Core Profile: Crinkle tops, chewy edges, rich cocoa-vanilla aroma.
Red velvet desserts carry a distinct reputation. They balance mild cocoa flavor with a subtle tang and an eye-catching ruby hue. Making traditional red velvet cookies from scratch requires Dutch-process cocoa powder, vinegar, buttermilk, red food dye, and precise leavening balances.
Boxed cake mix bypasses those labor-intensive steps without sacrificing texture or flavor. The dry mix provides pre-sifted cake flour, leavening agents, and flavor stabilizers in ideal proportions. By modifying the liquid ratios, you transform light cake batter into a dense, fudgy cookie dough.
This guide covers the underlying food science, ingredient variations, troubleshooting methods, and bakery-level techniques. Whether you are baking for Valentine’s Day, a holiday gathering, or an everyday treat, you will get consistent results every time.
The Food Science of Cake Mix Cookies
Standard cake batter relies on high hydration from water or milk to create a delicate crumb. The high liquid ratio activates gluten just enough while allowing leaveners to generate steam and lift during baking.
Cookie dough requires the opposite environment. By eliminating added water or milk and utilizing only fat and eggs, you limit starch gelatinization. This yields a chewy texture rather than a spongy crumb.
How Cake Flour Alters Cookie Texture
Boxed cake mixes use chlorinated, low-protein soft wheat flour. This flour holds sugar and fat in suspension far better than standard all-purpose flour.
Because the protein content is lower, gluten formation remains minimal. The finished cookies develop tender centers with a melt-in-your-mouth bite that traditional all-purpose cookie dough cannot match.
The Acidity and Color Retention
Traditional red velvet gets its color from an acidic reaction between natural cocoa powder and buttermilk. Modern cake mixes rely on concentrated red dye combined with small amounts of alkali-treated cocoa.
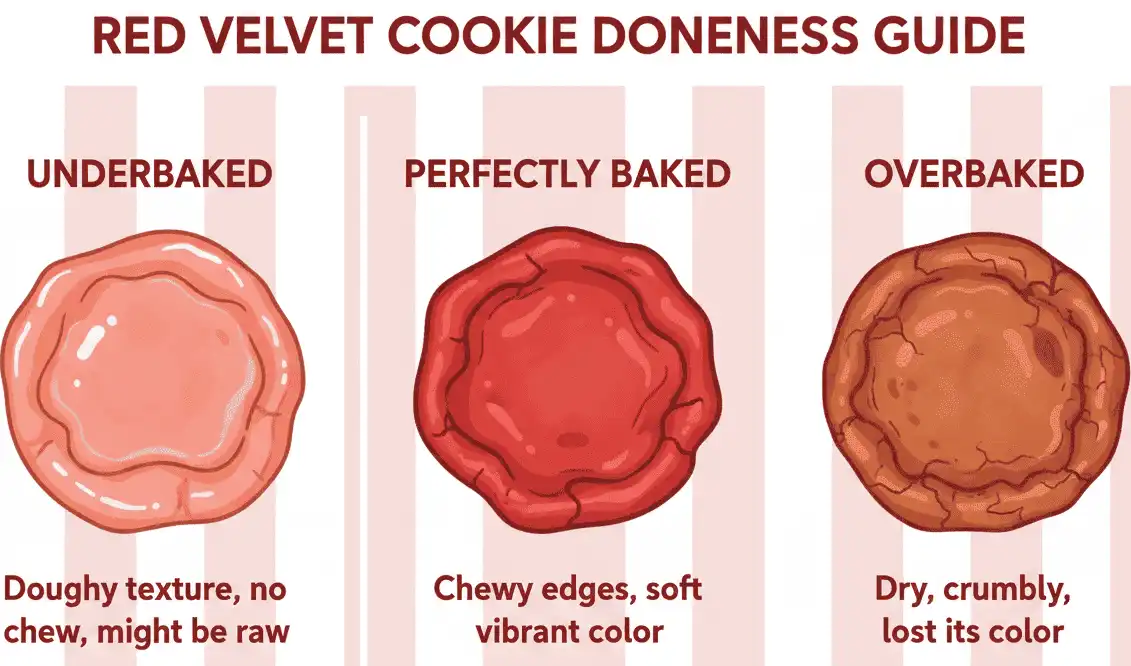
Overbaking destroys the vibrancy of this red pigment and creates an unappealing brownish-red crust. Controlling the oven temperature and removing the cookies while the center is slightly underdone preserves the bold red color.
Ingredient Breakdown & Smart Swaps
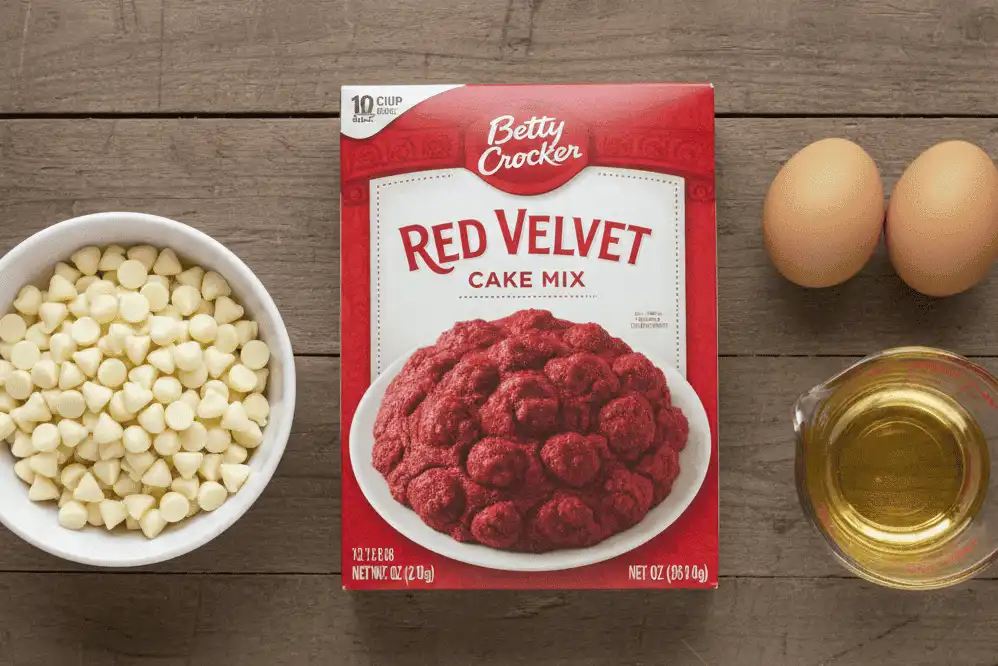
The standard recipe requires four basic pantry ingredients. Understanding what each ingredient contributes allows you to modify the dough to your preference.
1. Red Velvet Cake Mix (15.25 oz / 432g)
Major commercial brands like Betty Crocker, Duncan Hines, and Pillsbury work reliably. Duncan Hines yields a deeper red color and slight cocoa richness, while Betty Crocker produces a sweeter, lighter crumb.
2. Fat Source (1/2 Cup / 120ml)
Vegetable oil, canola oil, and melted unsalted butter are the primary options. Oil produces a softer, fudgier cookie that stays moist for several days. Melted butter yields crisper edges, richer flavor, and slightly more spread.
3. Large Eggs (2 Count, Room Temperature)
Eggs act as the primary binder and moisture source. The yolks add richness through lecithin, while the whites provide structure so the cookies hold their shape during baking.
4. Mix-Ins (1 Cup / 170g)
White chocolate chips are the classic choice because their sweet vanilla notes balance the mild cocoa flavor. You can also use semi-sweet chocolate chunks, dark chocolate chips, or crushed sandwich cookies.
The Box Size Dilemma (15.25 oz vs. Other Sizes)
Baking manufacturers periodically adjust standard package weights. Many older recipes were formulated for 18.25-ounce boxes, whereas modern boxes are usually 15.25 ounces, and some specialty brands sell 13.25-ounce boxes.
Using the wrong ingredient ratio can cause your cookies to turn out greasy or dry. Use this quick adjustment guide if your box size differs from the standard 15.25-ounce package:
- 18.25 oz Box: Use 1/2 cup oil + 2 large eggs + 1 tablespoon all-purpose flour.
- 15.25 oz Box (Standard): Use 1/2 cup oil + 2 large eggs (No adjustments needed).
- 13.25 oz Box: Reduce oil to 1/3 cup + 2 tablespoons, and use 2 large eggs.
Step-by-Step Baking Instructions
Step 1: Prep the Oven and Baking Sheets
Position your oven rack in the center position and preheat the oven to 350°F (177°C). Line two large baking sheets with unbleached parchment paper or silicone baking mats.
Why: Dark non-stick pans absorb heat faster, which can scorch the bottoms of the cookies before the centers cook through. Parchment paper ensures even heat distribution.
Step 2: Combine the Base Dough
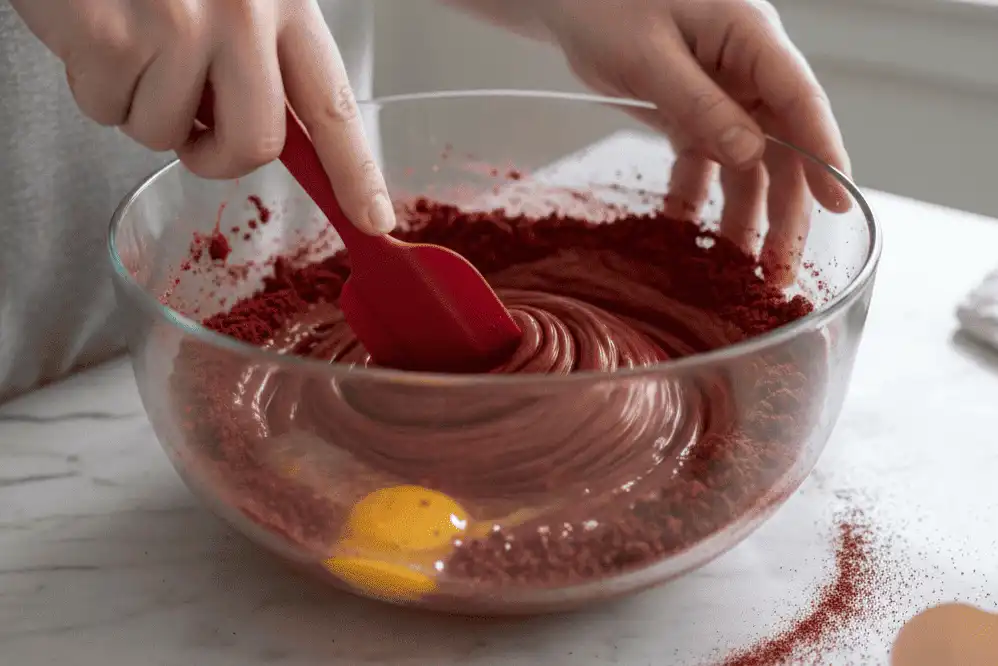
Pour the dry cake mix into a large mixing bowl. Whisk it briefly to break up any dense clumps of sugar or leavener. Add the 1/2 cup of oil and 2 large room-temperature eggs.
Stir with a sturdy spatula or wooden spoon until no dry flour streaks remain. The dough will feel thick, glossy, and slightly sticky.
Pro Tip: Avoid using an electric hand mixer on high speed. Beating introduces excess air, resulting in airy, cake-like cookies rather than dense, chewy ones.
Step 3: Fold in the Mix-Ins
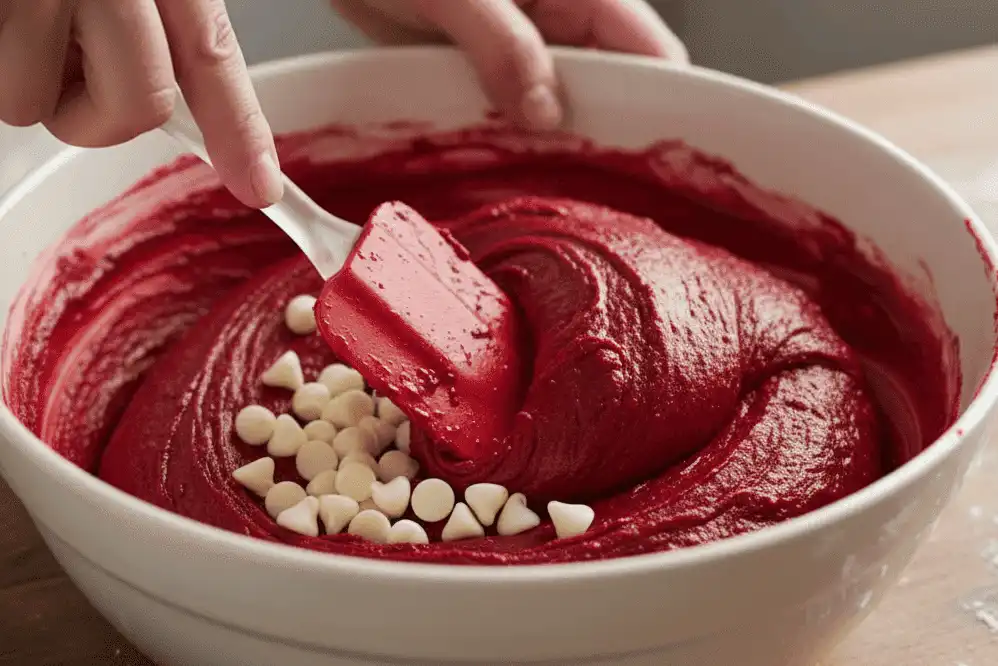
Add 1 cup of white chocolate chips or your chosen additions. Gently fold them into the dough until evenly distributed.
Step 4: Portion and Shape
Use a medium spring-loaded cookie scoop (size #40, approximately 1.5 tablespoons) to portion the dough. Place the dough mounds 2 inches apart on the prepared baking sheets.
For bakery-style aesthetics, press three or four extra white chocolate chips directly into the top of each dough ball before baking.
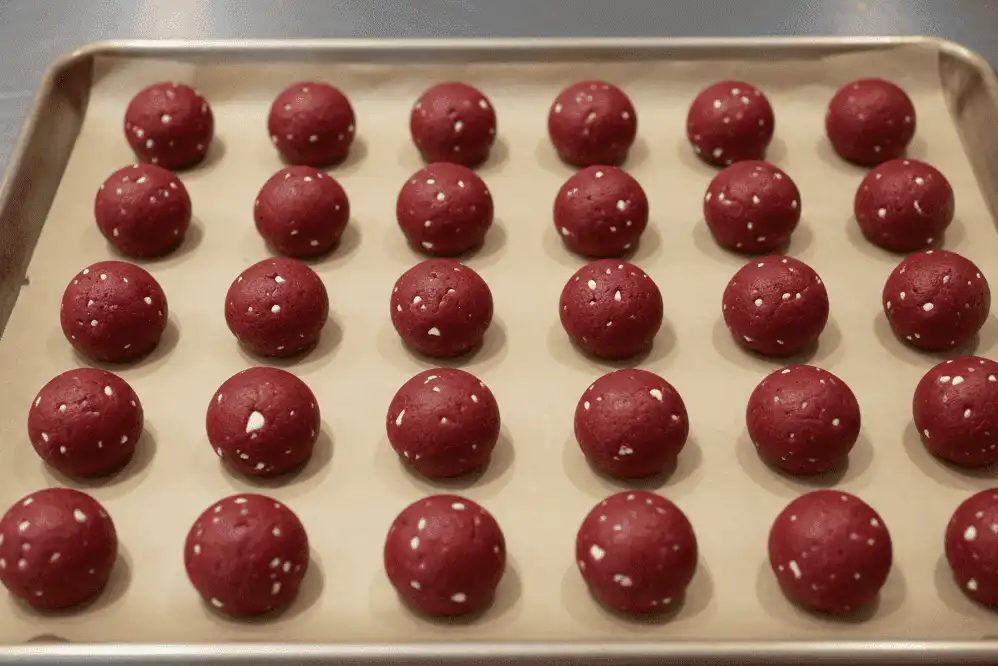
Step 5: Bake and Monitor
Bake one sheet at a time on the middle rack for 10 to 12 minutes. At the 10-minute mark, check the edges; they should look set and matte, while the center should still look slightly soft and underbaked.
Common Mistake: Waiting until the top turns brown will overbake the cookies. Overbaked cake mix cookies turn dry and crumbly once cooled.
Step 6: The “Cookie Swirl” and Cooling Process
Remove the baking sheet from the oven. If any cookies spread unevenly, immediately place a round cookie cutter or wide drinking glass over the warm cookie and swirl it in circular motions to form a round shape.
Let the cookies sit on the hot pan for 5 minutes. This allows carryover cooking to set the centers without drying out the edges. Transfer them to a wire rack to cool completely.
Comparison Table: Oil vs. Butter vs. Shortening
The fat you choose affects the spread, rise, chewiness, and flavor of the cookies. Use this comparison table to select the right fat for your target texture.
| Fat Type | Texture Profile | Spread Level | Flavor Impact | Shelf Life |
|---|---|---|---|---|
| Vegetable/Canola Oil | Soft, fudgy, chewy center | Moderate | Neutral; highlights cocoa | 5–6 Days (Stays moist) |
| Melted Butter | Crisp edges, slightly denser | High | Rich, buttery finish | 3–4 Days |
| Softened Cream Cheese (4 oz) + Butter (1/4 cup) | Melt-in-your-mouth, cakey-chew hybrid | Low (Thicker cookies) | Tangy authentic red velvet note | 3 Days (Requires refrigeration) |
| Vegetable Shortening | Puffy, soft, light crumb | Very Low | Neutral | 4–5 Days |
Popular Flavor Variations & Mix-Ins
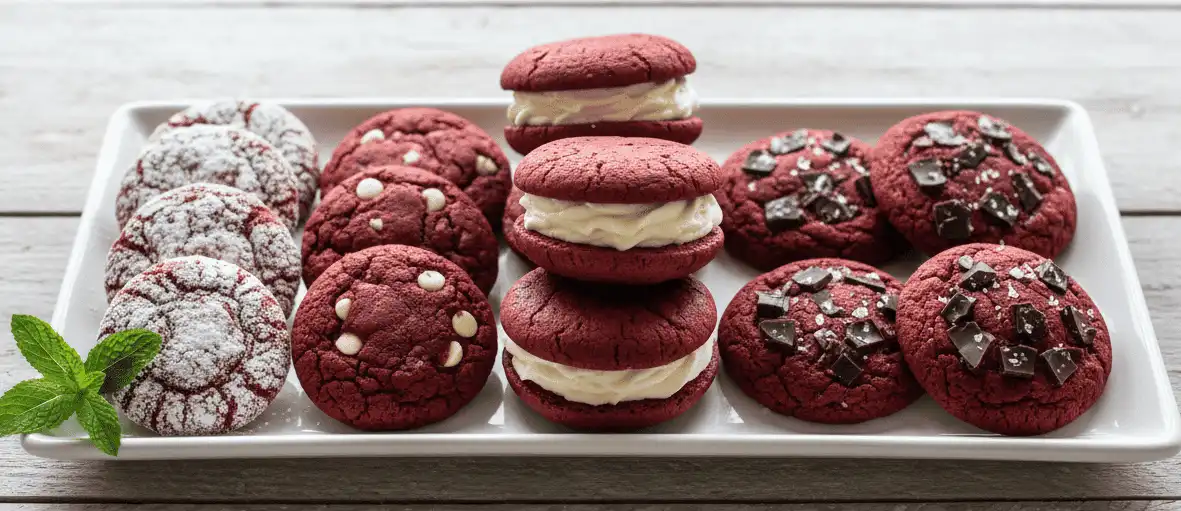
Once you master the base formula, you can customize these cookies for holidays, parties, and seasonal gifts.
1. Red Velvet Crinkle Cookies
Skip the white chocolate chips. Scoop the dough into balls and roll each ball generously in a small bowl of powdered sugar until coated. As the cookies expand in the oven, the white sugar cracks apart, revealing the deep red color underneath.
2. Cream Cheese Stuffed “Cheesecake Bombs”
Beat 4 ounces of brick-style cream cheese with 2 tablespoons of powdered sugar and 1/2 teaspoon of vanilla extract. Freeze teaspoon-sized dollops on a parchment-lined plate for 30 minutes.
Flatten each ball of red velvet dough in your palm, place a frozen cream cheese dollop in the center, and fold the dough around it to seal completely. Bake for 11 to 13 minutes.
3. Whoopie Pie Style Sandwich Cookies
Bake the cookies slightly smaller using a 1-tablespoon scoop. Once cooled, pipe classic cream cheese frosting onto the flat side of one cookie and press a second cookie on top.
4. Dark Chocolate & Sea Salt
Replace the white chocolate chips with 60% dark chocolate chunks. As soon as the cookies come out of the oven, sprinkle the tops with coarse Maldon flaky sea salt. The salt balances the sweet boxed mix.
Expert Tips & Pro Techniques
Professional bakers use subtle adjustments to transform standard box-mix recipes into bakery-grade treats.
Chill the Dough for 20 Minutes
While chilling is not strictly mandatory, placing the mixed dough in the refrigerator for 20 minutes solidifies the fat. This reduces spreading and creates a thicker, chewier cookie with a craggy surface.
Use Room Temperature Eggs
Cold eggs straight from the refrigerator can cause melted butter or oil to separate unevenly. Warm your eggs by placing them in a bowl of warm water for 5 minutes before cracking.
Add a Dash of Pure Vanilla and Espresso Powder
Commercial cake mixes rely heavily on artificial flavoring. Adding 1 teaspoon of pure vanilla extract and 1/4 teaspoon of instant espresso powder enhances the cocoa depth without making the cookies taste like coffee.
High-Altitude Adjustments (Above 3,000 Feet)
Lower air pressure causes baked goods to rise faster and dry out. At high altitudes, add 2 tablespoons of all-purpose flour to the dry mix, add 1 tablespoon of water, and reduce the bake time by 1 to 2 minutes.
Common Mistakes & How to Fix Them
If your cookies did not turn out as expected, one of these common preparation issues may be the cause.
Problem 1: Cookies Spread Too Thin and Turned Greasy
Cause: The butter was piping hot when added, or the baking sheets were warm from a previous batch.
Solution: Let melted butter cool to room temperature before mixing. Never scoop cookie dough onto a hot baking sheet; let the sheet cool completely between batches.
Problem 2: Cookies Are Cakey and Dry
Cause: You added water or milk according to the cake box instructions, or you baked them too long.
Solution: Only add the oil and eggs listed in this cookie recipe. Disregard all liquid instructions printed on the commercial cake box. Pull the cookies from the oven when the centers still look slightly moist.
Problem 3: Dough Is Too Sticky to Handle
Cause: Warm kitchen ambient temperature or high humidity.
Solution: Do not add extra flour, which ruins the chewiness. Lightly grease your cookie scoop with non-stick spray or chill the dough in the refrigerator for 30 minutes before portioning.
Dietary Adaptations (Vegan & Gluten-Free)
You can adapt this recipe for specific dietary needs while keeping the same texture.
Vegan & Dairy-Free Adaptations
Most commercial red velvet box mixes (such as Duncan Hines) are naturally dairy-free, but always verify the ingredient label. Replace the 2 eggs with either 1/2 cup of unsweetened applesauce or 1/3 cup of aquafaba (whipped chickpea liquid). Use dairy-free vegan white chocolate chips.
Gluten-Free Version
Use a 15-ounce box of certified gluten-free red velvet cake mix (such as King Arthur or Simple Mills). Gluten-free starches absorb moisture quickly, so let the dough rest for 10 minutes before scooping to allow complete hydration.
Recommended Baking Tools
Having the right tools makes the baking process faster and improves your results.
- Light-Colored Aluminum Sheet Pans: Reflect heat evenly and prevent dark, scorched bottoms.
- Parchment Paper Sheets: Pre-cut sheets prevent sticking and eliminate the need for cooking spray.
- Size #40 Cookie Scoop: Ensures uniform cookie sizes so the entire batch bakes at the same rate.
- Wire Cooling Rack: Circulates air under the cookies to keep the bottoms crisp rather than soggy from trapped steam.
Storage, Freezing, and Make-Ahead Instructions
Proper storage prevents your cookies from drying out and preserves their soft texture.
Room Temperature Storage
Store fully cooled cookies in an airtight container at room temperature for up to 5 days. Place a single slice of plain white bread in the container; the cookies will absorb moisture from the bread and remain soft.
Freezing Baked Cookies
Layer cooled cookies between sheets of parchment paper inside an airtight container or zip-top freezer bag. Freeze for up to 3 months. Thaw at room temperature for 15 minutes before serving.
Freezing Unbaked Cookie Dough Balls
Scoop the dough onto a parchment-lined tray and freeze for 1 hour until solid. Transfer the frozen dough balls into a freezer-safe bag. When ready to bake, place the frozen dough balls on a lined baking sheet and bake at 350°F (177°C) for 12 to 14 minutes (add 2 minutes to the standard bake time).
Related Recipes to Try Next
Looking for more easy dessert ideas? Explore these related baking guides:
- Authentic Cream Cheese Frosting from Scratch
- Easy 3-Ingredient Funfetti Cake Mix Cookies
- Classic Holiday Chocolate Crinkle Cookies
- Bright & Tangy Lemon Cake Mix Cookies
- Fudgy Red Velvet Brownies with White Chocolate Drizzle
Culinary & Safety References
For more baking science and safe food handling information, refer to these industry resources:
- USDA Food Safety and Inspection Service: Guidelines on egg storage and safe internal baking temperatures.
- FDA Center for Food Safety: Standards on flour handling and unbaked dough safety.
- King Arthur Baking School: Food science principles regarding cake flour composition and fat emulsion.
Key Takeaways
- Ignore the Box Instructions: Only use the cake mix powder combined with 1/2 cup oil and 2 eggs. Never add water.
- Don’t Overbake: Take the cookies out at 10 to 12 minutes when the centers still appear soft to preserve their chewiness and red color.
- Let Them Rest on the Pan: Give the cookies 5 minutes on the warm baking sheet to finish setting up through carryover heat.
- Chill for Extra Thickness: A quick 20-minute chill prevents excessive spreading and keeps the cookies thick and bakery-like.
Red velvet cake mix cookies offer an easy way to enjoy bakery-style flavor in under 20 minutes. Grab a box of mix, preheat your oven, and prepare a batch for your next gathering or sweet craving.
Frequently Asked Questions
Why are my red velvet cake mix cookies flat?
Flat cookies usually result from placing dough on hot baking pans, using warm melted butter without chilling the dough, or using an undersized cake mix box. Chill your dough for 20 minutes before scooping, and make sure your baking sheets cool completely between batches.
Can I use butter instead of vegetable oil?
Yes, you can substitute an equal amount (1/2 cup) of melted unsalted butter for the vegetable oil. Butter adds a richer flavor and crisper edges, while oil creates a slightly softer, fudgier center that stays moist longer.
Do I need to chill red velvet cookie dough before baking?
Chilling is not strictly required, but it is recommended. Chilling the mixed dough for 20 to 30 minutes solidifies the fats, which prevents excessive spreading in the oven and yields thicker, chewier cookies.
How many cookies does one box of cake mix yield?
A standard 15.25-ounce box of cake mix yields approximately 20 to 24 medium-sized cookies when portioned with a standard #40 cookie scoop (about 1.5 tablespoons of dough per cookie).
Why did my red velvet cookies turn brown on top?
Red food dye is sensitive to high heat. Leaving cookies in the oven too long or baking them on the top rack causes the surface sugar to caramelize and scorch, turning the red color brown. Bake strictly on the center rack and remove the cookies at 10 to 12 minutes.
Can I make these cookies without eggs?
Yes. You can replace the 2 eggs with 1/2 cup of unsweetened applesauce, 1/2 cup of plain Greek yogurt, or 1/3 cup of aquafaba (canned chickpea liquid). The texture will be slightly softer but will bake successfully.
How long do red velvet cake mix cookies stay fresh?
When stored in an airtight container at room temperature, these cookies stay soft and fresh for up to 5 days. Adding a slice of plain white bread to the container helps retain optimal moisture.
Can I freeze red velvet cake mix cookie dough?
Yes. Portion the dough into balls and freeze them solid on a baking sheet for 1 hour, then transfer them to a freezer-safe zip-top bag for up to 3 months. Bake straight from frozen at 350°F (177°C) for 12 to 14 minutes.