To create a simple birthday cake drawing, start by sketching a horizontal oval for the top surface of the cake. Extend two straight vertical lines down from each edge of the oval, then connect them with a curved bottom line that mirrors the oval above.
Add a smaller cylinder stacked directly on top using the exact same method to create a second tier. Finish the drawing with vertical candle cylinders on top, teardrop flame shapes, scalloped frosting drips along the rims, and colored sprinkles across the cake body.
- Core Shape: Cylinders built from paired ellipses and parallel vertical lines.
- Key Detail: Always mirror the curve of the top ellipse at the base to maintain proper three-dimensional perspective.
- Finishing Touches: Contrast warm flame tones (yellow and orange) with vibrant frosting highlights.
Introduction
A birthday cake drawing is one of the most versatile illustration projects an artist can tackle. It serves as the centerpiece of handmade greeting cards, classroom celebration banners, and personalized sketchbook entries. Drawing food appeals across every age group because it combines simple geometry with expressive decorative choices.
This comprehensive guide covers everything needed to construct, ink, and render celebratory baked goods on paper. Whether you are an absolute beginner learning pencil control, an educator designing printables, or a parent assisting a child with a handmade gift, these instructions break down complex curves into clear steps.
You will learn the fundamental geometry behind three-dimensional tiers, methods for drawing dripped icing and lit candles, and coloring systems that make the final artwork pop off the page. Let us explore the materials and techniques required to master this celebratory subject.
Essential Drawing Supplies and Workspace Setup
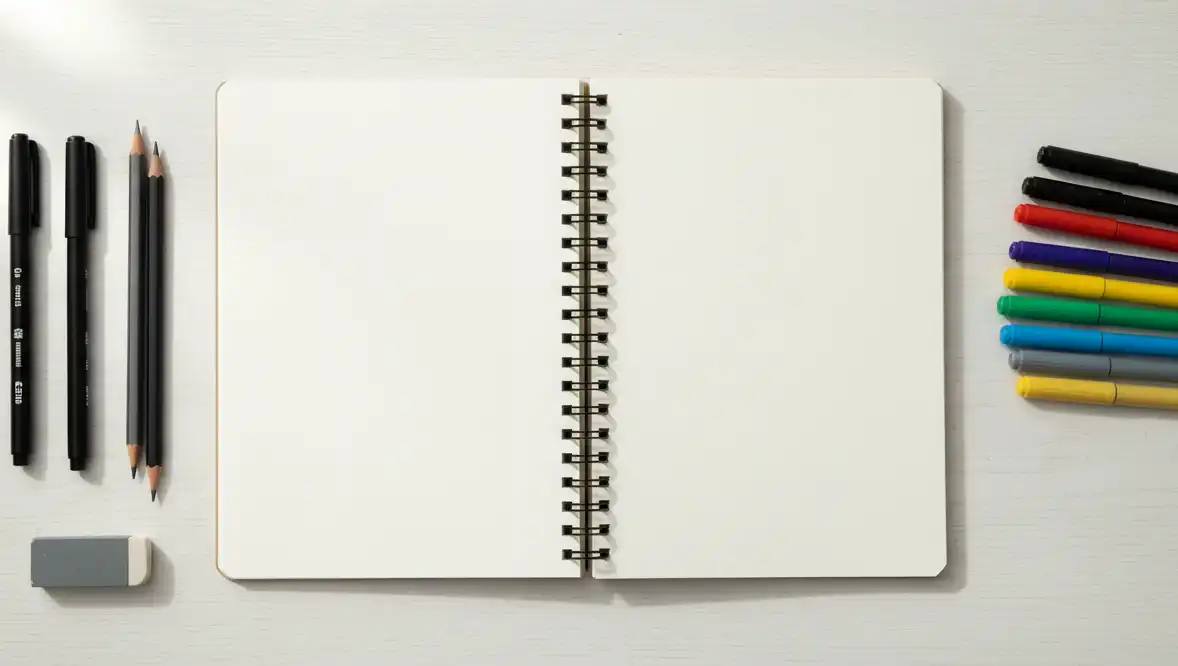
Creating clean artwork starts with selecting the right physical supplies for your skill level and chosen medium. While a standard office pen and printer paper work for rough practice, specialized materials yield dramatically better results.
Setting up your workspace properly reduces hand strain and prevents accidental graphite smudging during long drawing sessions. Keep your lighting source positioned opposite your drawing hand to eliminate harsh cast shadows over your paper.
Recommended Paper Types
Standard sketch paper with a weight between 70 lb (100 gsm) and 90 lb (160 gsm) is ideal for graphite, colored pencils, and light ink work. This thickness tolerates repeated eraser friction without tearing or thinning out the surface fibers.
If you plan to use alcohol-based markers or watercolor paint, select smooth Bristol board or 140 lb (300 gsm) cold-press watercolor paper. Heavyweight paper prevents ink bleed-through and eliminates paper warping when applying saturated liquid pigments.
Pencils and Erasers
Use a dual-pencil strategy to keep construction guidelines separate from final details. A hard graphite pencil such as a 2H or H creates faint layout lines that wipe away easily with light eraser pressure.
A softer pencil such as an HB or 2B delivers dark, rich contours for final detailing and cast shadows. Pair these with a kneaded eraser, which lifts graphite cleanly without leaving messy rubber crumbs across your work surface.
Inking and Outlining Pens
Fine-liner technical pens with archival pigment ink provide crisp, waterproof borders that will not dissolve under marker washes. A standard 0.5 mm nib works well for structural outlines, while a 0.1 mm nib handles small frosting textures and candle wicks.
Keep a white gel pen or opaque acrylic paint marker on your desk for final highlights. These tools allow you to restore clean white reflections on glossy icing surfaces after coloring is complete.
Geometric Foundations: Cylinders and Ellipses
Every cake drawing relies on one fundamental geometric form: the three-dimensional cylinder. Artists who struggle with lopsided cakes almost always run into trouble when translating flat circles into three-dimensional planes.
Understanding how viewing angles distort circular cake pans into ellipses gives your illustrations visual weight and realistic depth. Mastering this single mechanical exercise prevents flat, awkward drawings before you begin adding decorative icing.
Understanding the Ellipse
When viewed straight down from above, a round cake appears as a perfect circle. However, when viewed from a natural seated table angle, that circle compresses visually into an elongated oval known as an ellipse.
An ellipse must always remain symmetrical along both its horizontal major axis and vertical minor axis. The outer edges should curve smoothly like a capsule rather than coming to sharp, pointed corners like a football.
The Rule of Parallel Vertical Lines
The sides of standard round cakes drop straight down at precise ninety-degree angles from the widest points of the top ellipse. These vertical walls must remain strictly parallel to one another unless you are intentionally drawing a stylized novelty cake.
If your outer vertical lines tilt inward, the cake will look like a truncated cone rather than a traditional bakery tier. Use a standard clear ruler to check your vertical lines against the borders of your paper.
Matching the Curvature of the Base
The most common structural error beginners make is drawing a flat, straight line across the base of the cylinder. Because the bottom rim is also a circle resting in space, its bottom curve must mirror the curve of the top oval.
In fact, due to perspective distortion, the bottom curve should bend slightly deeper than the visible ellipse above it. Maintaining this curved bottom contour instantly makes your two-dimensional line art look spherical and solid.
Step-by-Step Guide: Classic Two-Tier Birthday Cake
This master tutorial walks you through creating a balanced, two-tier celebration cake complete with candles, dripped frosting, and a presentation platter. Follow each step sequentially, keeping your initial pencil marks light and easy to erase.
Step 1: Sketch the Top Ellipse for Tier One
What: Draw a flattened oval near the upper third of your drawing paper.
Why: This oval establishes the viewing perspective and serves as the upper surface of the top tier.
How: Sketch a faint horizontal crosshair with your 2H pencil to identify the center point. Glide your wrist in a continuous looping motion above the paper before lowering the lead to lay down a smooth, symmetrical ellipse.
Common Mistake: Drawing pointed corners at the left and right edges. Keep the turning points wide and round.
Pro Tip: Turn your paper upside down after sketching. Asymmetry and flat spots become instantly obvious to your eyes from this reversed orientation.
Step 2: Construct the Sides and Base of the Top Tier
What: Lower two vertical lines from the outer edges of the oval and connect them with a matching curved baseline.
Why: This step turns your flat oval into a three-dimensional cylinder with height and volume.
How: Drop a vertical line straight down from the far left edge of the ellipse, roughly two inches long. Repeat this exact distance on the far right edge, then connect both endpoints with a downward-sweeping arc that mirrors the front curve of the top oval.
Common Mistake: Drawing the connecting baseline flat, which ruins the cylinder’s illusion of depth.
Pro Tip: Measure the vertical lines using your pencil tip against your thumb to confirm both sides share identical heights.
Step 3: Establish the Wider Bottom Tier
What: Construct a second, larger cylinder directly underneath the first tier.
Why: A wider base tier provides structural stability and visual balance to the overall composition.
How: Extend your top tier’s curved base line outward on both sides by roughly one inch to establish the shelf of the bottom tier. Drop two vertical lines down from these outer points, then connect them with another deep downward curve that sits parallel to the lines above.
Common Mistake: Making the lower tier too narrow, which makes the structure appear top-heavy and ready to tumble.
Pro Tip: Keep the exposed shelf area equal on both sides so the upper tier looks centered.
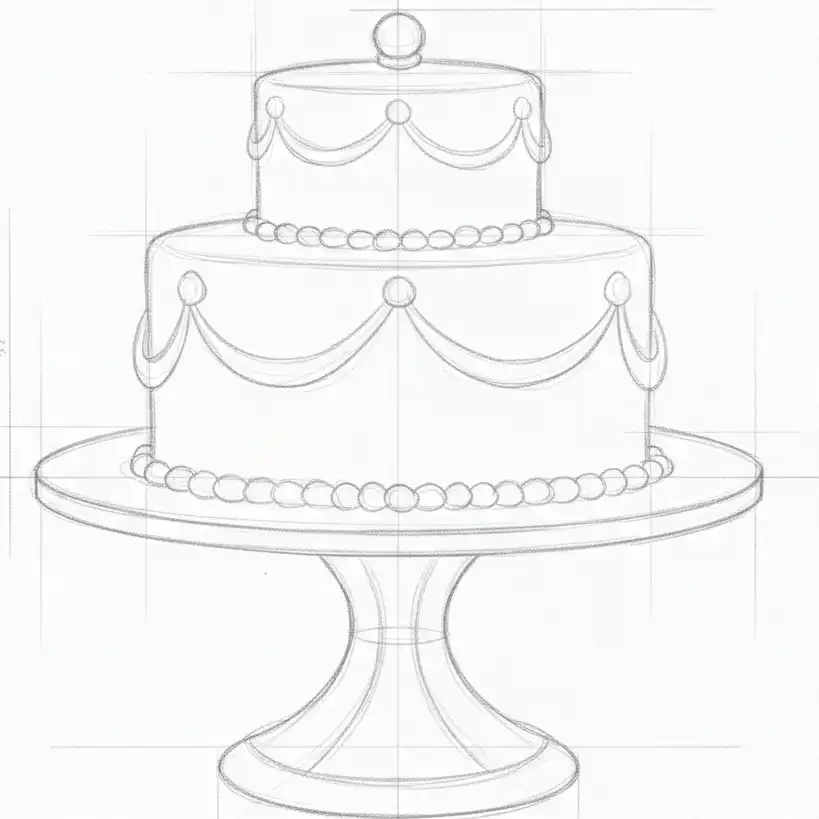
Step 4: Draw the Cake Stand or Serving Platter
What: Add a display plate beneath the base tier to ground the illustration in space.
Why: An ungrounded cake looks like it is floating in midair. A plate gives the drawing a finished, anchored look.
How: Sketch a wide, thin rim around the bottom baseline of the second tier, extending half an inch past the cake walls. Draw a small decorative pedestal underneath the plate with two curving lines that flare outward toward the table surface.
Common Mistake: Making the platter narrower than the bottom tier of the cake.
Pro Tip: Add a secondary parallel curve right beneath the plate edge to show plate thickness and rim depth.
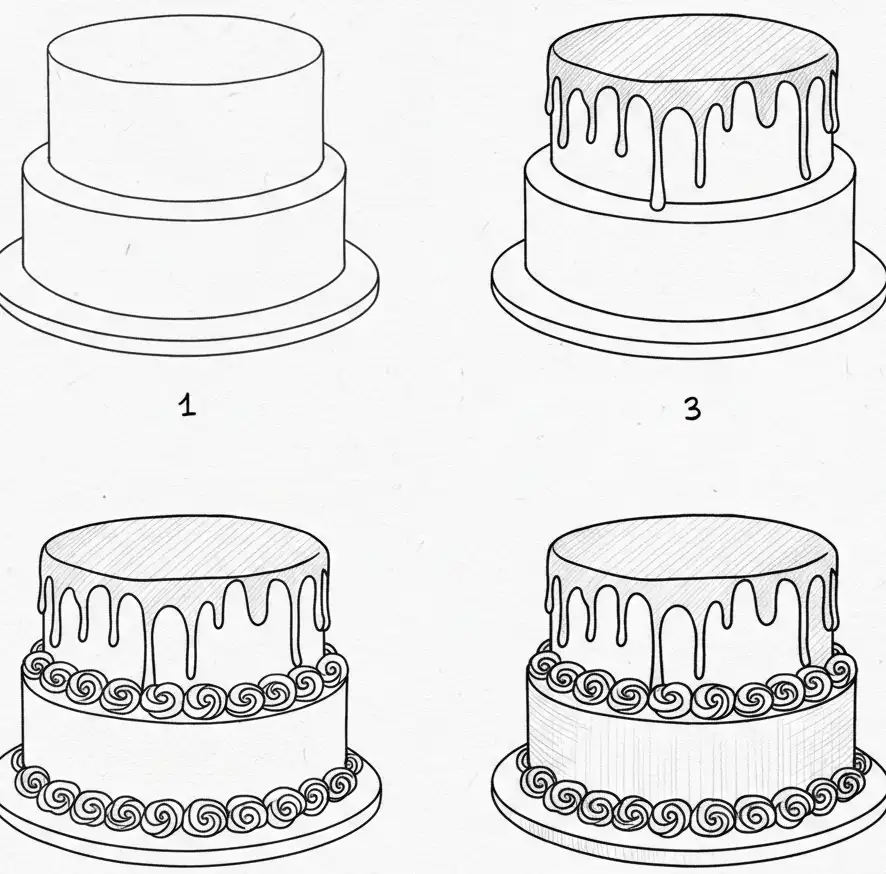
Step 5: Illustrate Drips, Frosting Layers, and Borders
What: Add organic curves along the tier rims to represent delicious poured ganache and piped butter cream.
Why: Bakery items feature soft, organic shapes that contrast nicely with rigid geometric cylinder guides.
How: Draw undulating, U-shaped wavy lines draping down from the top edge of each tier. Vary the lengths of these drips—make some long, some short, and some wide—to mimic viscous liquid chocolate pooling naturally over edges.
Common Mistake: Making every drip identical in width and length, which produces a monotonous, artificial look.
Pro Tip: Add tiny detached droplet circles underneath the longest drips to imply active movement.
Step 6: Add Birthday Candles and Glowing Flames
What: Position celebration candles across the upper surface of the top tier.
Why: Candles transform a generic cake drawing into a recognizable birthday celebration scene.
How: Draw narrow vertical rectangles standing straight up from the top surface oval. Place a short curved wick at the top of each cylinder, then enclose it in a teardrop flame shape with a rounded base and pointed apex.
Common Mistake: Placing the base of the candles on the back rim instead of resting them on the flat top plane.
Pro Tip: Draw spiral stripes wrapping around the candles using tilted diagonal lines that follow the cylinder’s curvature.
Step 7: Inking, Clean Up, and Sprinkles
What: Finalize structural lines with ink, erase construction marks, and scatter small decorative toppings.
Why: Clean ink lines prepare the artwork for vibrant coloring and remove distracting setup marks.
How: Trace over permanent contours using an archival 0.5 mm technical pen. Once the ink dries completely, erase internal overlap lines with a kneaded eraser, then draw short cylindrical sprinkles and round sugar pearls across the tiers.
Common Mistake: Erasing pencil guidelines immediately, which smears wet drawing ink across the paper.
Pro Tip: Let your ink dry for a full five minutes before touching the surface with any eraser.
Popular Cake Drawing Styles and Variations
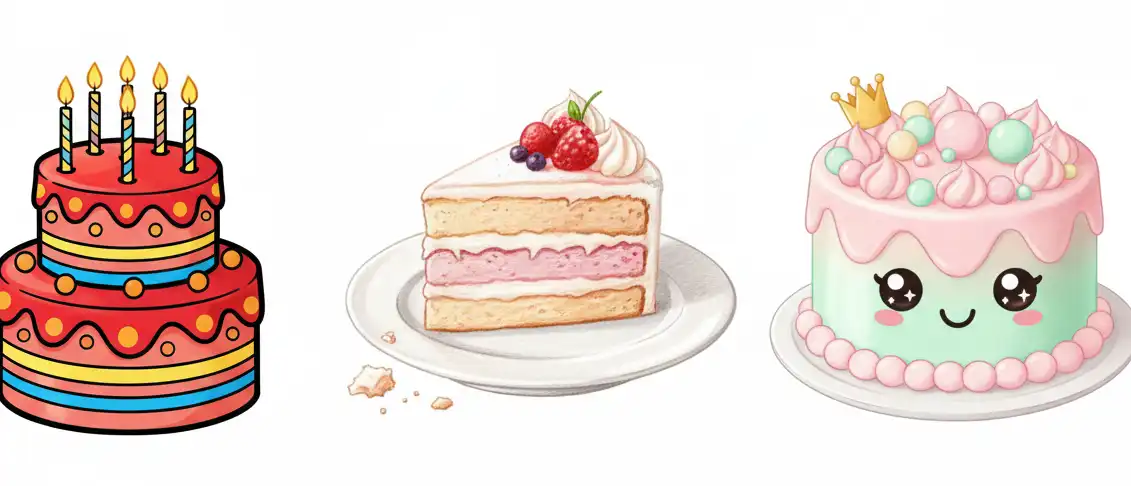
Once you understand the basic two-tier structure, you can adapt the concept into several popular artistic styles. Different projects call for different aesthetics, ranging from cheerful storybook characters to precise realism.
Experimenting with different styles builds your line confidence and expands your design versatility. Here are three widely used approaches to birthday cake illustration.
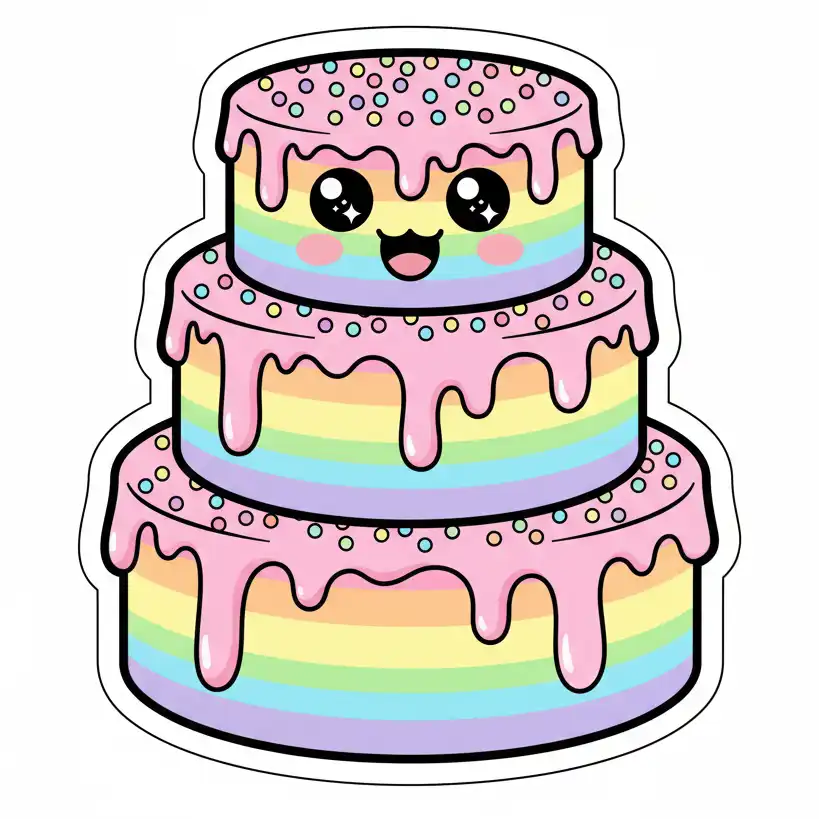
Cute Kawaii Birthday Cake
The Japanese kawaii aesthetic emphasizes playful proportions, extreme simplicity, and friendly emotional expressions. Kawaii cakes typically use a single stocky tier with exaggerated frosting flourishes and oversized features.
Place two wide-set black circles in the lower middle section of the cake body to serve as eyes. Add tiny white circular reflections inside each eye, a small curving “U” shape for a smiling mouth, and soft pink ovals directly underneath for rosy cheeks.
Realistic Slice of Cake
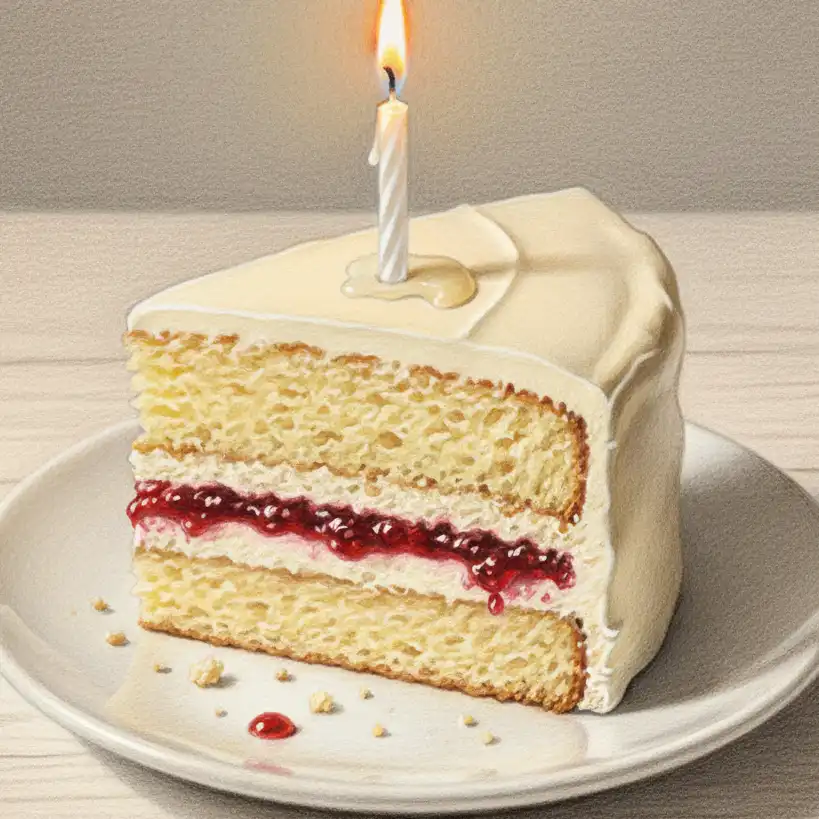
Drawing a single cut slice provides a look at internal crumb textures, fruit compote layers, and filling tiers. This approach relies on triangular wedge geometry rather than round cylinders.
Begin with a sharp triangle pointing toward the background, then pull vertical lines down from each corner to reveal the internal structure. Use a stiff, stippled pencil pattern on the exposed inner planes to capture the porous, spongy look of baked sponge cake.
Whimsical Tilted Storybook Cake
Whimsical fantasy illustrations ditch rigid parallel lines in favor of playful curves, reminiscent of classic animated fairytales. Each tier leans in an alternating direction, giving the confection an energetic, dancing quality.
To draw this successfully, tilt the center axis of each tier roughly ten to fifteen degrees away from vertical. Keep the connecting baselines curved so the leaning tiers look flexible and playful rather than broken.
Coloring, Shading, and Texture Techniques
Color application turns flat line art into a mouthwatering visual piece. Approaching your colors with an organized layering strategy prevents muddy blends and creates convincing three-dimensional volume.
By establishing a clear light direction early on, you can consistently place highlights, midtones, and core cast shadows across every tier and decorative garnish.
Establishing a Unified Light Source
Choose an imaginary light position before picking up your coloring supplies, such as an upper-left spotlight. Every surface facing toward that light will receive your lightest tints and bare white highlights.
Surfaces facing away from the light source, typically the lower-right contours, require deeper shadow values. Consistent light placement ties the separate tiers, candles, and platter together into a single believable scene.
Rendering Candle Glow
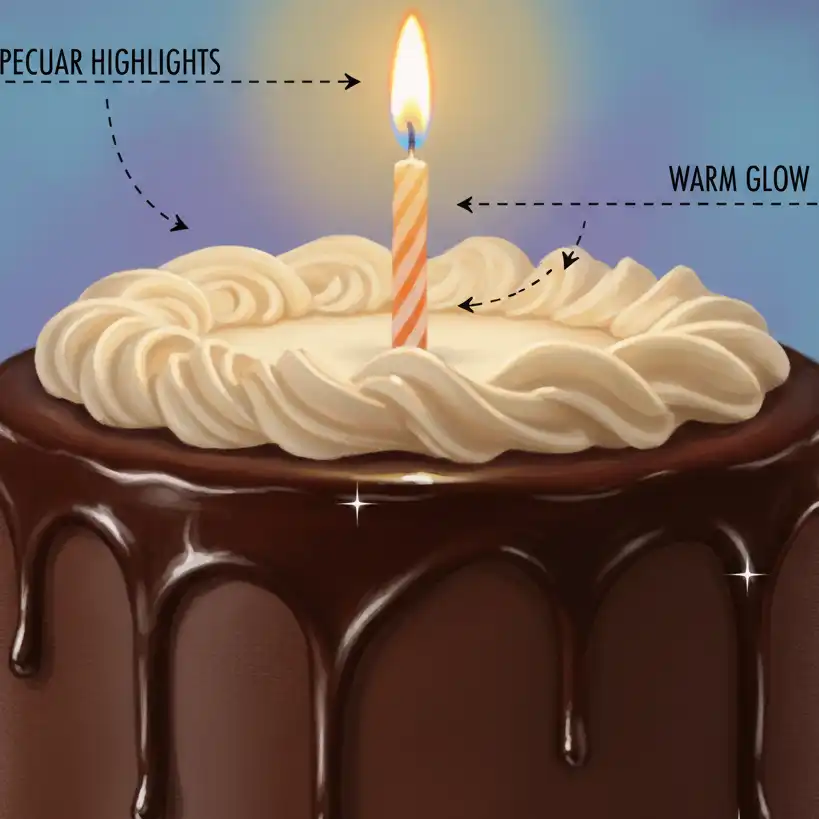
Candle flames produce an active secondary light source right on top of your cake. Color the flame interior with brilliant pale yellow, transitioning outward to rich orange and warm red along the edges.
Leave a tiny halo of untouched white paper immediately around the flame shape. Lay down a faint wash of yellow over the adjacent frosting surface to simulate warm candlelight bouncing off smooth butter cream.
Creating Glossy Glazes and Dripping Ganache
Glossy surfaces like melted chocolate, berry glaze, and royal icing reflect direct light with hard, sharp highlights. Matte surfaces like plain cake sponge diffuse light softly without sharp glints.
To render a glossy drip, leave thin slivers of pure white paper along the shoulder curve of each droplet. Place your darkest brown or dark red tone directly beneath that white glint to maximize visual contrast.
Drawing Styles Comparison Matrix
Review the breakdown below to select the best drawing approach for your available time, target skill level, and intended project format.
| Drawing Style | Recommended Audience | Difficulty Level | Best Medium | Average Time |
|---|---|---|---|---|
| Minimalist Cartoon | Kids, Quick Cards, Bullet Journals | Beginner | Felt-tip Pens & Crayons | 5–10 Minutes |
| Kawaii Character | Students, Sticker Crafters, Beginners | Easy | Water-based Markers | 10–15 Minutes |
| Classic Two-Tier | Art Students, DIY Invitations | Intermediate | Colored Pencils & Fine Liners | 20–30 Minutes |
| Detailed Cake Slice | Experienced Sketchers, Food Illustrators | Advanced | Alcohol Markers & Soft Pastels | 35–50 Minutes |
| 3D Realistic Cake | Advanced Artists, Portfolio Builders | Master | Layered Colored Pencil or Gouache | 60+ Minutes |
Professional Tips for Advanced Artists
Elevating a cake illustration from a basic cartoon to a gallery-ready piece comes down to subtle surface details. Professional illustrators rely on specialized rendering tricks to make baked goods look tactile and mouthwatering.
Implement these technical adjustments when you feel comfortable with basic perspective and want to bring higher polish to your sketchbook work.
Reflected Ground Light
A white cake platter or table surface bounces light back up onto the underside of your bottom tier. Instead of running a pure black shadow along the bottom rim, tint it with a muted version of the tabletop’s color.
This subtle bounce light prevents your cake from looking like a flat sticker pasted onto a background. It establishes genuine environmental interaction between the cake and the room around it.
Stippling for Crumb Consistency
Smooth frosting creates a stark contrast against textured cake interiors. Use a fine 0.1 mm pen to layer varied stipple dots along any exposed cake sponge or cracked surface lines.
Cluster your stippling dots tightly in shadowed recesses, spreading them out as the plane reaches highlighted surfaces. This tonal variation instantly communicates the porous nature of baked flour and sugar.
Dynamic Candle Configurations
Uniform rows of straight candles can make an illustration look stiff and mechanical. Stagger your candle heights slightly, tilting some at gentle two-degree angles as if hand-placed by an excited baker.
Vary the size and lean of the teardrop flames to suggest gentle air currents moving through the room. A slight, consistent tilt across all candle flames gives the scene a sense of life and ambient motion.
Common Mistakes and How to Avoid Them
Drawing errors on cylinder-based subjects usually trace back to rushed early construction lines. Identifying these common pitfalls lets you catch and fix perspective issues before laying down permanent ink.
1. Pointed “Football” Ellipses
Why it happens: Artists often focus on the front and rear curves of an oval while neglecting the outer sides, pinching the corners together into sharp points.
How to avoid it: Keep your hand and wrist loose while sketching. Imagine fitting the ellipse inside a rounded rectangle, ensuring the extreme left and right borders form continuous, sweeping curves.
2. The Straight Baseline Blunder
Why it happens: The brain instinctively assumes the flat base of a cake pan should be represented by a flat, horizontal line across the paper.
How to avoid it: Always remind yourself that the bottom rim of a cylinder curves through space just like the top rim. Consciously mirror the curve of the top oval along every horizontal tier edge below it.
3. Floating Decorations
Why it happens: Adding sprinkles, candies, and candles without considering the surface curvature causes decorations to look like they are hovering in midair.
How to avoid it: Lightly sketch faint curved contour lines across the top surface of the cake. Align all decorative elements along these curved planes to maintain accurate perspective.
4. Muddy Marker Overlaps
Why it happens: Coloring over water-soluble fineliner pens dissolves the ink lines, dragging dark grey pigment across bright pastel frosting.
How to avoid it: Check your pen packaging to ensure your inking pens use waterproof, alcohol-resistant pigment ink. Alternatively, complete all marker coloring first, then ink your final line art directly on top.
Best Practices for Teaching Kids and Classrooms
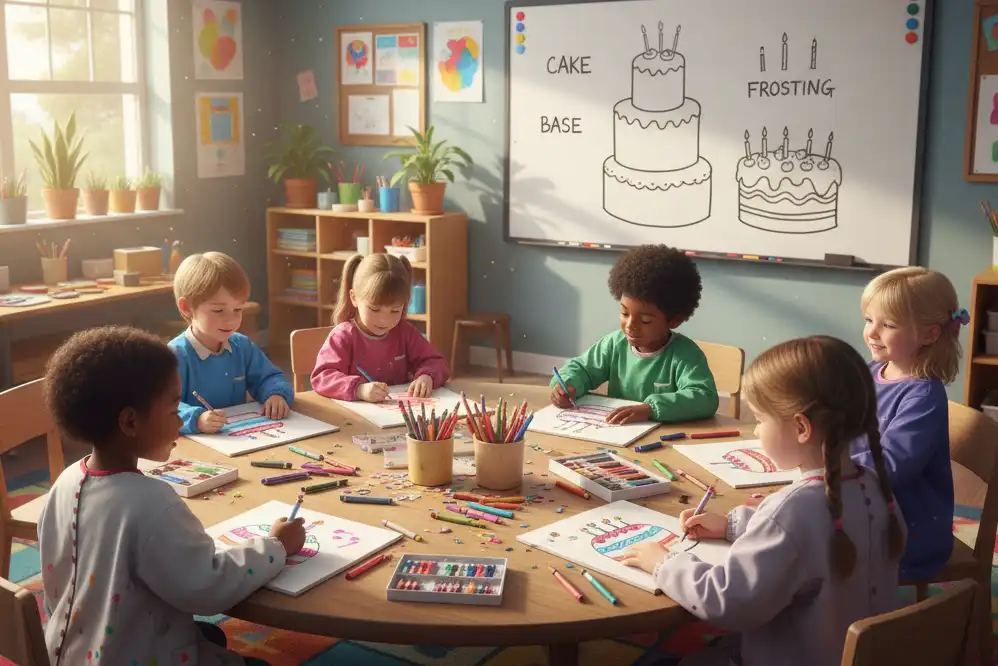
Teaching drawing to young students requires breaking complex spatial ideas down into familiar shapes. Children thrive when technical terms like “ellipses” and “parallel lines” are translated into approachable visual games.
Use these classroom-tested strategies to keep drawing exercises fun, engaging, and frustration-free for young artists.
The “Squashed Circle” Method
Instead of introducing the geometric concept of an ellipse, ask students to draw a “squashed pancake” or “flat dinner plate” near the top of their page. This visual analogy helps children naturally round off the side corners without overthinking the geometry.
Have them trace their index finger through the air in an oval motion before touching pencil to paper. This physical warm-up builds muscle memory for smooth, fluid curves.
Building with Standard Shapes
Encourage children to spot the simple shapes hidden inside a complex celebration cake. A two-tier cake is simply two soup cans stacked together, while candles are straight drinking straws topped with tiny raindrops.
Breaking down a complex subject into familiar household objects removes performance anxiety. Students feel confident building a project out of shapes they already know how to draw.
Customization and Creative Freedom
Once students establish the core cake structure, let them take the lead on toppings, themes, and colors. Children love choosing between dripping chocolate, rainbow sprinkles, fresh strawberries, or themed candle toppers.
Providing open-ended decorative choices keeps students invested in their work. It ensures every child leaves the art session with a distinct, personal illustration they are proud to share.
Recommended Tools and Learning Resources
The right tools make technical drawing more approachable, especially when you are practicing precise symmetry and clean outlines. These reliable supplies provide consistent, predictable results for artists at all levels.
Physical Drafting Tools
- Helix Circle and Ellipse Template: A sturdy plastic stencil that helps you draw clean, consistent ellipses across different sizes without struggling with hand wobble.
- Sakura Pigma Micron Pen Set: Industry-standard pigment fineliners that do not smear under alcohol markers or watercolor washes.
- Strathmore 300 Series Bristol Board: Smooth-finish heavyweight paper that supports fine ink work, clean pencil erasing, and vibrant marker blending.
- Tombow Mono Zero Precision Eraser: A micro-tip mechanical eraser that lets you clean up tiny graphite details around candle wicks without wiping away surrounding linework.
Digital Drawing Resources
- Procreate (iPad): A flexible digital illustration app with built-in QuickShape tools that snap hand-drawn ovals into perfect geometric ellipses instantly.
- Autodesk SketchBook (Desktop/Mobile): An accessible digital art platform featuring symmetry guides, stroke smoothing, and adjustable perspective rulers.
Related Drawing Project Ideas
Pairing your birthday cake drawing with complementary party elements creates complete celebratory scenes for greeting cards and poster designs. Consider exploring these related drawing guides to expand your illustration skills:
- How to Draw Realistic Party Balloons: Master light reflections, translucent rubber surfaces, and tied ribbon physics.
- Step-by-Step Gift Box Illustration: Learn two-point perspective to draw cubes, satin bows, and patterned wrapping paper.
- Party Hat Drawing Tutorial: Explore cone geometry, zigzag party patterns, and fluffy paper pom-poms.
- Drawing Birthday Confetti and Streamers: Bring motion, dynamic twisting ribbons, and festive depth to your backgrounds.
- Cupcake Illustration for Beginners: Practice drawing corrugated paper liners, swirled soft-serve frosting, and cherry toppers.
- Hand-Lettering “Happy Birthday”: Pair your illustrations with decorative banner calligraphy, block letters, and serif fonts.
- Cute Cartoon Animals with Party Hats: Combine basic character sketching with celebratory accessories for handmade cards.
- Drawing Bakery Pastries: Expand into croissants, fruit tarts, and glazed donuts using similar circular perspective techniques.
Recommended External Resources
Deepen your grasp of observational drawing, perspective mechanics, and color theory through these established educational art resources:
- National Art Education Association (NAEA): Offers curriculum guidelines, developmental art milestones for children, and teaching strategies for fine motor control.
- Drawabox Free Fundamentals: A structured, self-paced drawing course covering the mechanical rules of three-dimensional cylinders, vanishing points, and structural linework.
- The Metropolitan Museum of Art Open Access: Study centuries of still-life paintings to see how master artists handle light reflections, table surfaces, and food textures.
Key Takeaways
Drawing an eye-catching birthday cake comes down to mastering a few structural shapes and finishing with thoughtful decorative details. Keep these fundamental principles in mind as you begin your next piece:
- Anchor with Ellipses: Smooth, symmetrical ovals form the top surfaces of your cake tiers. Avoid sharp, pinched outer edges.
- Maintain Parallel Walls: Keep the vertical sides of each tier dropping straight down at ninety-degree angles to keep the cake stable.
- Curve Every Baseline: Always mirror the curve of the top oval at the bottom of each tier to sell the three-dimensional illusion.
- Vary Organic Drips: Create natural, mouthwatering frosting by drawing drips in alternating lengths, widths, and spacings.
- Leave Crisp Highlights: Preserve pure white highlights along glossy icing ridges and around glowing candle flames to maximize contrast.
Final Thoughts
Learning how to draw a birthday cake equips you with timeless creative skills for cards, family gifts, and personal sketchbooks. The basic cylinder techniques you practiced here apply directly to drawing coffee mugs, flower vases, and countless other everyday objects.
Grab your favorite pencil, lay down your first top ellipse, and see where your creative choices take you. Add your favorite frosting colors, experiment with fun candle designs, and enjoy bringing your unique celebratory cake to life on the page.
Frequently Asked Questions
What is the easiest way to draw a birthday cake for a complete beginner?
The easiest method starts with basic shapes. Draw a flat horizontal oval for the top plane. Add two short vertical lines dropping down from the sides, then connect them with a curved bottom line that mirrors the oval. Top it with a simple vertical rectangle candle, a teardrop flame, and scalloped wavy lines for frosting.
Why does my birthday cake drawing look flat instead of 3D?
A cake drawing usually looks flat because the baseline is drawn straight across instead of curved. Since a cake is round, the bottom line must curve downward to match the curve of the top oval. Additionally, adding cast shadows along one side and curved frosting lines helps establish genuine three-dimensional depth.
How do you make drawn frosting drips look natural?
To draw natural frosting drips, vary both their length and width across the rim of the cake tier. Avoid drawing uniform, repetitive waves. Make some drips pool into wide U-shapes, extend others further down the side, and leave tiny isolated droplet dots underneath the longest drips to suggest viscous liquid movement.
What pencils are best for sketching cake guidelines?
A hard graphite pencil like a 2H or H is best for sketching initial guidelines. These pencils lay down faint, erasable lines that do not indent your paper or smear when you ink over them. Switch to a softer HB or 2B pencil later for finalizing rich borders, details, and dark shadows.
How can kids draw symmetric cake tiers without using a ruler?
Kids can maintain symmetry by drawing a light vertical center line down the middle of their paper first. By measuring equal finger-widths outward to the left and right of that center line, they can place balanced corner dots. Connecting those dots ensures both sides of the cake tier remain evenly sized.
How do I draw a realistic candle flame on a cake?
Begin with a faint teardrop contour around a short, dark wick line. Color the center of the flame with pale yellow or leave it white for the hottest part of the fire. Blend outward into bright orange and warm red at the outer tip, leaving a thin uncolored halo around the flame.
Can I use this tutorial for digital drawing apps like Procreate?
Yes, these step-by-step techniques translate directly to digital illustration apps like Procreate or Photoshop. Digital artists can take advantage of QuickShape features to snap perfect ellipses and use separate layers for structural sketches, line art, color flats, and glowing flame lighting effects.
What colors work best for birthday cake drawings?
Classic birthday cakes look best with high-contrast color pairings. Use pastel tones like soft pink, mint green, or sky blue for the butter cream to keep the design light. Pair these with deep chocolate brown or strawberry red for ganache drips, and bright yellow-orange highlights for the candle flames.