Quick Answer: What Makes a Great Happy Birthday Cake?
A memorable happy birthday cake balances structural integrity, balanced moisture, and a design tailored to the recipient’s personality. Standard party portions require roughly 2 to 3 square inches of cake per adult, making an 8-inch round cake ideal for 14 to 18 guests.
Success relies on selecting sturdy fillings that survive room temperature presentation, pairing complementary textures, and chilling the structure thoroughly before travel or display. Whether purchased from an artisan baker or made at home, timing the preparation 24 hours prior produces the best slicing texture.
- Portion Rule: Calculate 1 slice per adult guest, adding a 15% buffer for second helpings.
- Structure First: Buttercream and ganache hold shape better than whipped cream for decorated cakes.
- Temperature Control: Always transport chilled; serve at room temperature for the best crumb flavor.
The Central Anchor of the Birthday Celebration
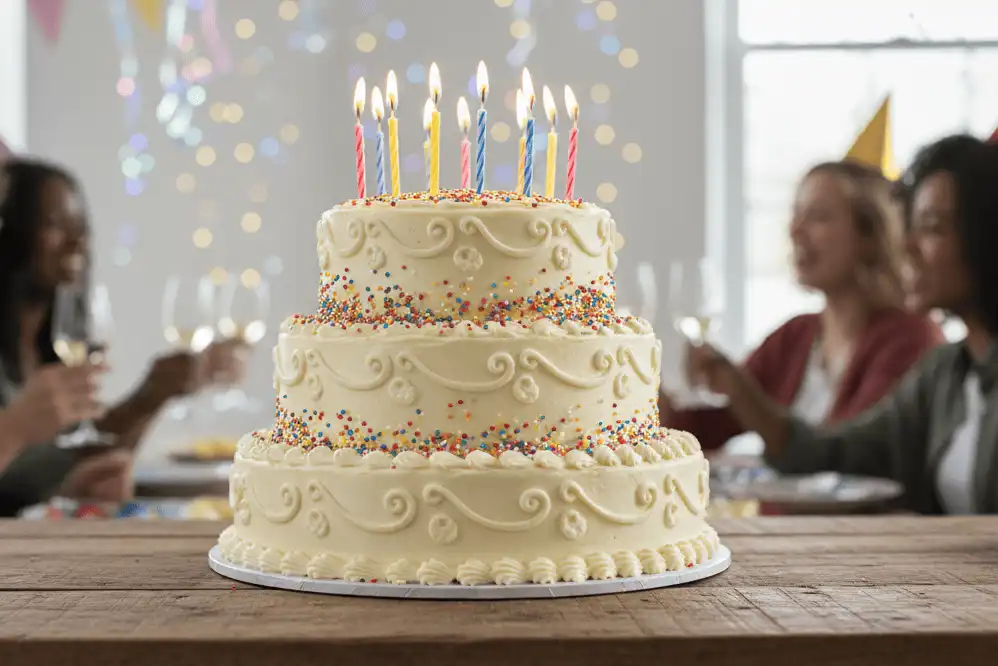
The moment guests gather around a lit cake remains the emotional centerpiece of any birthday party. It represents care, celebration, and a shared pause to mark another year of life.
This guide serves party hosts, ambitious home bakers, parents, and friends who want to secure a cake that tastes as exceptional as it looks. You will learn precise portion calculations, flavor pairing formulas, bakery ordering protocols, and reliable decorating mechanics.
By following these commercial baking principles, you can eliminate dry sponge, structural collapse, and communication breakdowns with custom bakeries.
Sizing and Portion Guide: Exactly How Much Cake to Prepare
Ordering or baking the wrong size leads to embarrassing shortages or costly food waste. Professional bakeries calculate portions using standardized measurements rather than rough guesses.
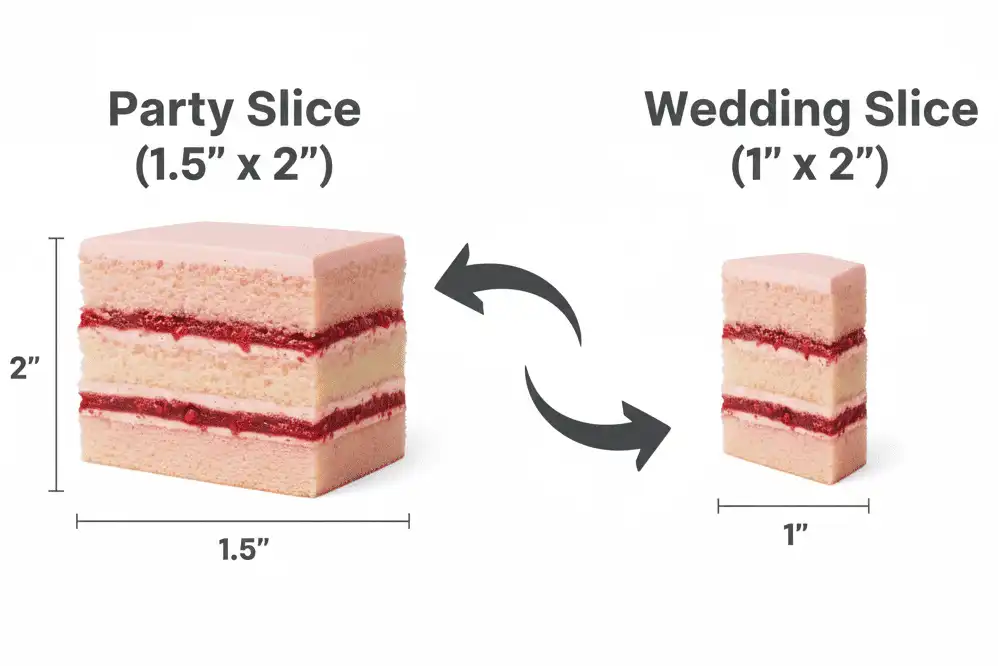
Party Slices vs. Wedding Slices
Event planners recognize two portion scales: party size and wedding size. A standard party slice measures approximately 1.5 inches by 2 inches, cut from a 4-to-5-inch tall layer.
Wedding portions measure a slimmer 1 inch by 2 inches, intended for multi-course meals. For birthday parties where cake is the primary dessert, always use the larger party slice standard.
Standard Round Cake Yields
Round cakes remain the industry standard for residential birthday gatherings. Their circular form distributes frosting evenly across every slice.
- 6-Inch Round (3 layers): Serves 8 to 10 people. Perfect for intimate family dinners or children’s smash sessions.
- 8-Inch Round (3 layers): Serves 14 to 18 people. The universal default for casual home parties.
- 9-Inch Round (3 layers): Serves 20 to 24 people. Offers ample room for piped messages and elaborate borders.
- 10-Inch Round (3 layers): Serves 28 to 32 people. The practical upper limit for single-tier domestic cake stands.
Sheet Cakes for High-Capacity Crowds
When hosting more than 40 guests, multi-tiered cakes can stretch budgets quickly. Sheet cakes provide maximum portions at a predictable cost per serving.
A standard quarter-sheet pan serves 20 to 25 guests with ease. A half-sheet pan yields 40 to 54 clean rectangular portions, making service fast and uniform.
Flavor Profiles and Structural Fillings
Visual appeal creates anticipation, but flavor execution dictates whether guests return for another piece. A dependable birthday cake requires harmony between sweetness, acidity, and mouthfeel.
Balancing Density and Moisture
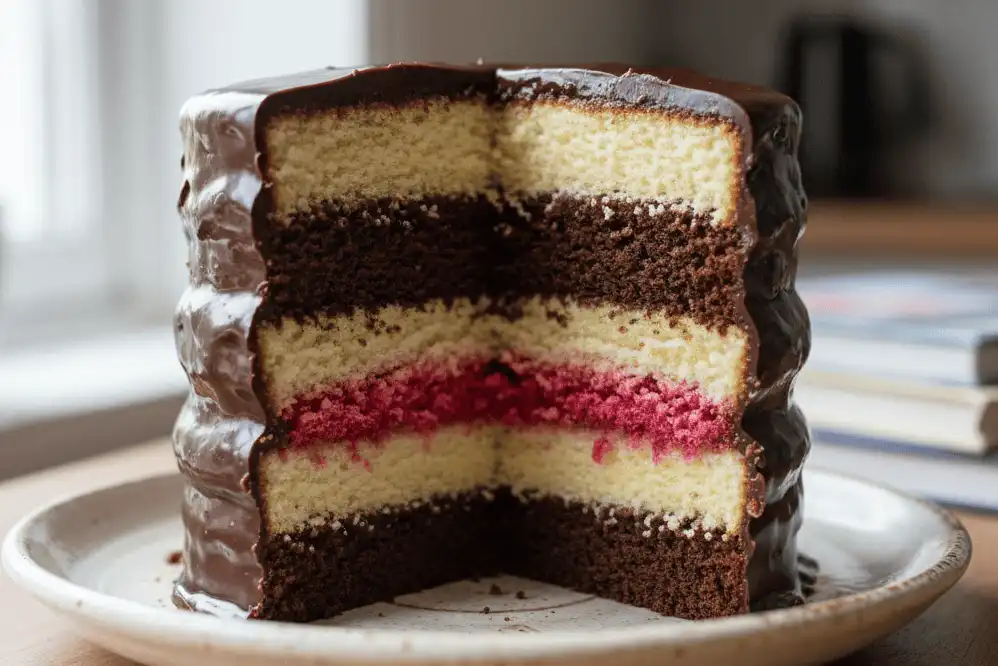
Fluffy angel food or delicate chiffon cakes collapse under the weight of heavy fondant or dense frostings. An oil-based sponge or creamed butter cake provides the tensile strength necessary for stacking.
Oil-based batters stay soft when chilled, which helps cakes that require prolonged refrigeration before the party. Butter-based sponges deliver richer depth of flavor but become firm when cold, requiring full room-temperature warming before service.
Proven Flavor Combinations
Certain flavor profiles have earned classic status because they appeal across diverse age brackets and palate preferences.
- Vanilla Bean and Tart Raspberry: Sweet Madagascar bourbon vanilla sponge tempered by sharp, seeded raspberry compote and Swiss meringue buttercream.
- Deep Dutch Chocolate and Salted Caramel: Dark cocoa sponge with roasted caramel filling and whipped chocolate ganache exterior.
- Bright Lemon and Wild Blueberry: Citrus-zested butter sponge layered with cooked blueberry coulis and cream cheese frosting.
- Confetti Funfetti and Sweet Milk Crumb: Nostalgic vanilla base loaded with rainbow jimmies, paired with whipped vanilla bean frosting.
Selecting the Right Frosting Medium
The exterior coating does more than decorate; it acts as a sealant that preserves sponge moisture. The medium you choose dictates how the cake performs in warm party rooms.
American Buttercream relies on powdered sugar and butter, forming a slight outer crust that resists minor physical knocks. Swiss Meringue Buttercream cooks egg whites and sugar over steam before whipping in butter, yielding a silky, less-sweet finish that melts gracefully on the tongue.
Birthday Cake Designs for Every Age and Milestone
Cake styling has evolved far beyond basic supermarket piping. Contemporary celebrations use the cake as an artistic centerpiece that mirrors party decor.
First Birthdays and Toddler Parties
Parents often commission two cakes for a first birthday: a dedicated “smash cake” for the toddler and a larger display cake for guests. Smash cakes should prioritize soft, pastel-tinted whipped frostings and low-sugar sponges that tiny hands can break apart easily.
Avoid dark food dyes like deep blue, black, or red for toddler events. These pigments stain skin and clothing instantly, complicating photo sessions and clean-up.
Kids’ Interactive and Character Themes
Children respond enthusiastically to dimensional elements rather than flat drawings. Sculpted sugar figurines, edible wafer paper cutouts, and surprise core cakes filled with sprinkles create genuine surprise during the first cut.
When incorporating pop culture characters, custom acrylic toppers paired with color-coordinated abstract piping often look cleaner than hand-piped icing portraits.
Adult Milestones: 21st, 30th, 50th, and Beyond
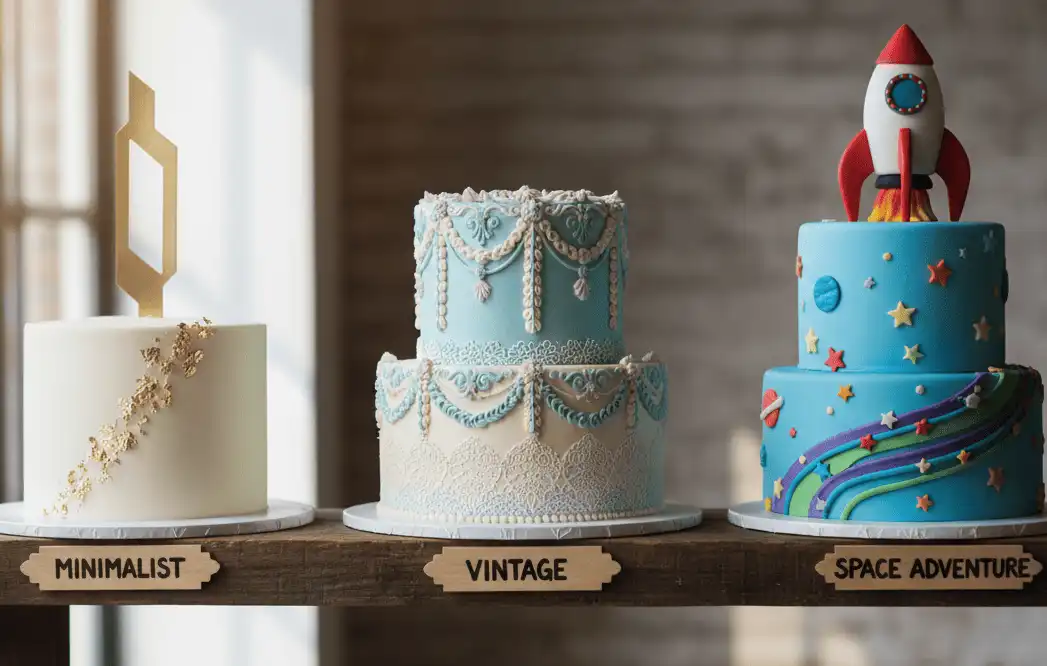
Milestone birthdays call for sophisticated, mature aesthetic treatments. Textured stucco buttercream, metallic leaf accents, and dried floral arrangements elevate the presentation.
Vintage Lambeth piping—characterized by intricate, scalloped borders and dramatic over-piped lace—has seen a resurgence for young adult celebrations. It delivers antique charm while offering playful contrast when combined with humorous or irreverent piped text.
Bento and Lunchbox Miniatures
Originating in South Korea, miniature bento box cakes measure roughly 4 inches across and sit inside biodegradable takeout containers. They are designed for intimate celebrations involving two to four people.
These cakes prioritize minimalist lettering, soft pastel backgrounds, and quirky line drawings. They reduce food waste and offer an accessible gifting alternative for long-distance friends.
How to Order a Custom Cake from a Professional Bakery
Securing a custom bakery creation requires clear communication and realistic lead times. Misunderstandings regarding sizing, flavor, and delivery logistics remain common sources of party stress.
Timeline and Booking Windows
Boutique bakeries operate with limited weekly oven capacity. For standard weekend celebrations, submit inquiries three to four weeks in advance.
Peak seasons like graduation months and autumn wedding weekends demand eight to twelve weeks of lead time. Last-minute requests often incur rush fees or limit you to basic bakery-case items.
The Consultation Checklist
Arrive at your consultation prepared with concrete details rather than vague ideas. Clear parameters help the pastry chef formulate an accurate quote quickly.
- Definite Headcount: Know your confirmed guest total so the baker can size the tiers correctly.
- Venue Conditions: State clearly whether the party takes place outdoors in direct sun or in an air-conditioned banquet hall.
- Color Palette and Swatches: Supply actual fabric samples or paint codes rather than casual phone screenshots that shift color across screens.
- Strict Allergy Disclosures: Disclose all airborne or contact sensitivities, particularly tree nuts, peanuts, gluten, and eggs.
Budgeting and Hidden Charges
Custom cakes are priced per serving based on technical complexity rather than raw ingredient weight. Elaborate sugar flowers, custom fondant modeling, and metallic silver or gold leafing add substantial labor hours to your invoice.
Always ask about delivery, staging, and stand rental fees before signing a contract. Paying for professional delivery is almost always worth the investment for multi-tier structures.
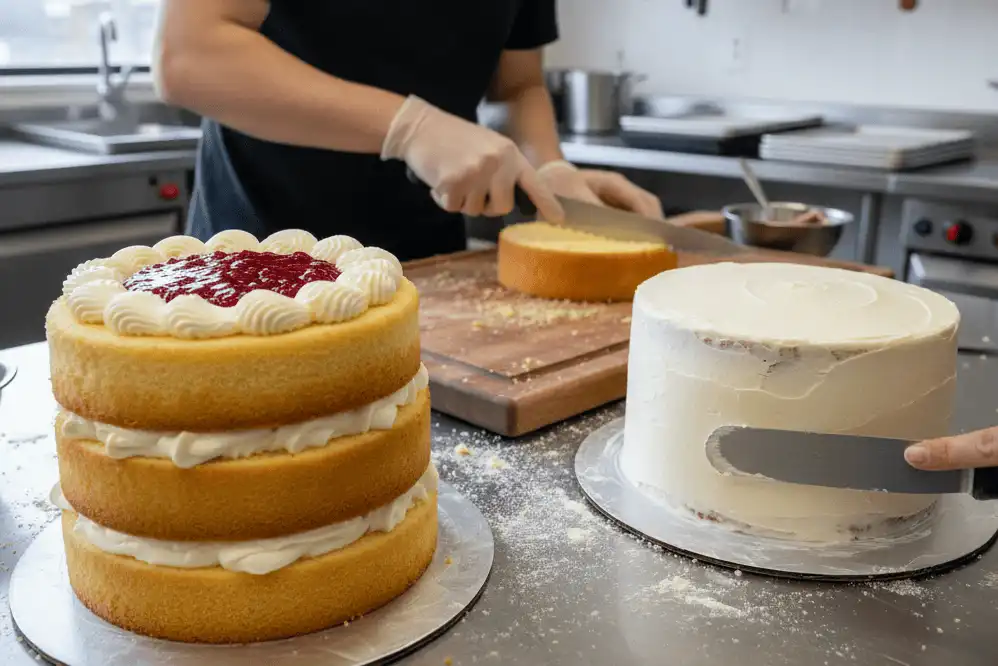
Step-by-Step Guide: Baking and Decorating at Home
Baking a showstopping birthday cake at home requires systematic execution. Spreading the workload across two days reduces anxiety and yields superior structural stability.
-
Day One: Bake and Chill the Sponges
What: Prepare your chosen batter, divide it evenly using a digital kitchen scale, and bake according to recipe specifications.
Why: Weighing batter ensures equal layer thickness, which leads to uniform baking times across pans.
How: Line pan bottoms with parchment paper rounds and grease the sides. Bake until a wooden skewer inserted in the center emerges clean with a few moist crumbs. Cool in the pan for 10 minutes, turn out onto wire racks, wrap tightly in plastic wrap while slightly warm, and freeze flat overnight.
Common Mistake: Attempting to cut or level warm sponge layers, which causes tearing and ragged crumb edges.
Pro Tip: Trapping residual steam by wrapping slightly warm cakes locks in moisture and simplifies slicing the next morning.
-
Day Two: Level and Torte the Cake
What: Trim the crowned tops off your chilled cake rounds to create flat surfaces.
Why: Flat layers prevent the cake from leaning or wobbling once stacked.
How: Use a serrated bread knife or wire cake leveler held strictly parallel to your work surface. Slice smoothly through the top dome using gentle sawing strokes.
Common Mistake: Rushing the cut with a dull knife, which pulls chunks out of the interior crumb.
Pro Tip: Keep a clean cardboard cake circle beneath the bottom layer to make maneuvering simple throughout assembly.
-
Build the Stacking Dam and Fill
What: Create a perimeter wall of firm buttercream before adding soft fruit preserves or curds inside.
Why: The dam prevents soft fillings from leaking out the sides under the weight of upper layers.
How: Fit a piping bag with a half-inch round tip and pipe a heavy ring of buttercream around the outer edge of your bottom cake layer. Spoon your soft filling inside that protective boundary, keeping it flush with the ring.
Common Mistake: Overfilling the center cavity, causing the filling to breach the barrier when upper layers are added.
Pro Tip: Chill the assembled layers for 15 minutes before applying exterior frosting to set the inner core firmly.
-
Apply the Crumb Coat and Chill
What: Spread a thin, sheer layer of frosting over the top and exterior sides of the cake.
Why: This preliminary coat traps stray cake crumbs so they cannot contaminate your clean outer frosting layer.
How: Using an offset spatula and a revolving turntable, spread frosting smoothly over the surfaces. Use an acrylic bench scraper held at a 45-degree angle against the sides while turning the stand. Place the cake in the refrigerator for 30 minutes until the coat is completely firm to the touch.
Common Mistake: Scraping crumb-laden frosting back into your master bowl of clean decorating icing.
Pro Tip: Keep a dedicated secondary bowl for used, crumb-speckled frosting during this stage.
-
Apply the Final Coat and Style
What: Apply the final layer of smooth or textured buttercream and finish with decorative piping.
Why: This outer layer creates the final look and seals in sponge freshness.
How: Apply generous quantities of buttercream across the top and sides. Smooth with a warmed metal bench scraper run under hot tap water and wiped dry. Add borders, sprinkles, or custom lettering once the canvas is clean.
Common Mistake: Skimping on frosting during application, causing the scraper blade to touch the cake sponge.
Pro Tip: Practice your lettering spacing on a clean sheet of parchment paper before piping directly onto the cake face.
Comparison: Homemade vs. Grocery Store vs. Custom Bakery
Selecting the best procurement path depends on your budget, timeline, and design expectations. Every approach carries distinct trade-offs.
| Feature | Homemade DIY | Supermarket Bakery | Boutique Custom Studio |
|---|---|---|---|
| Average Cost | $15 – $35 (Raw materials) | $20 – $45 (Standard sizes) | $90 – $350+ (Design scale) |
| Lead Time Needed | 1 to 2 days prep time | Same day to 48 hours | 3 to 8 weeks |
| Flavor Customization | Unlimited possibilities | Limited preset options | Artisan, bespoke pairings |
| Artistic Control | Bound by personal skill | Standard catalog designs | Bespoke, professional sculpting |
| Effort Required | High (Baking, cleaning) | Low (Store pickup) | Minimal (Delivery/Setup) |
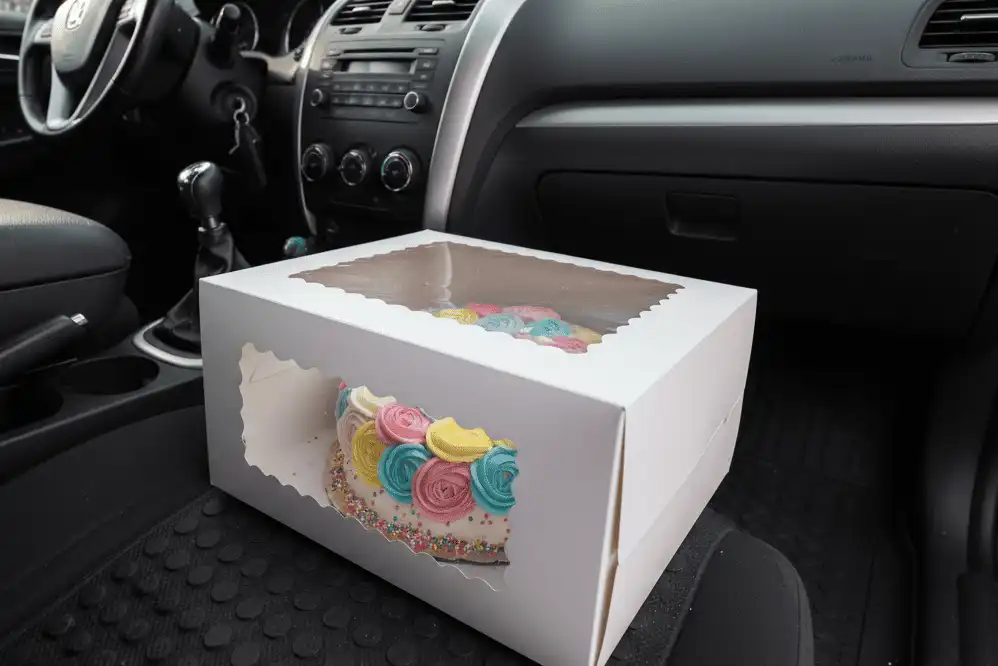
Transport, Temperature, and Storing Essentials
Even expert work can be ruined during the drive to a venue. Buttercream behaves like chilled dairy fat; it softens quickly under heat and solidifies when refrigerated.
The Physics of Moving a Cake
Never transport a cake on a passenger car seat. Vehicle seats slope backward toward the seatback, creating a constant gravitational tilt that causes multi-tier cakes to slide apart.
Place the boxed cake on a flat, non-skid rubber mat on the vehicle floorboards. The front passenger floorboard is the safest location because it remains flat and receives direct airflow from dashboard air conditioning vents.
Handling Outdoor Heat
Outdoor summer parties present real risks for decorated cakes. Direct sunlight softens butter-based frostings within 20 minutes, causing tiers to lean and slide.
Keep the cake inside an air-conditioned room until 15 minutes before singing and blowing out the candles. If the event is entirely outdoors, place the display table under dense shade and choose American buttercream or rolled fondant, which offer greater heat stability than whipped creams.
Freezing and Storing Leftovers
Store cut cake leftovers by pressing plastic wrap directly against the exposed sponge faces to prevent staling. Whole uncut slices can be wrapped in parchment, sealed in aluminum foil, and frozen for up to three months.
Thaw frozen slices in the refrigerator overnight while still sealed inside their packaging. This step ensures condensation forms on the outer wrapper rather than softening the cake crumb.
Expert Baker Tips for Difficult Scenarios
Commercial bakeries rely on practical techniques to solve construction, structural, and presentation issues under tight deadlines.
Internal Doweling for Multi-Tier Stability
Any cake taller than two layers needs dedicated internal support. Without hidden vertical columns, the bottom layer bears all upper weight and can bow or blow out its sides.
Insert food-grade plastic or wooden dowels vertically into the bottom tier, trimming them flush with the top frosting surface. Place an interior cardboard cake round directly under the upper tier so it rests squarely on top of those dowel posts.
Correcting Damaged Frosting at the Venue
Accidents happen during transit. Keep a small emergency kit containing an offset spatula, matching sprinkles, and a small piping bag filled with extra base-color buttercream.
Disguise transit dings along base borders with a fresh row of piped pearls or an intentional splash of matching sprinkles. If a flat side sustains an indentation, warm your metal spatula with warm water, dry it thoroughly, and gently buff the imperfection smooth.
Managing Dietary Constraints Safely
Cross-contamination creates serious health risks for guests with celiac disease or severe nut allergies. Never bake allergen-safe items alongside conventional flour-based goods.
Purchase certified allergen-free cupcakes from specialized bakeries for sensitive guests. This guarantees safety while allowing you to serve your primary birthday cake without compromising on flavor or design.
Common Mistakes and How to Avoid Them
Most cake failures stem from impatience or skipping essential prep steps. Understanding these root causes helps prevent common baking pitfalls.
- Frosting a Warm Cake: Butter softens quickly when exposed to warmth. Frosting a cake that retains internal oven heat melts the fat instantly, causing layers to slide apart into an unfixable mess. Cool your sponges completely, then chill them in the refrigerator for at least two hours before assembling.
- Relying on Volume Rather than Weight: Scooping flour with a measuring cup packs down the powder, yielding up to 30% more ingredient than called for by weight. This extra flour produces dense, dry sponges. Use a digital kitchen scale to measure all dry ingredients in grams.
- Ignoring Simple Syrup Spritzes: Storing layers in the refrigerator can dry out exposed sponge surfaces. Commercial bakers mist light vanilla simple syrup over each layer before frosting. This step seals in moisture without making the cake soggy.
- Choosing the Wrong Candle Type: Thick, novelty wax candles can leave heavy wax puddles across your clean frosting surface during the birthday song. Select slender, dripless beeswax tapers, and remove them immediately after they are blown out.
Serving and Presentation Best Practices
A well-planned cake service keeps the celebration moving smoothly without messy plates or long delays.
The Clean-Slice Method
Dragging a dry, cold knife through a multi-layer cake tears the crumb and smears filling across the exterior frosting. Fill a tall pitcher with hot water and keep a clean kitchen towel close by.
Dip your long chef’s knife into the hot water, dry the heated blade completely on the towel, and slice straight downward through the cake in a single, smooth motion. Wipe the blade clean after every cut to preserve sharp, clean presentation edges.
The Cutting Board Technique for Tall Tiers
Tall cakes measuring over 6 inches in height produce unwieldy, floppy wedges if cut using standard triangular methods. Cut across the entire cake horizontally to create a flat, slab-like section.
Tilt that slab back onto a clean cutting board, then portion it into neat rectangular bars. This method doubles your total serving count and creates manageable, clean portions for your guests.
Essential Tools and Recommended Resources
Having the right tools on hand makes a dramatic difference in decorating precision, speed, and overall finish quality.
Crucial Baking Equipment
- Cast-Iron Heavy Turntable: A weighted turntable with smooth ball bearings prevents wobbling while smoothing sides with a bench scraper.
- Stainless Steel Offset Spatula: The angled neck keeps your knuckles out of wet frosting while smoothing cake tops.
- Aluminized Steel Commercial Cake Pans: Heavy-gauge metal pans conduct heat evenly, reducing doming and dark, overbaked edges.
- Digital Gram Scale: Essential for consistent baking results, even batter portioning, and balanced tier construction.
Online Calculators and Digital Planning Aids
Use digital cake portion calculators to estimate precise batter requirements for non-standard pan shapes like hexagons or heart pans. Online color-mixing charts also provide reliable drop-ratios for matching specific gel food color shades.
Related Reading and Celebration Resources
Continue your party planning with these complementary culinary guides and decoration tutorials from our library:
- Swiss Meringue Buttercream Troubleshooting: Rescuing Broken Emulsions
- Gentle Smash Cake Recipes: Natural Colors and Lower Sugar
- Dessert Table Styling: Harmonizing Cupcakes, Cookies, and Main Tiers
- Gluten-Free Baking: Maintaining Tender Crumb Structure in Celebration Cakes
- The Master Event Timeline: 30-Day Checklist for Effortless Hosting
External Authority References
For additional reading on baking science and safe food handling, consult these respected educational institutions and trade resources:
- King Arthur Baking School Resources: Trusted guides on flour protein ratios, moisture balance, and crumb structure mechanics.
- USDA Food Safety and Inspection Service: Official temperature standards for dairy products, whipped creams, and safe egg handling in frostings.
- Retail Bakers of America (RBA): Professional commercial portioning standards, trade guidelines, and bakery management metrics.
Core Rules for Birthday Cake Success
- Base your cake size on an adult party portion standard of 1.5 x 2 inches per slice, including a 15% buffer.
- Spread DIY baking tasks across two days: bake and chill layers on day one, assemble and frost on day two.
- Always place a protective buttercream dam around soft fillings to maintain structural stability.
- Transport your boxed cake on a level vehicle floorboard over a non-slip mat, never on a tilted car seat.
- Slice tall tiers into horizontal slabs before portioning into neat, uniform rectangles.
Next Steps for Your Celebration
A great birthday cake brings together sound structural mechanics and genuine personal flair. Clear portion planning, proper layer chilling, and sturdy frosting prevent common party disasters.
Whether you book a talented local cake artist or bake your own creation at home, prioritizing these fundamentals ensures your cake serves as a stunning centerpiece. Choose your flavor profile, secure your equipment, and build a cake that leaves your guests talking long after the party wraps up.
Frequently Asked Questions
How far in advance can I bake a birthday cake before the party?
You can bake sponge layers up to three days ahead if you wrap them tightly in plastic wrap and store them in the refrigerator. For longer storage, freeze wrapped layers for up to one month. Assemble and frost the cake 24 hours prior to the celebration to allow flavors to meld while maintaining a fresh crumb.
Should a decorated birthday cake be served cold or at room temperature?
Always serve birthday cakes at room temperature. Buttercream and butter-based sponges contain dairy fats that solidify when refrigerated, resulting in a firm, waxy texture. Remove your cake from the refrigerator two to three hours before serving so the frosting softens and the sponge crumb relaxes to its optimal texture.
How do I keep my cake layers from drying out?
Avoid overbaking by checking your sponges three minutes before the stated recipe time. Brush or spritz the cooled layers with a simple syrup solution made from equal parts water and dissolved sugar. This step traps moisture inside the crumb without compromising structural integrity during assembly and frosting.
What size cake do I need to feed 20 guests?
A three-layer 9-inch round cake reliably yields 20 to 24 standard party portions. Alternatively, an 8-inch round cake paired with a dozen matching cupcakes provides ample servings while giving guests flexibility between single-serve treats and full slices.
Why is my frosting pulling crumbs off the cake surface?
This happens when you skip the essential crumb coat or attempt to frost a warm, delicate cake. Always chill your leveled layers until firm before applying frosting. Spread a thin, sheer layer of frosting to lock in loose crumbs, chill for 30 minutes, and then apply your final decorative outer coat.
Can I use whipped cream frosting for an outdoor summer party?
Avoid stabilized whipped cream for outdoor summer parties. Heat and humidity destabilize whipped cream emulsions quickly, causing decorative borders to soften and slide off the sponge. Use American buttercream, chocolate ganache, or rolled fondant instead, as these options offer substantially better heat stability.