Quick Guide: What Makes an Authentic Harry Potter Cake?
An authentic Harry Potter birthday cake captures the magical details of the wizarding world through intentional color palettes, recognizable symbols, and nostalgic textures. The most famous version is Hagrid’s sticky chocolate sponge with dusty pink icing, cracked sugar glaze, and misspelled green cursive writing.
For more formal celebrations, bakers rely on Hogwarts house crests, metallic gold accents for Quidditch themes, or sculpted fondant elements like the Sorting Hat and antique spellbooks. Choosing the right design depends on your skill level, timeline, and whether you prefer rustic buttercream or sculpted sugar paste.
- Beginner Favorite: Hagrid’s rustic “Happee Birthdae Harry” chocolate cake.
- Intermediate Choice: Hogwarts house drip cakes finished with edible gold leaf and custom toppers.
- Advanced Project: 3D carved Sorting Hat or Book of Monsters cake with structural internal supports.
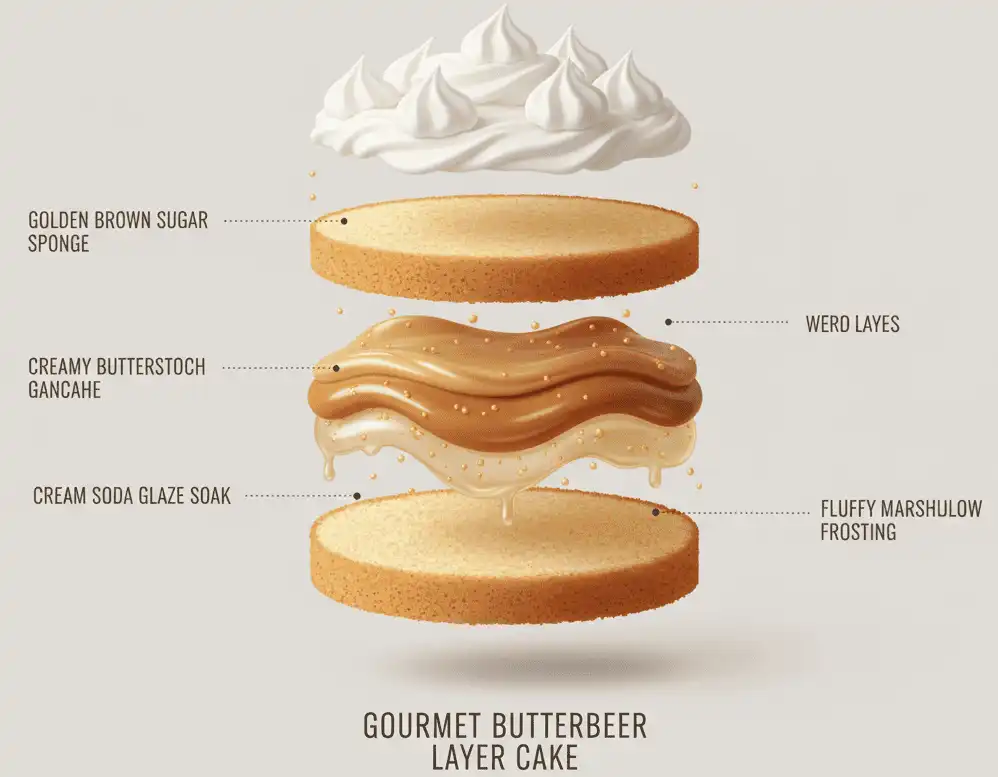
- Signature Flavor: Butterbeer sponge layered with butterscotch ganache and cream soda reduction.
Why Harry Potter Cakes Remain a Party Classic
A Harry Potter birthday cake serves as the visual anchor for wizarding-themed celebrations. Unlike generic party themes, this aesthetic bridges the gap between childhood nostalgia and sophisticated adult baking.
The visual world built by the books and films offers rich design assets. You can draw inspiration from vintage leather textures, antique parchment, aged metal, and gothic architecture. These elements give bakers creative freedom across every skill level.
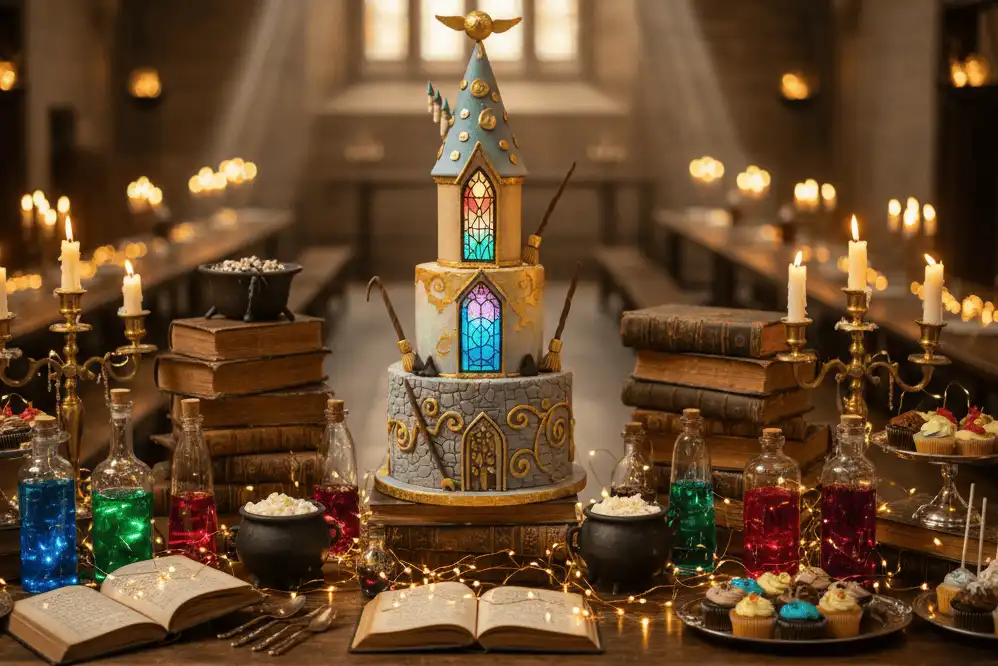
Top Harry Potter Birthday Cake Designs
1. The Iconic Hagrid “Happee Birthdae” Cake
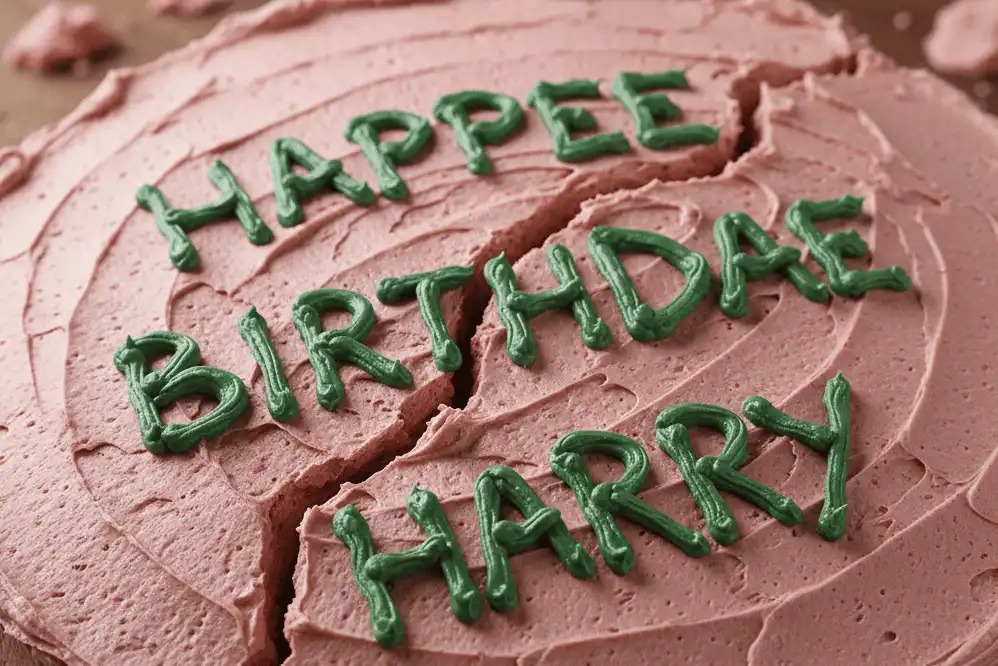
First presented to Harry in his 11th birthday cabin, this cake is the most recognizable dessert in the entire franchise. Its charm lies entirely in its handcrafted imperfections.
The original cake features a dense chocolate sponge coated in a muted, slightly glossy pink glaze. Across the top, two prominent horizontal cracks divide the surface where Hagrid accidentally sat on the box. Bright green piped frosting spells out “HAPPEE BIRTHDAE HARRY” across two lines.
To keep the look authentic, resist the urge to smooth the surface perfectly. A textured, homemade finish honors the heartwarming origin of the story.
2. Hogwarts House Pride Cakes
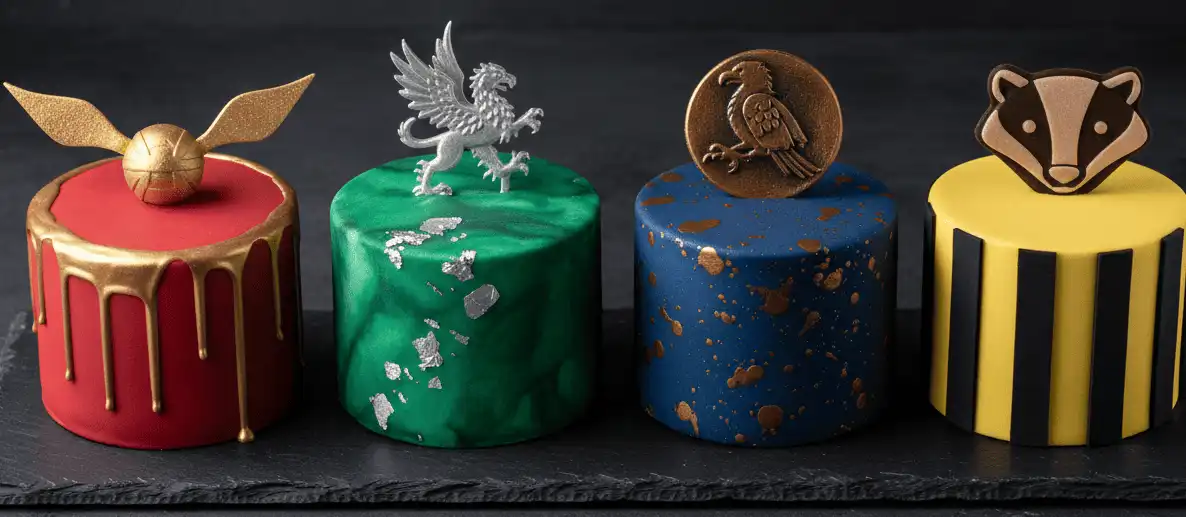
Designing around the four Hogwarts houses allows you to personalize the cake directly for the birthday guest. Each house carries a distinct two-color palette and aesthetic texture.
- Gryffindor (Scarlet and Gold): Combine deep crimson buttercream with hand-painted edible gold leaf accents. Rich red velvet sponge pairs naturally with this bold color scheme.
- Slytherin (Emerald and Silver): Use deep forest-green fondant accented with edible silver luster dust. Subtle piped snake scales or marbleized green-and-white fondant create an elevated finish.
- Ravenclaw (Midnight Blue and Bronze): Mix dark sapphire blue frosting with antique bronze splatters. For book purists, bronze is the canonical secondary color rather than movie silver.
- Hufflepuff (Canary Yellow and Rich Black): Pair vibrant warm yellow with clean charcoal or matte black stripes. Geometric drip designs and honeycomb textures fit this loyal house theme.
3. The Golden Snitch Cake
A Golden Snitch cake is an eye-catching option for sports fans and Quidditch enthusiasts. You can build this design as a single spherical cake or position a sculpted snitch as a showpiece topper on a tiered tier.
Creating the sphere requires baking two halves in stainless steel hemispherical pans. Once chilled and filled, secure the sphere onto a sturdy center dowel to prevent rolling.
The delicate wings require lightweight materials. Wafer paper cut with feather details or thin gum paste wired onto floral wire will hold shape without snapping or weighing down the cake.
4. 3D Sculpted Cakes: Sorting Hat and Monster Book
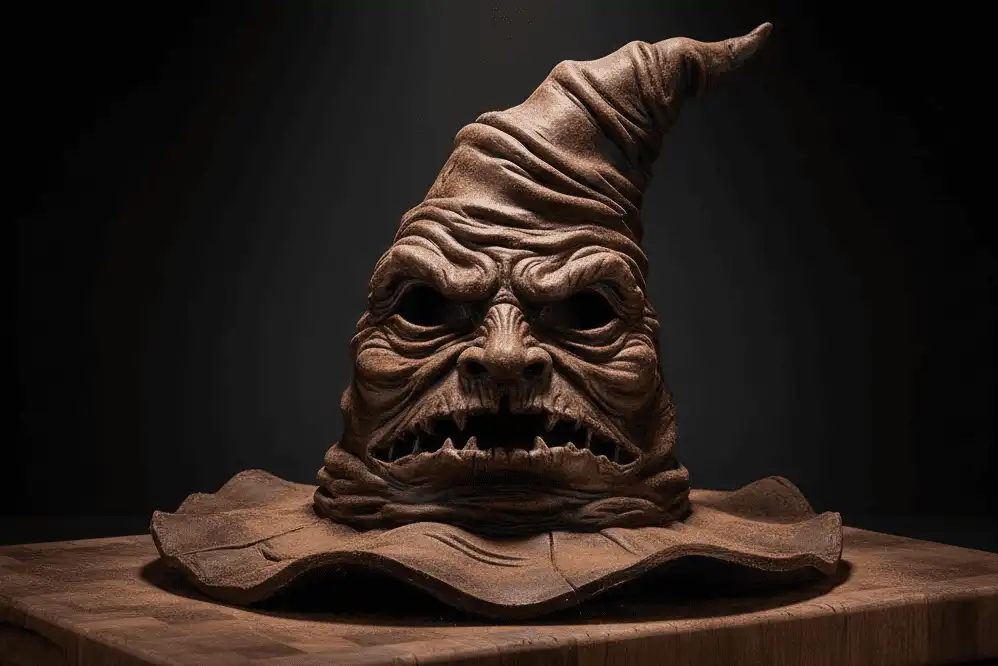
Sculpted cakes test your structural carving and texturing skills. The Sorting Hat requires a tall, tapered conical shape made from dense carved cake or compressed cereal treats.
Cover the base with warm brown modeling chocolate or fondant. Pinch and drape the medium to form the iconic brow, open mouth slit, and deep fabric folds before dusting with dark cocoa powder for an aged leather patina.
The Monster Book of Monsters requires stacked rectangular layers. Ruffle wafer paper sheets along the sides to replicate aged book pages, and shape sharp fondant teeth along the interior edge.
The Signature Flavor: Crafting an Authentic Butterbeer Cake
While classic chocolate or vanilla works well, serving an authentic Butterbeer-flavored cake elevates the thematic experience for your guests.
True Butterbeer combines rich butterscotch, vanilla cream, brown sugar, and a slight hint of carbonated cream soda effervescence. You can achieve this flavor profile through three balanced components.
- The Sponge: Replace granulated white sugar with dark brown sugar to introduce molasses depth. Substitute a third of the liquid milk with a concentrated cream soda reduction.
- The Filling: Whip a silky butterscotch ganache using white chocolate, heavy cream, and natural butterscotch baking chips. Add a generous pinch of flaky sea salt to cut the sweetness.
- The Frosting: Use a light marshmallow-cream buttercream or whipped cream-cheese frosting. This mirrors the frothy white head of a freshly poured mug of Butterbeer.
Step-by-Step Tutorial: The Authentic Hagrid Birthday Cake
Follow this kitchen-tested guide to build the classic Hagrid birthday cake from scratch. This recipe uses an 8-inch, two-layer configuration that serves 14 to 16 guests.
Ingredients and Materials
- 2 cooled 8-inch round chocolate fudge cake layers
- 1.5 batches of standard American or Swiss Meringue Buttercream
- Oil-based gel food coloring: Dusty Rose (or warm pink plus a toothpick drop of chocolate brown)
- Gel food coloring: Leaf Green or Forest Green
- Piping bag fitted with a #3 or #4 round writing tip
- Offset spatula and bench scraper
- Toothpick or paring knife for scoring
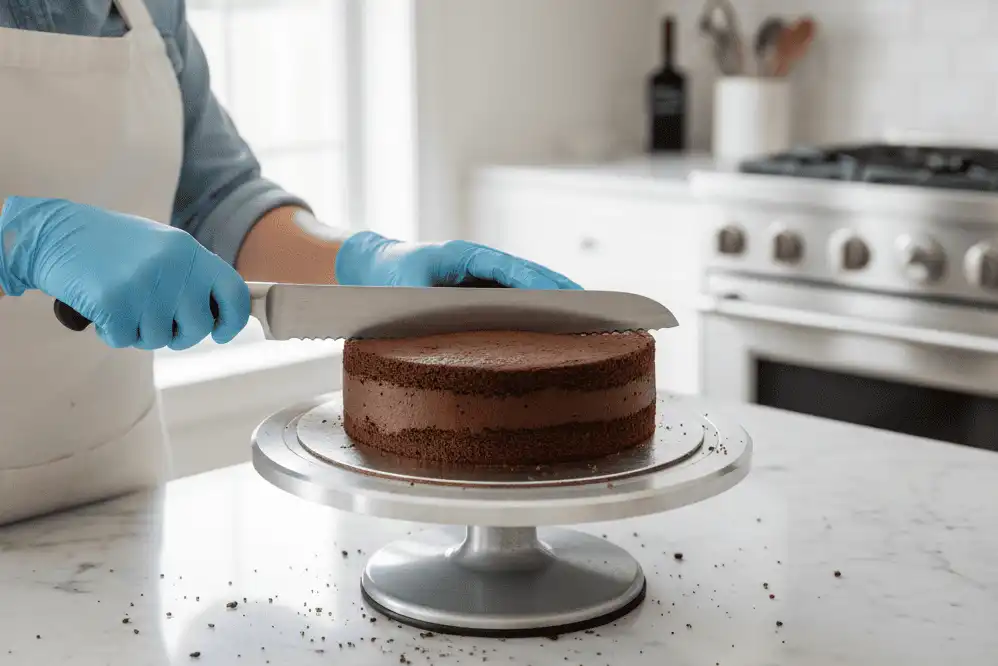
Step 1: Level and Torte the Cake Layers
What: Trim the rounded domes off both cooled cake layers using a long serrated knife or wire cake leveler.
Why: Flat cake surfaces create a stable structural foundation and prevent the top of the cake from sliding or bulging under frosting.
How: Place your hand lightly on top of the cake. Saw gently through the sponge horizontally, maintaining an even, parallel line across the surface.
Common Mistake: Trimming warm cake. Warm sponge tears easily and leaves loose crumbs that ruin your icing coat.
Pro Tip: Wrap your baked layers tightly in plastic film and freeze them for 30 minutes before trimming. Chilled sponge produces cleaner cuts with almost zero crumbs.
Step 2: Apply the Crumb Coat and Chill
What: Spread a thin, sheer layer of buttercream across the top and sides of the assembled, filled cake.
Why: The crumb coat locks loose chocolate particles into the frosting so they do not speckle your final pink coat.
How: Center the first layer on a cake board. Spread filling evenly, stack the second layer cut-side down, and coat the entire exterior lightly with an offset spatula. Smooth lightly with a bench scraper.
Common Mistake: Putting dirty spatula blades back into the main frosting bowl, contaminating your clean icing with dark crumbs.
Pro Tip: Chill the crumb-coated cake in the refrigerator for 20 minutes until the buttercream feels firm to the touch.
Step 3: Mix the Vintage Dusty Pink Shade
What: Color 80% of your remaining buttercream into the specific muted pink seen in the film.
Why: Standard pink dye looks bright, modern, and synthetic. Hagrid’s cake features an earthy, slightly muted rose tone.
How: Add 2 to 3 drops of rose gel color. Dip a clean toothpick into brown gel coloring and add that tiny microscopic amount to the pink icing to desaturate the brightness.
Common Mistake: Adding too much brown at once, which turns the pink frosting into a dull gray-tan.
Pro Tip: Mix your colored buttercream two hours ahead of time. Gel food colors deepen and oxidize significantly as they sit.
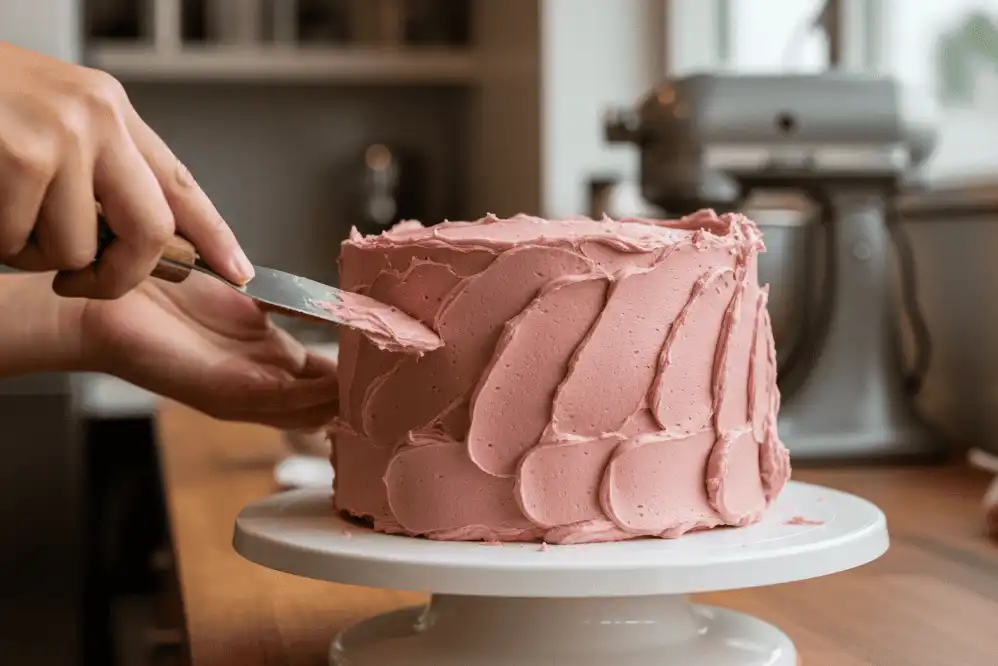
Step 4: Frost the Cake with Rustic Texture
What: Apply the dusty pink frosting generously over the chilled crumb coat.
Why: Hagrid carried this cake in his overcoat pocket. The texture should look thick, luscious, and homemade rather than machine-perfected.
How: Apply an even coat of pink frosting. Instead of scraping the edges smooth, use the flat paddle of your offset spatula to create gentle horizontal swoops around the sides and top.
Common Mistake: Leaving bare patches where the dark chocolate crumb coat shows through.
Pro Tip: Wipe your spatula clean with a warm, dry kitchen towel between strokes to keep the swirl texture clean and glossy.
Step 5: Score the Iconic Surface Cracks
What: Cut two distinct, clean fault lines across the center of the top frosting layer.
Why: The fractures recreate the famous detail of Hagrid accidentally sitting on the cake during his journey.
How: Chill the frosted cake for 15 minutes so the surface is slightly set. Use a clean toothpick to trace two jagged, intersecting fracture lines across the top. Drag the tip of a paring knife through the mark to widen the gap slightly.
Common Mistake: Cutting into the chocolate sponge underneath, causing brown cake crumbs to spill out into the fresh pink frosting.
Pro Tip: Warm your knife blade briefly under hot running water and dry it completely before scoring the groove for a clean edge.
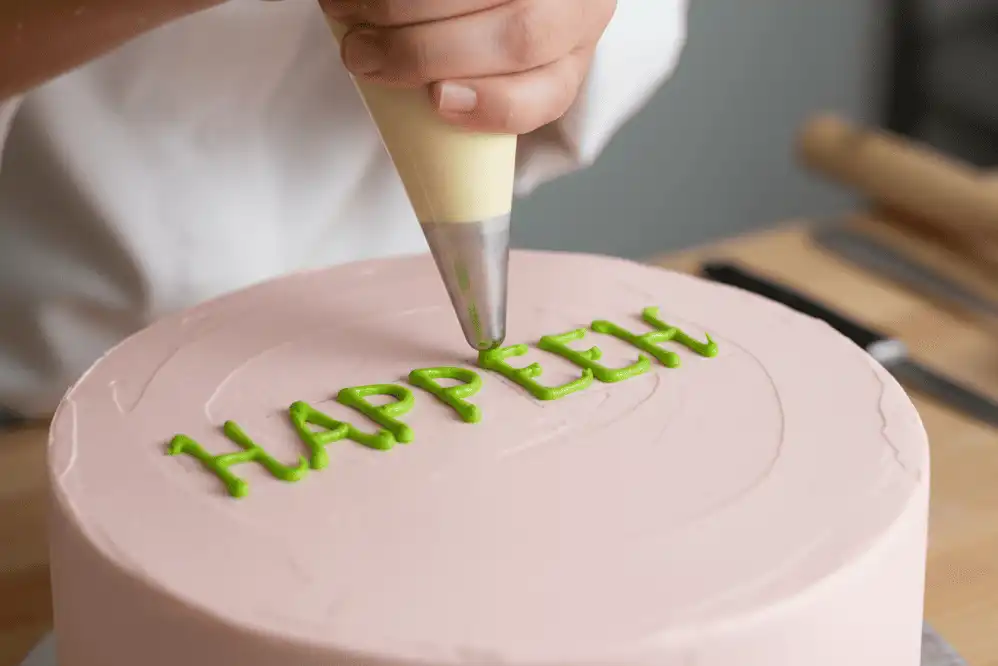
Step 6: Pipe the Green Cursive Inscription
What: Write the classic misspelling in piped green frosting across the top surface.
Why: The specific lettering layout is the primary identifier of this iconic pop culture cake.
How: Tint your remaining frosting deep grass green. Fit a piping bag with a small #3 round tip. Pipe “HAPPEE BIRTHDAE” across the upper hemisphere and “HARRY” in larger letters across the lower hemisphere, writing right across the cracks.
Common Mistake: Running out of room on the edge because you started the letters too large or too far to the right.
Pro Tip: Lightly sketch the cursive letters into the chilled pink frosting with a toothpick first. If you make a mistake, smooth it over with your finger and retrace before piping.
Design Comparison: Skill Level, Time, and Budget
Review this comparison to choose the right Harry Potter cake style for your celebration schedule, decorating skill, and overall budget.
| Design Style | Skill Level | Prep & Decor Time | Material Cost | Key Techniques | Best For |
|---|---|---|---|---|---|
| Hagrid’s Rustic Cake | Beginner | 2 to 3 hours | Low ($15 – $25) | Crumb coating, rustic texturing, basic piping | Home bakers, nostalgic fans, kids’ parties |
| House Colors Drip Cake | Intermediate | 3 to 5 hours | Medium ($30 – $45) | Sharp buttercream edges, ganache drip, gold leaf | Teenagers, modern aesthetic parties |
| Golden Snitch Sphere | Intermediate-Advanced | 4 to 6 hours | Medium-High ($40 – $60) | Sphere carving, wafer paper wings, metallic luster | Quidditch enthusiasts, visual centerpiece |
| Sculpted Sorting Hat | Advanced | 6 to 9 hours | High ($60 – $90) | 3D carving, internal armature, leather texturing | Milestone birthdays, experienced decorators |
| Tiered Hogwarts Crest Cake | Professional | 8+ hours | Very High ($80 – $130) | Multi-tier doweling, fondant drape, stencil piping | Large events, weddings, grand celebrations |
Professional Decorating and Color-Matching Tips
Creating believable wizarding elements comes down to managing your food coloring and sugar paste properly.
Mastering Antique Gold and Metallic Finishes
Never paint dry metallic dust directly onto buttercream or dry fondant. It leaves a patchy, translucent streak that dulls the finish.
Mix your edible metallic gold or silver luster dust with a few drops of high-proof clear grain alcohol or pure lemon extract. The alcohol dissolves the powder into a smooth paint and evaporates rapidly, leaving behind a streak-free, brilliant metallic sheen.
Preventing Fondant Sweating and Melting
Fondant absorbs ambient humidity easily. Storing a fondant-decorated cake in a standard home refrigerator causes condensation beads to form across the surface when brought out to room temperature.
If you must refrigerate a fondant cake, place the entire cake box inside a sealed plastic garbage bag before chilling. When removing it from the fridge, leave it inside the sealed bag on your counter for two hours so condensation forms on the bag instead of on your cake.
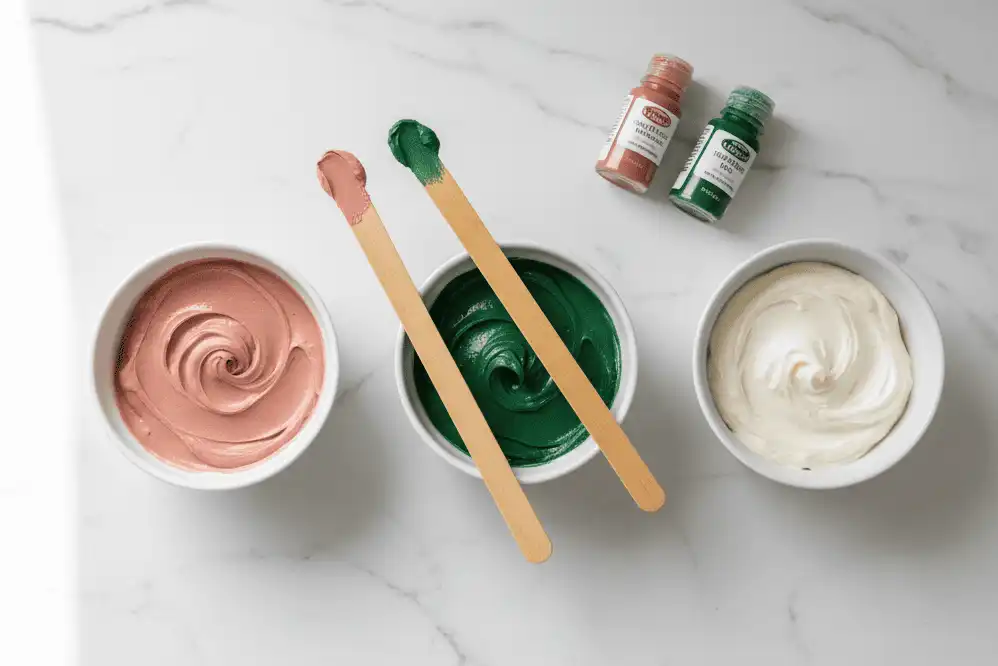
Color Mixing Formula for Hagrid’s Cake
To match the film prop precisely, combine the following proportions:
- Background Pink: 1 cup white buttercream + 2 drops Americolor Soft Pink + 1 toothpick tip of Chocolate Brown.
- Piping Green: 1/2 cup white buttercream + 3 drops Americolor Leaf Green + 1 drop Forest Green.
Common Mistakes and How to Avoid Them
Even experienced bakers run into hurdles when designing themed cakes. Knowing how to handle these issues preserves your hard work.
1. Over-Smoothing Hagrid’s Cake
Why It Happens: Habit leads bakers to use hot bench scrapers and acetate sheets for razor-sharp edges.
How to Avoid: Step away from the scraper. Use only an offset spatula, deliberately leaving smooth waves and a slightly rounded upper rim to preserve the hand-carried look.
2. Snitch Wings Sagging or Breaking
Why It Happens: Humidity softens gum paste wings, or heavy materials break the thin wire anchors.
How to Avoid: Build wings using double-layered wafer paper instead of heavy sugar paste. Wafer paper is practically weightless and stays upright permanently when anchored into the cake.
3. Letters Bleeding into the Pink Base
Why It Happens: Using cheap liquid water-based grocery store dyes causes moisture to migrate between frosting layers.
How to Avoid: Use concentrated professional gel or paste colors. Gel colors contain very little water and remain locked inside the buttercream fat crystals without spreading.
4. Structural Collapse on Carved Cakes
Why It Happens: Carving soft, airy sponges like chiffon or boxed cake mix causes the structure to buckle under the weight of fondant.
How to Avoid: Always bake sturdy sponges such as pound cake, Madeira cake, or chocolate mud cake for 3D designs. Anchor every 4 inches of height with a corrugated board and plastic dowel supports.
Preparation, Storage, and Transport Best Practices
A well-organized timeline eliminates race-against-the-clock stress on party day.
The 3-Day Baking Timeline
- Day 1 (Bake and Freeze): Bake all sponges. Allow them to cool completely, wrap them tightly in two layers of plastic wrap, and freeze overnight.
- Day 2 (Prep and Fill): Prepare your buttercreams, simple syrups, and fillings. Fill, crumb coat, and final frost your cakes. Assemble all fondant toppers so they have 24 hours to dry.
- Day 3 (Assemble and Serve): Add final piping, metallic paint, and delicate toppers. Serve the cake at comfortable room temperature.
Safe Cake Transport Rules
Never transport an assembled cake on a passenger car seat. Vehicle seats slope backward, creating constant shear stress that can cause tiered cakes to lean and collapse.
Place a non-slip silicone shelf liner on the flat floorboard of your car or inside the level trunk area. Set the boxed cake directly on top of the mat and keep the cabin air conditioning running cold.
Recommended Tools and Supplies
Investing in a few specialized decorating supplies makes clean execution straightforward.
- Revolving Turntable: A heavy cast-iron or aluminum turntable provides smooth rotation for even coating and lettering.
- Offset Spatulas: Keep both a 4-inch mini spatula for lettering corrections and a 9-inch spatula for main frosting application.
- Concentrated Gel Colors: Americolor, Chefmaster, or Rainbow Dust gels deliver saturated tones without thinning buttercream.
- Edible Luster Dust: Choose non-toxic, FDA-approved edible metallics for Golden Snitch wings and house crest highlights.
- Wafer Paper (0.27mm O Grade): Ideal for crafting feathers, open spellbook pages, and magical floating letters.
Authoritative References
For additional reading on food safety, color matching, and foundational baking sciences, consult these resources:
- FDA Food Safety Guidelines on Non-Edible Cake Supports: Consult official food contact regulations regarding dowels, wire armatures, and true food-grade luster dusts versus craft glitters.
- The Institute of Food Technologists (IFT): Academic resources explaining fat-to-sugar emulsification in Swiss Meringue versus American Buttercream stability.
- The British Sugarcraft Guild: Established techniques for gum paste modeling, structural wire safety, and armature building in carved novelty cakes.
Key Takeaways
- Hagrid’s birthday cake is defined by its muted dusty rose icing, two deliberate fracture lines, and bright green cursive spelling “HAPPEE BIRTHDAE HARRY”.
- Desaturate pink gel food coloring with a tiny touch of brown to avoid harsh neon tones and match the movie prop accurately.
- Butterbeer flavor relies on brown sugar sponge, a salted butterscotch ganache core, and a light vanilla-cream frosting.
- For sculpted designs like the Sorting Hat, rely on dense mud cakes or pound cakes supported by internal dowels every four vertical inches.
- Always paint metallic luster dust using high-proof alcohol or lemon extract rather than dry brushing for an opaque, reflective shine.
Final Thoughts
Baking a Harry Potter birthday cake gives you the chance to bring storytelling directly to your party table. Whether you tackle a beginner-friendly, beautifully cracked Hagrid cake or sculpt an elaborate 3D Sorting Hat, the magic lives in the thoughtful handmade details.
Gather your supplies, prepare your sponges ahead of time, and take your time with the color mixing. Your guests will remember the magic of slicing into their favorite wizarding world treat.
Frequently Asked Questions
What flavor is the official Hagrid Harry Potter birthday cake?
In the original novel, Hagrid presents Harry with a large, sticky chocolate cake. Most modern bakers pair a rich, dark chocolate sponge with classic vanilla buttercream tinted pink. This combination keeps the interior rich and moist while allowing for the iconic pastel pink exterior and green script lettering.
What does the writing on Hagrid’s cake actually say?
In the film adaptation of Harry Potter and the Sorcerer’s Stone, the green piped lettering reads “HAPPEE BIRTHDAE HARRY” across two lines. In the original book text, the spelling is standard English (“Happy Birthday Harry”). Most fans prefer the film’s charming misspelled version.
How do you achieve the exact dusty pink color of Hagrid’s cake?
Start with a clean white buttercream base and add two drops of soft rose gel coloring. Then, dip a toothpick into chocolate brown gel color and stir a tiny trace into the icing. The brown desaturates the pink, giving it that vintage, earthy tone instead of a bright bubblegum shade.
How far in advance can I make a Harry Potter birthday cake?
You can bake and freeze your cake sponges up to three weeks in advance. Frost and decorate the cake one to two days before your event. Store the decorated cake in a cool room or bakery box. Add delicate elements like wafer paper wings right before serving.
What is the easiest Harry Potter cake design for beginners?
The classic Hagrid cake is by far the easiest design for beginners. It requires no complex fondant modeling, sharp buttercream smoothing, or specialty molds. The charm of the cake comes from its rustic, imperfect swirls, cracked glaze line, and simple hand-piped cursive lettering.
Can you make a Harry Potter cake without using fondant?
Yes. You can complete iconic designs like Hagrid’s cake, house color drip cakes, and celestial constellation designs entirely with buttercream. Use textured spatula techniques, piped rosettes, ganache drips, and edible gold splatters to create dramatic visual interest without touching sugar paste.
How do you keep edible Golden Snitch wings from wilting?
Make Golden Snitch wings from printed or cut wafer paper rather than heavy fondant or gum paste. Wafer paper remains stiff, completely dry, and unaffected by mild humidity. Anchor the base of each wafer wing into a small piece of tempered chocolate or dry royal icing.
What is the best frosting to use under fondant decorations?
Firm chocolate ganache or stiff American buttercream works best under fondant. Ganache sets firm at room temperature, creating an unyielding, smooth shell that prevents the fondant from sagging, bulging, or developing dimples when handled during decorating and transport.