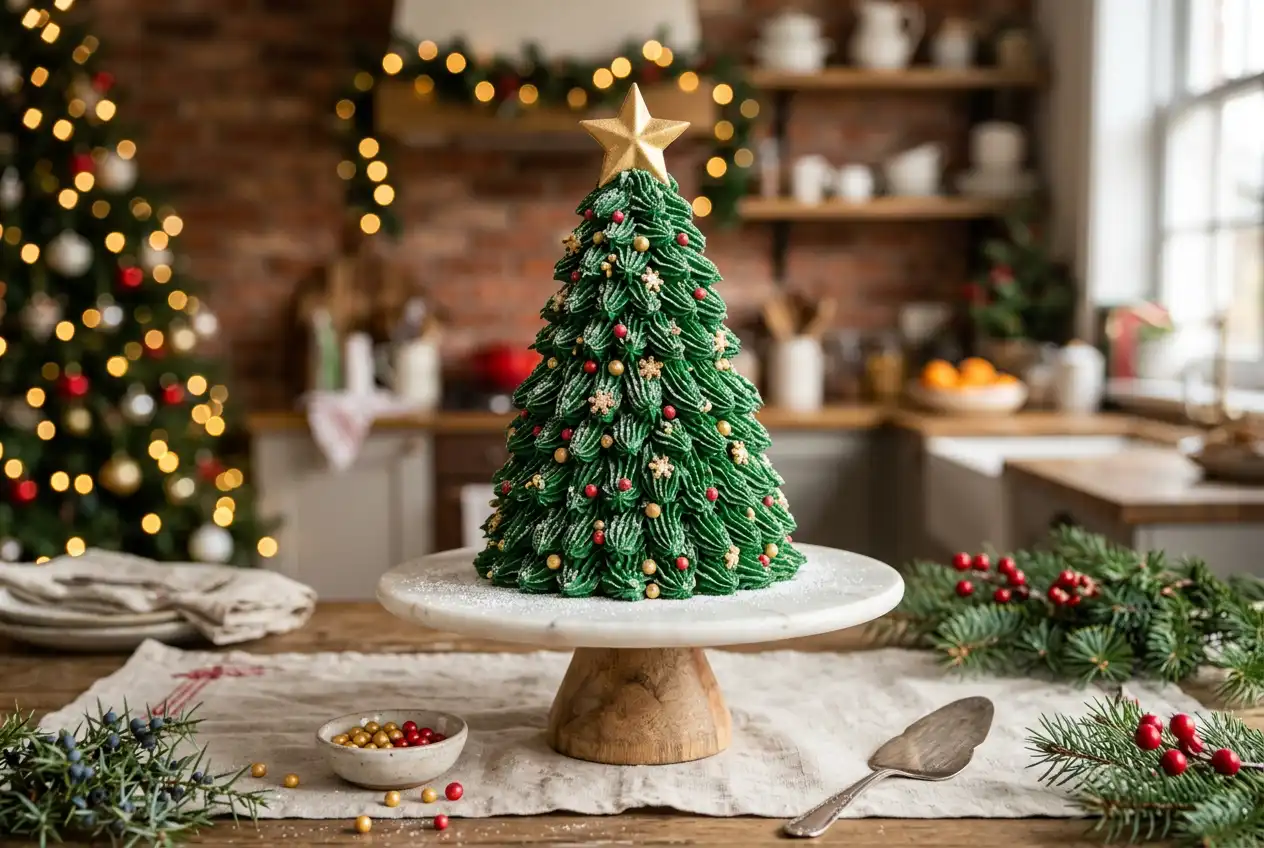
A 3D Christmas tree cake is a festive centerpiece made by stacking, carving, frosting, and decorating cake layers into the shape of an edible Christmas tree. This guide walks you through the full process, from baking sturdy layers to piping green branches and adding sparkling decorations. You will also get practical holiday baking tips for cleaner assembly, stronger structure, and a polished finish.
What do you need before you start?
You need a firm cake, stable buttercream, basic decorating tools, and enough chilling time to keep the shape neat. A 3D xmas tree cake is not difficult, but it works best when you build it in stages instead of rushing from oven to decorating table. Plan to bake, cool, trim, stack, chill, carve, crumb coat, and decorate in that order.
Ingredients for the cake layers
Use a dense vanilla, chocolate, gingerbread, or spiced sponge recipe. Very soft cakes can collapse when stacked, so choose one that slices cleanly.
- 3 baked round cakes in graduated sizes, such as 8-inch, 6-inch, and 4-inch
- 1 small dome-shaped cake or cupcake for the tree top
- Butter, sugar, eggs, flour, baking powder, milk, and vanilla if baking from scratch
- Optional festive flavors: cinnamon, orange zest, nutmeg, ginger, cocoa, or peppermint extract
- Simple syrup, if you want extra moisture
- Green gel food coloring
- Sprinkles, sugar pearls, edible glitter, fondant stars, or mini candies
- Optional shredded coconut or powdered sugar for a snow effect
Tools that make the cake easier
The right equipment helps you create a cleaner 3D cake design. You do not need a professional kitchen, but a few reliable tools make a big difference.
- Cake pans in different sizes for a natural cone shape
- Kitchen scales for accurate batter and frosting measurements
- Electric mixer for smooth cake batter and fluffy buttercream
- Silicone spatulas for scraping bowls and spreading frosting
- Serrated knife for leveling and carving
- Cake board or sturdy serving plate
- Offset spatula or bench scraper
- Piping bags with star, leaf, or grass piping tips
- Wooden dowel or thick straw for support
- Turntable, if available
- Parchment paper, cooling racks, and measuring cups
Build the cake in clear stages
The easiest way to make this edible Christmas tree is to think like a builder. First create strong cake layers. Then add structure. After that, shape the tree and decorate it with texture, color, and sparkle. The steps below keep the process logical and manageable.
- Bake the cake layers evenly. Grease and line your cake pans with parchment paper. Divide the batter between the pans, using kitchen scales if you want even layers. Bake until the centers spring back and a skewer comes out with a few moist crumbs. Let the cakes cool in the pans briefly, then transfer them to cooling racks.
- Cool the cakes completely. Do not stack warm cake. Warm layers melt buttercream and create sliding, bulging, or leaning. Once cool, wrap the cakes and chill them for at least 30 minutes. Chilled cake is much easier to carve.
- Prepare a firm buttercream. Beat softened butter with an electric mixer until smooth and pale. Add powdered sugar gradually, then mix in vanilla, a pinch of salt, and a small splash of milk or cream. The frosting should be spreadable but not loose. If it droops from a spatula, add more powdered sugar.
- Level each cake. Use a serrated knife to remove domed tops from the larger cakes. Keep your knife level and turn the cake as you cut. Save trimmed cake pieces in a bowl. You can use them later to fill small gaps or make cake crumbs for decoration.
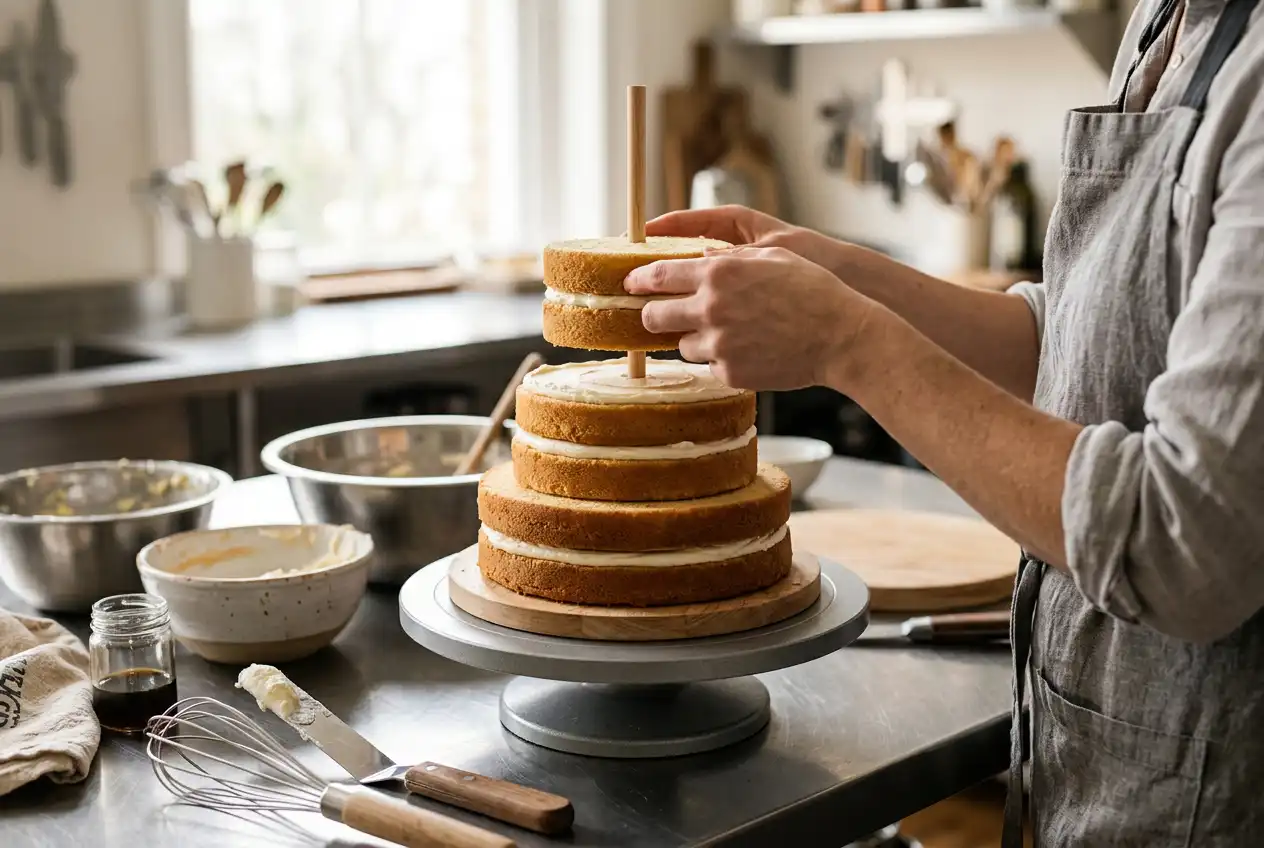
- Stack the layers into a cone. Place the largest cake on a cake board. Spread a thin, even layer of buttercream on top. Add the next cake, frost again, then add the smallest round layer. Finish with the dome cake or cupcake at the top. Insert a dowel through the center for extra support.
- Chill the stacked cake. Place the cake in the refrigerator until the buttercream firms up. This helps the layers stay in place while you carve. If the cake feels wobbly, chill longer before cutting.
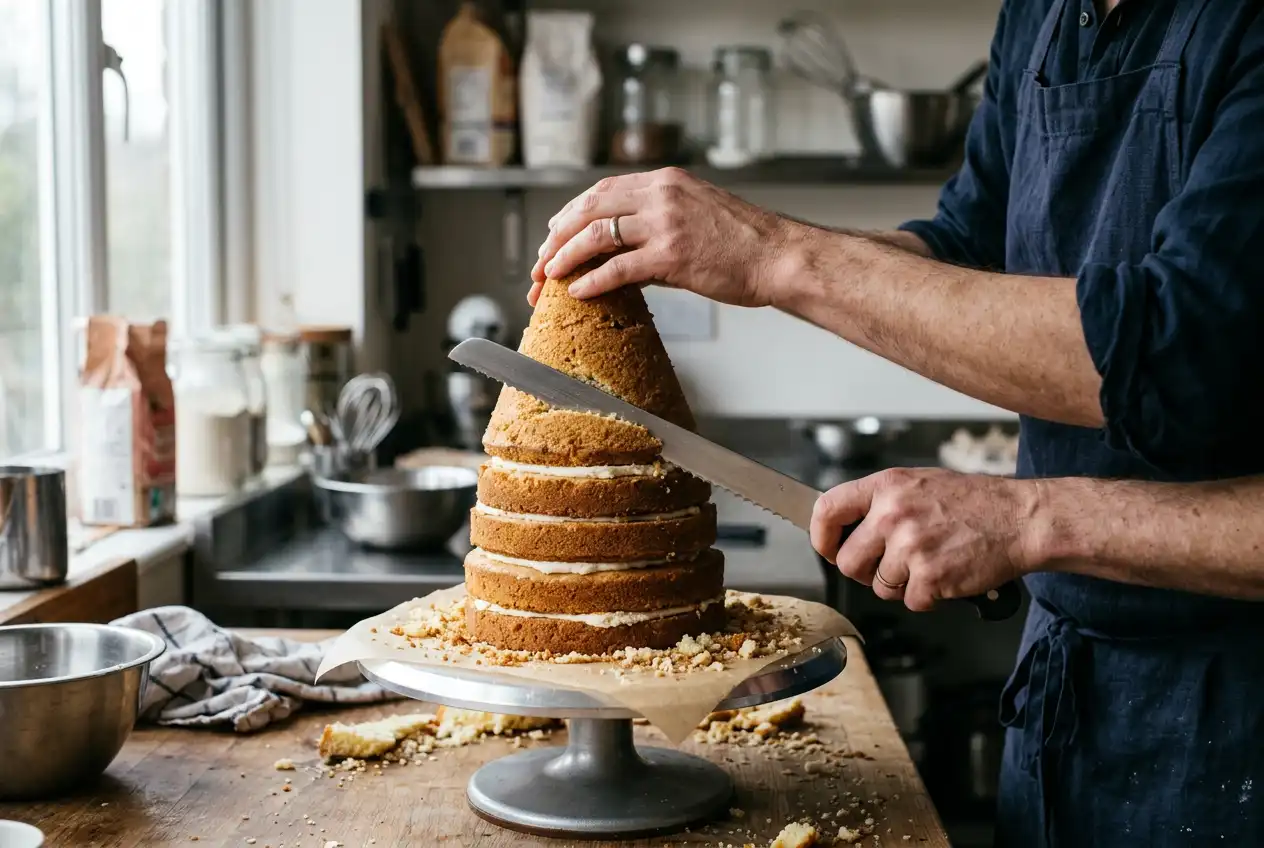
- Carve the tree shape. Trim the sides gradually to form a tapered tree. Cut small amounts at a time. Step back often and check the silhouette. Aim for a wide base, narrower middle, and pointed top. Do not worry if the surface looks rough; frosting will cover it.
- Apply a crumb coat. Spread a thin layer of buttercream over the entire cake with an offset spatula. This traps crumbs and creates a base for decorating. Use a silicone spatula to fill gaps with frosting or cake scraps. Chill again until the crumb coat feels firm.
- Tint the frosting. Color most of the remaining buttercream green with gel food coloring. Start with a small amount and add more as needed. Make a small portion darker or lighter if you want depth in the branches. Keep a little white frosting for snow details.
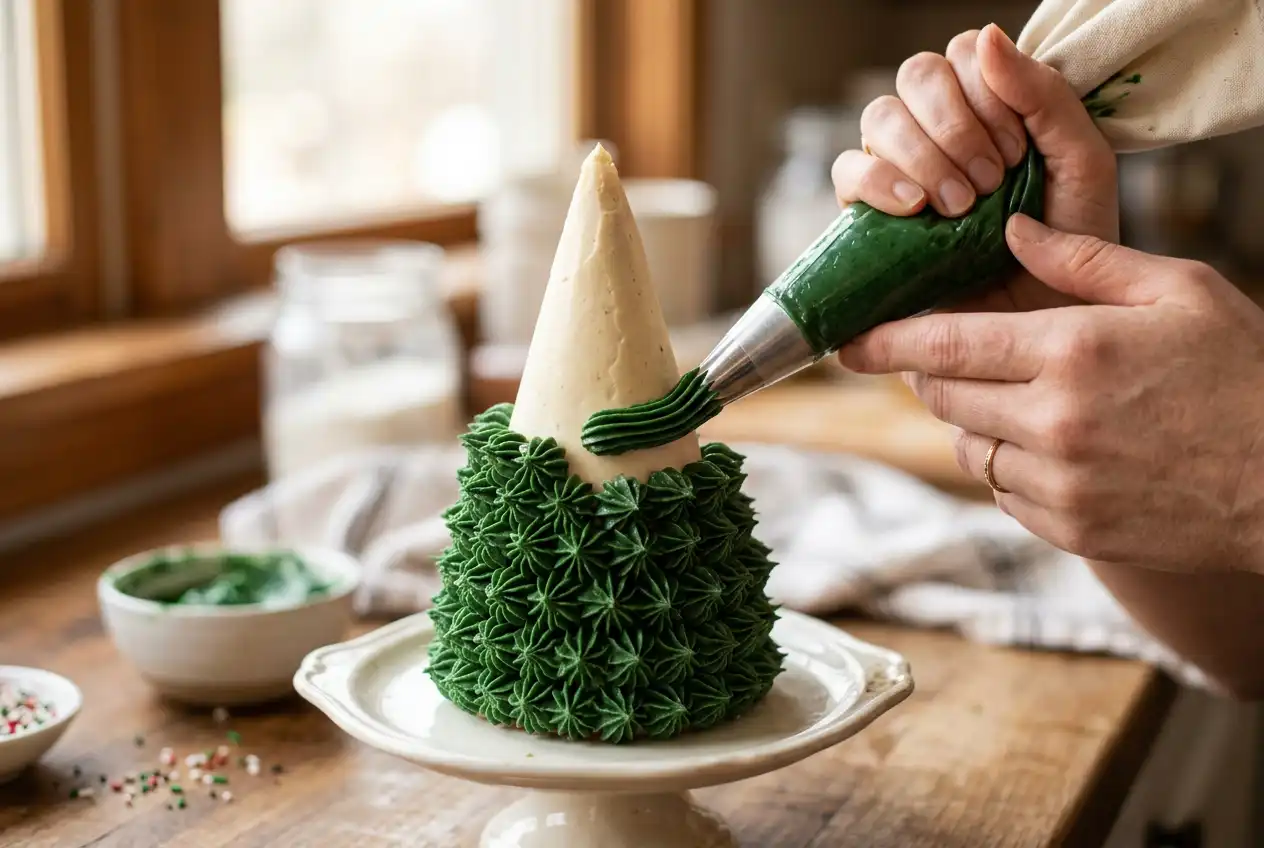
- Pipe the branches. Fill piping bags with green buttercream. Use a star tip for fluffy branches, a leaf tip for sharper texture, or a grass tip for fine needles. Start at the bottom and work upward in rows. Overlap each row slightly so the cake looks full.
- Add xmas cake decoration details. Press sugar pearls, sprinkles, or mini candies gently into the frosting as ornaments. Add edible glitter for shimmer. Place a fondant or cookie star at the top. Use white frosting, coconut, or powdered sugar to create snow on branch tips.
- Chill, then display. Chill the finished cake until the buttercream sets. Before serving, let it sit at room temperature for a short time so the cake softens slightly. Place it on a festive platter and add small cookies, sugared cranberries, or rosemary around the base if desired.
Shape the tree without stress
Carving is the part that makes many bakers nervous, but it is also forgiving. The goal is not a perfect cone. Real trees have uneven branches, and textured piping covers many small mistakes.
Work with a chilled cake and a sharp serrated knife. Hold the knife at a slight angle and shave the cake instead of making deep cuts. If you remove too much from one side, patch it with buttercream and cake crumbs, then chill it before continuing.
A helpful approach is to mark the rough outline first. Imagine four vertical sides around the cake, then trim each side lightly. Rotate the cake often. This keeps the tree balanced and prevents one area from becoming too narrow.
Decorate with texture, color, and height
A 3D Christmas tree cake becomes stunning when the decoration adds movement. Instead of spreading smooth green frosting, pipe layered branches that create shadows and dimension. This is where simple piping bags can make your holiday cake ideas look more polished.
Choose your piping style
- Star tip: Best for fluffy, classic branches. Pipe short stars close together.
- Leaf tip: Best for defined branch shapes. Pull each leaf outward and slightly down.
- Grass tip: Best for fine evergreen needles. Pipe short bursts in rows.
- Round tip: Best for garlands, baubles, and small dots of snow.
For a fuller effect, pipe darker green frosting near the bottom of each row and lighter green frosting on the outer tips. This creates depth without complicated techniques. If the buttercream warms in your hands, place the piping bag in the refrigerator for a few minutes.
Add edible ornaments
Keep decorations small so they do not pull down the frosting. Sugar pearls, confetti sprinkles, mini chocolate candies, and tiny fondant shapes all work well. Add them shortly after piping while the buttercream is still soft.
For a traditional look, use red, gold, and white accents. For a winter woodland style, use white snow, silver pearls, and a dusting of powdered sugar. For a playful children’s party cake, use bright candy ornaments and a cookie star.
How do you keep a 3D xmas tree cake stable?
Keep the cake stable by using firm layers, chilling between stages, and adding central support. A tall cake needs structure, even when it is small. The dowel or straw through the center helps hold the layers together, while chilled buttercream acts like edible glue.
Follow these stability tips:
- Use cake layers that are fully cooled and slightly chilled.
- Avoid overfilling between layers.
- Keep buttercream thick enough to hold its shape.
- Insert one central dowel if the cake is tall or narrow.
- Build the cake on a sturdy cake board, not a flexible plate.
- Chill after stacking, after carving, and after the crumb coat.
- Move the cake slowly and keep it level during transport.
If the cake starts to lean, stop decorating. Chill it until firm, then gently adjust the shape. Add frosting to low areas and remove weighty decorations from the leaning side.
Use flavor combinations that feel festive
Festive cake recipes work best when the flavor supports the theme. Vanilla cake with almond buttercream gives a clean, snowy feel. Chocolate cake with peppermint frosting feels rich and wintry. Gingerbread cake with cream cheese-style frosting creates a warm holiday flavor.
Try one of these combinations:
- Classic Christmas: Vanilla cake, vanilla buttercream, red and gold ornaments.
- Chocolate peppermint: Chocolate cake, peppermint buttercream, crushed candy cane accents.
- Gingerbread tree: Spiced cake, cinnamon buttercream, white snow details.
- Citrus sparkle: Orange cake, vanilla frosting, silver and white decorations.
- Coconut snow tree: Vanilla or coconut cake, green buttercream, shredded coconut snow.
Do not overload the cake with wet fillings. Jam, curd, or soft cream can make layers slide. If you want a filling, use a thin layer and pipe a buttercream dam around the edge before stacking.
Fix common decorating problems
Even careful bakers run into small problems. Most are easy to solve if you pause and chill the cake instead of trying to fix soft frosting while it is warm.
- The cake crumbles while carving: Chill it longer and use a gentler sawing motion.
- The frosting is too soft: Add powdered sugar or chill the bowl for a few minutes.
- The piping looks messy: Pipe another layer over uneven areas to create fuller branches.
- The tree looks flat: Add darker green shadows under some branches and lighter tips on top.
- Decorations slide down: Use smaller ornaments and press them lightly into fresh buttercream.
- The top will not hold a star: Insert a toothpick into the star, then anchor it into the top of the cake.
These holiday baking tips also help if you are making the cake ahead. Bake the layers a day in advance, wrap them tightly, and decorate when you have enough time to chill between stages.
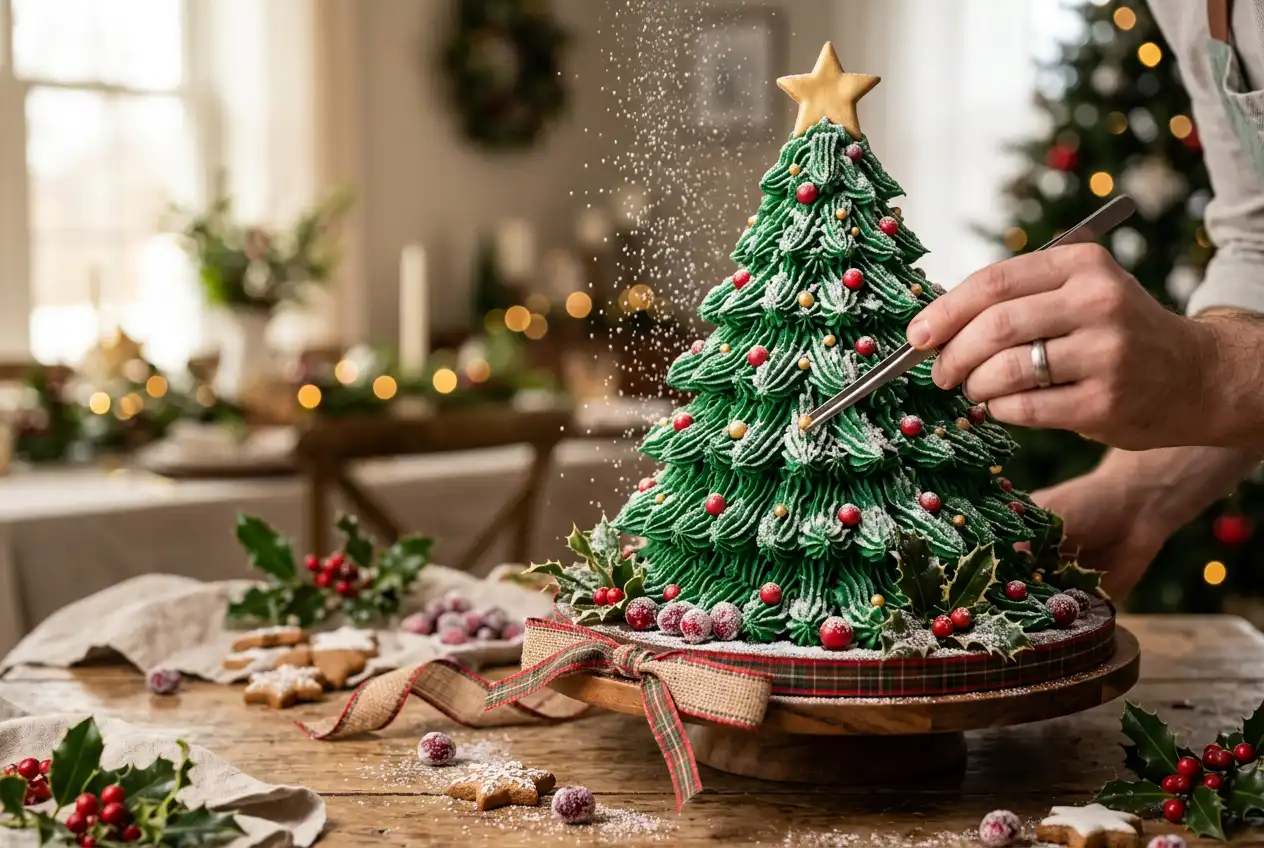
Finish with a clean holiday presentation
Presentation turns the cake from a fun bake into a true centerpiece. Wipe the edge of the cake board before serving. Add a few simple decorations around the base, but keep the focus on the tree.
Good finishing touches include:
- A ring of piped white frosting snow
- Mini gingerbread cookies around the base
- Sugared cranberries or small candies
- A light dusting of powdered sugar
- A ribbon wrapped around the cake board edge
- A cake topper or edible star at the peak
Slice the cake with a sharp knife, starting from the top and working down in sections. Because the cake is vertical, the first slices may be smaller than standard cake wedges. Serve on small plates and keep extra napkins nearby if children are helping themselves.
A 3D Christmas tree cake looks impressive, but the process is very achievable when you take it step by step. Bake sturdy layers, chill often, carve slowly, and use piping to create the branch texture. With a few basic tools and thoughtful xmas cake decoration, you can turn a simple stack of cakes into a festive edible Christmas tree for your holiday table.